
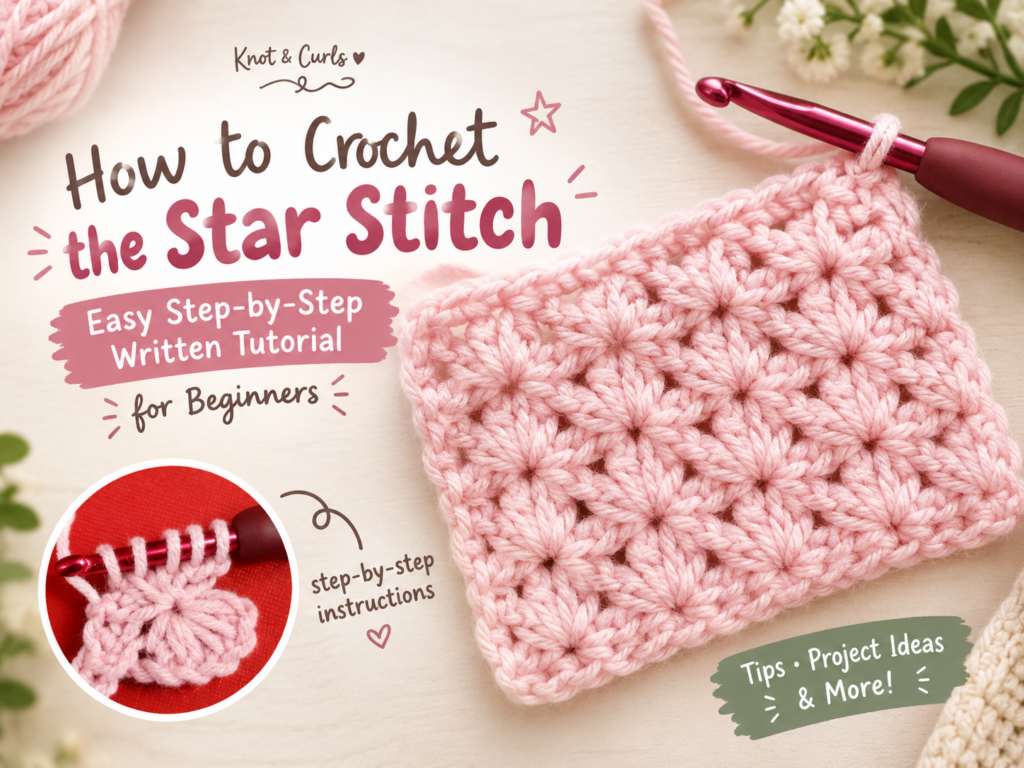
The crochet star stitch is one of those beautiful stitches that can make even a simple crochet project look extra special. With its unique star-shaped pattern and lovely texture, it’s a great stitch to learn if you’re looking to add something new to your crochet skills.
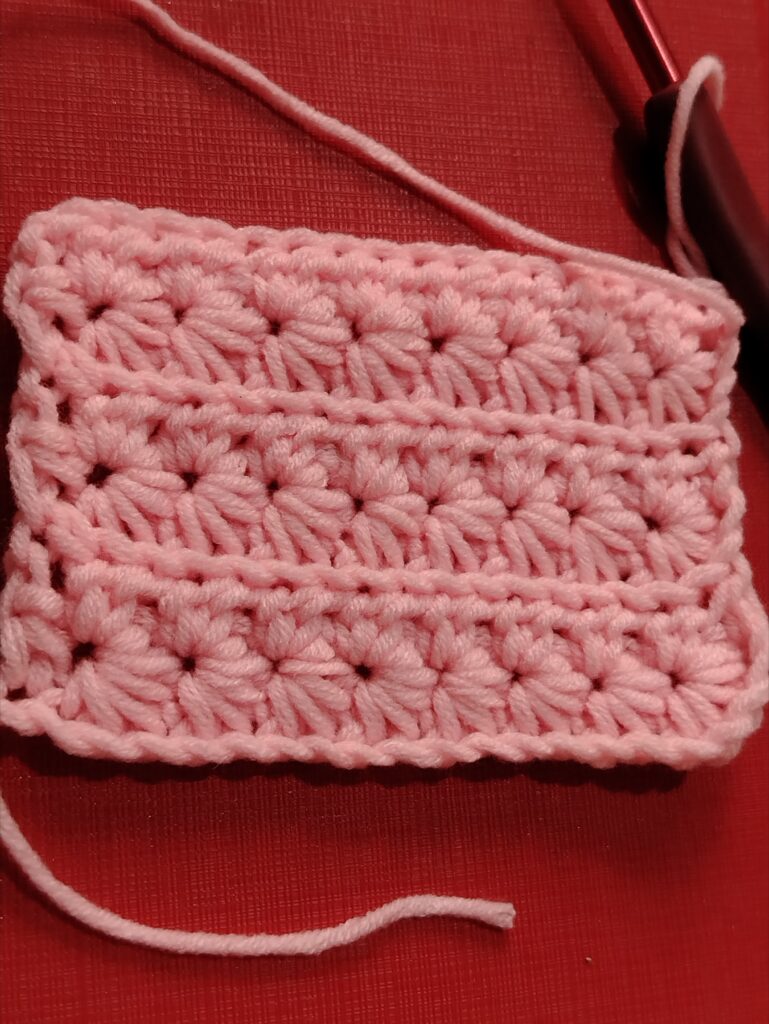
As someone who enjoys exploring different crochet stitches, I find it exciting how a simple combination of loops can create such an interesting design. Although it may look a little complicated at first, the star stitch is easier to work once you understand how the loops come together.
In this tutorial, I’ll show you how to crochet the star stitch step by step, along with some helpful tips to make learning this technique a little easier. Whether you’re a beginner or an experienced crocheter looking for a new stitch to try, I hope this tutorial inspires you to pick up your hook and give it a go.
How I Discovered the Star Stitch
I actually came across the star stitch on YouTube when I was still a beginner in crochet. At the time, I was looking for a pattern for a wallet, and that’s when I stumbled upon a video tutorial by “Adel on YouTube”
Back then, I was still exploring different stitches and techniques, trying to find patterns that I could use for my projects. The star stitch immediately caught my attention because of its unique texture and the beautiful star shapes it creates.
It’s funny how looking for a pattern for one particular project can lead you to discover something entirely new. What started as a search for a wallet pattern became an opportunity to learn a stitch that I could use in other crochet creations.
Looking back, I’m glad I came across that tutorial during the early days of my crochet journey. It reminds me that learning crochet is a continuous process, and sometimes, the most interesting discoveries happen when we’re simply looking for inspiration.
Now, I’d love to share this stitch through a written tutorial for those who prefer following step-by-step instructions.
What Is the Crochet Star Stitch?
The crochet star stitch is a textured crochet stitch created by pulling up several loops from consecutive stitches and closing them together to form star-shaped patterns.
The stars are worked in rows, with a supporting row of half double crochet stitches in between. This creates a dense, textured fabric with a beautiful repeating design.
The star stitch is versatile and can be used for different crochet projects, including wallets, bags, scarves, blankets, and other handmade accessories.
Materials You’ll Need
Before getting started, prepare the following materials:
- Yarn of your choice
- Crochet hook suitable for your yarn
- Scissors
- Yarn needle
For beginners, I recommend using a smooth, light-colored yarn. This makes it easier to see the stitches and identify where to insert your hook, especially when you’re learning to pull up multiple loops.
Crochet Abbreviations (US Terms)
Here are the abbreviations used in this tutorial:
- ch – Chain
- blo – back loop only
- hdc – Half double crochet
- st/sts – Stitch/stitches
- yo – Yarn over
- rep – Repeat
How to Crochet the Star Stitch
For this tutorial, we’ll work the star stitch in rows. The first row creates the stars, the second row fills in the spaces with half double crochet stitches, and the following star rows build the repeating pattern.
Foundation Chain
Chain an odd number of stitches for your starting swatch, such as 21 chains.
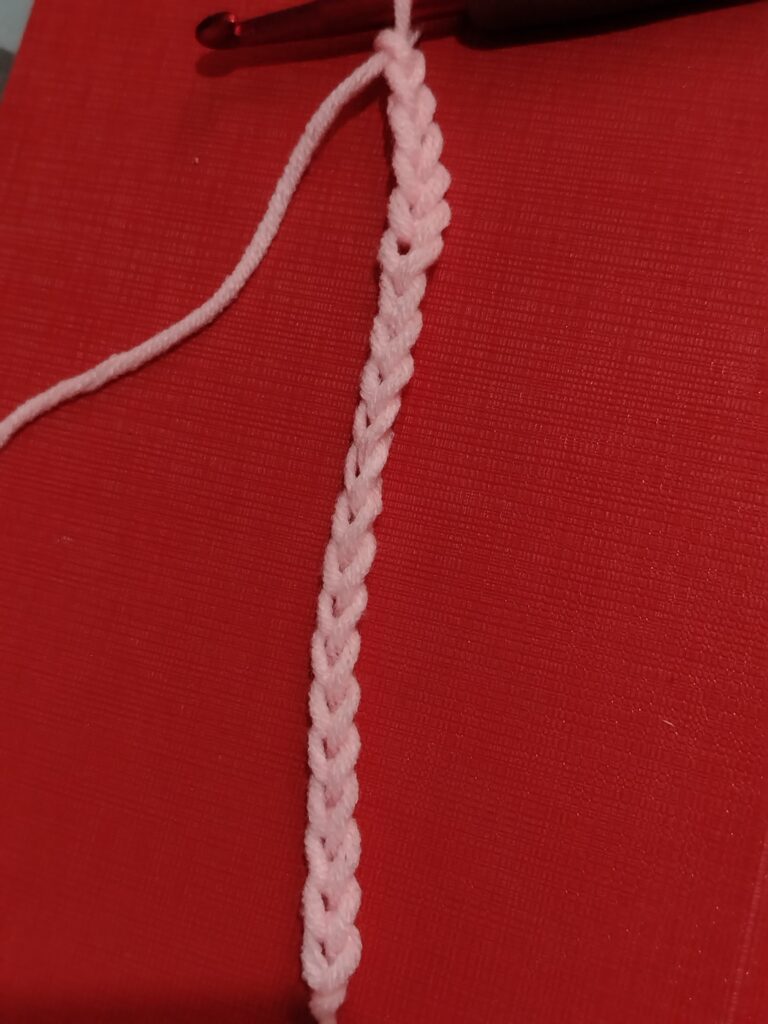
The foundation chain should be long enough to practice forming several stars. You can make a longer chain for a wider project, following the same stitch pattern.
Row 1: Creating the First Row of Stars
1. Insert your hook into the second chain from the hook, yarn over, and pull up a loop.
2. Insert your hook into the next chain, yarn over, and pull up another loop.
3. Continue inserting your hook into the next three chains, pulling up a loop each time. You should now have six loops on your hook, including the original loop.
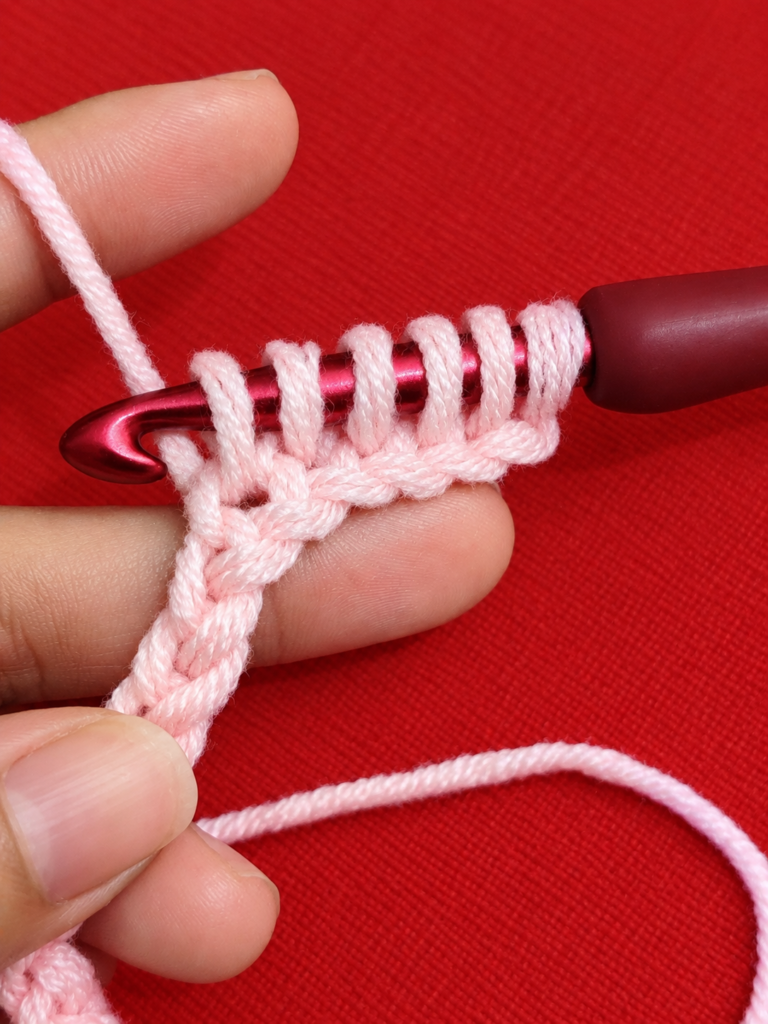
4. Yarn over and pull through all six loops on your hook.
5. Chain 1 to close the star and create the eye of the star.
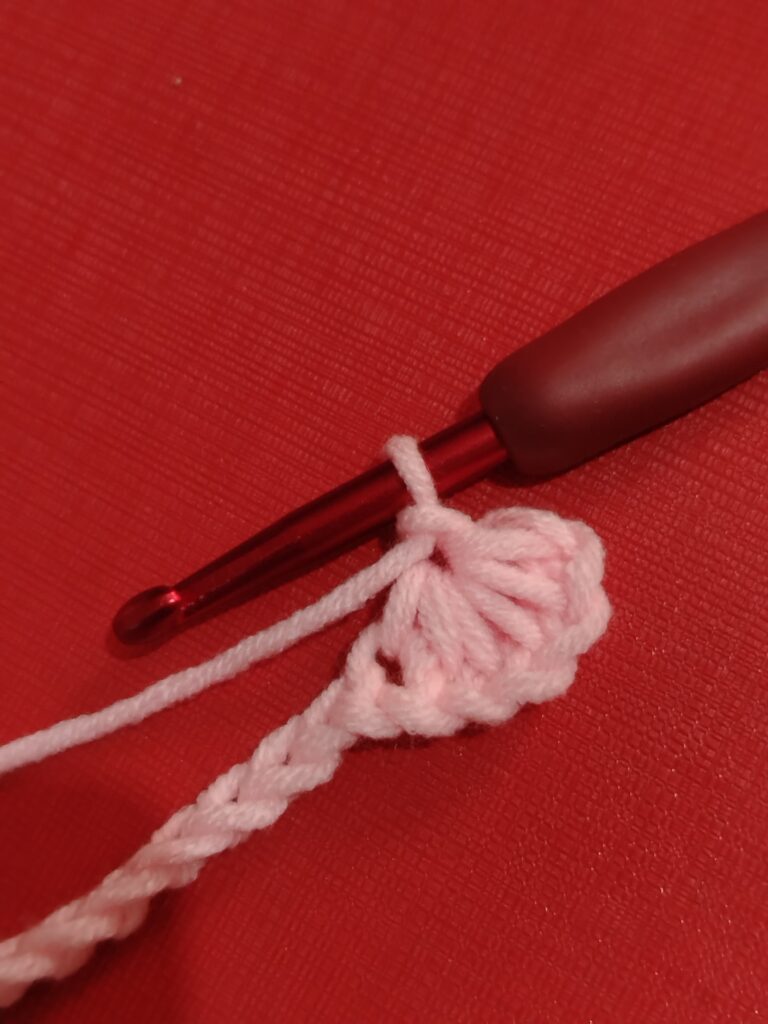
Now, let’s create the next star.
6. Insert your hook into the eye of the previous star and pull up a loop.
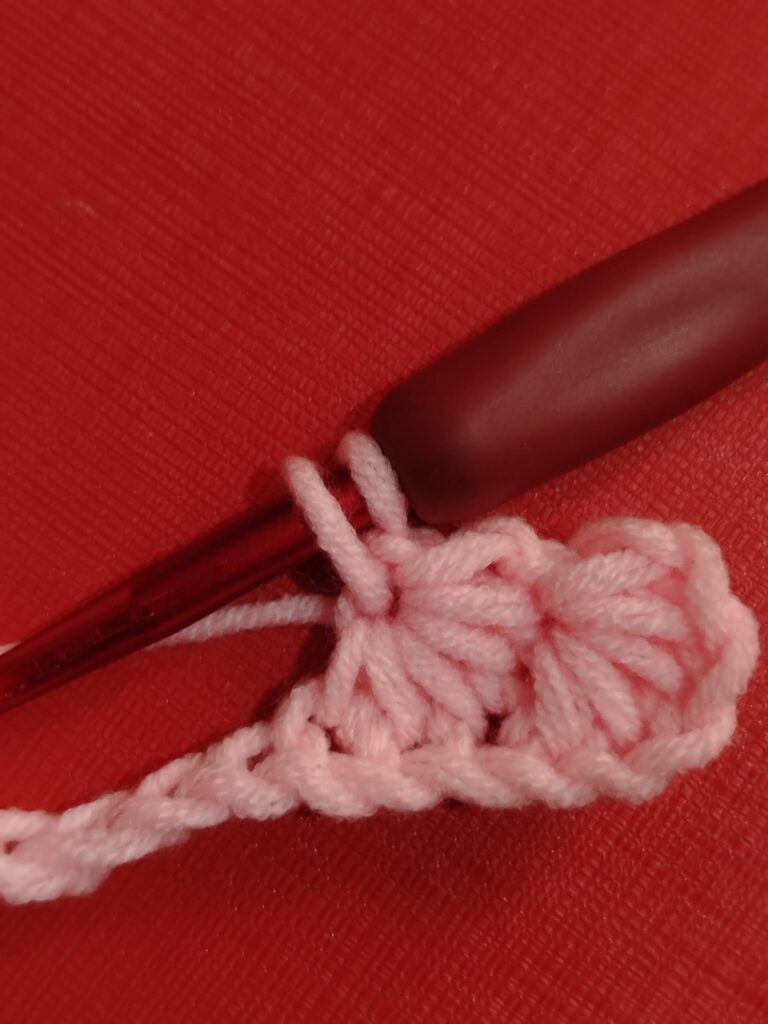
7. Insert your hook into the last leg of the previous star and pull up a loop.
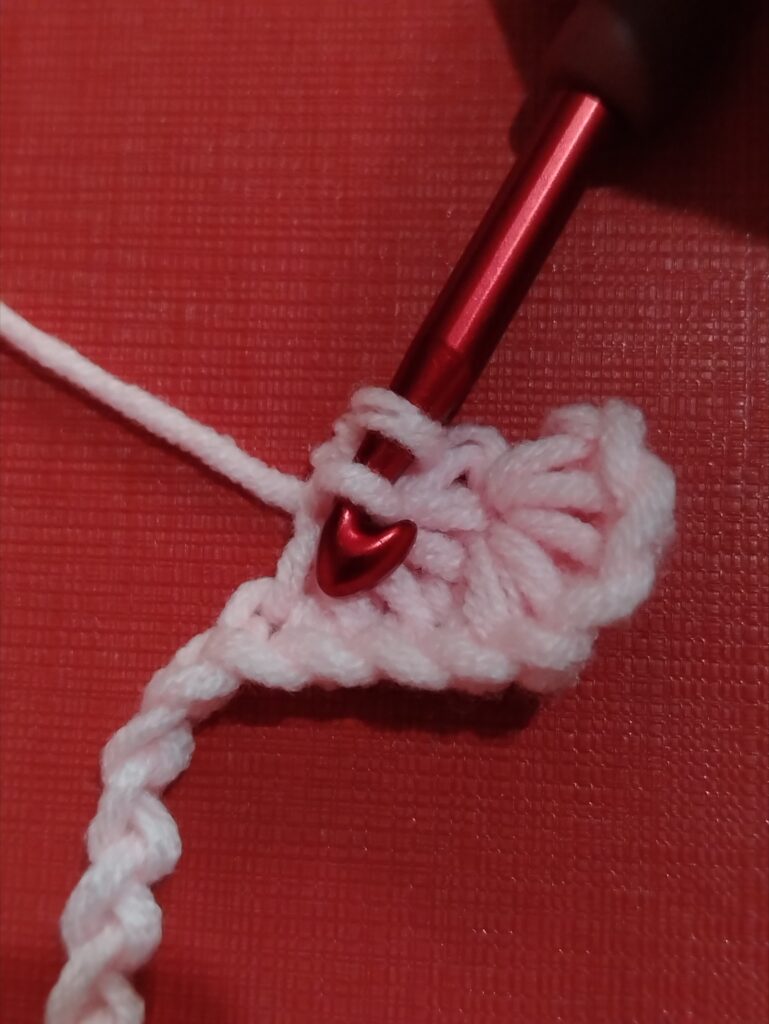
8. Insert your hook into each of the next three chains, pulling up a loop each time until you have six loops on your hook.
9. YO and pull through all six loops, then ch 1 to complete the star.
Repeat these steps across the row, forming stars using the eye and last leg of the previous star, along with the next three chains.
At the end of the row, work a half double crochet into the last chain to create a neat edge.
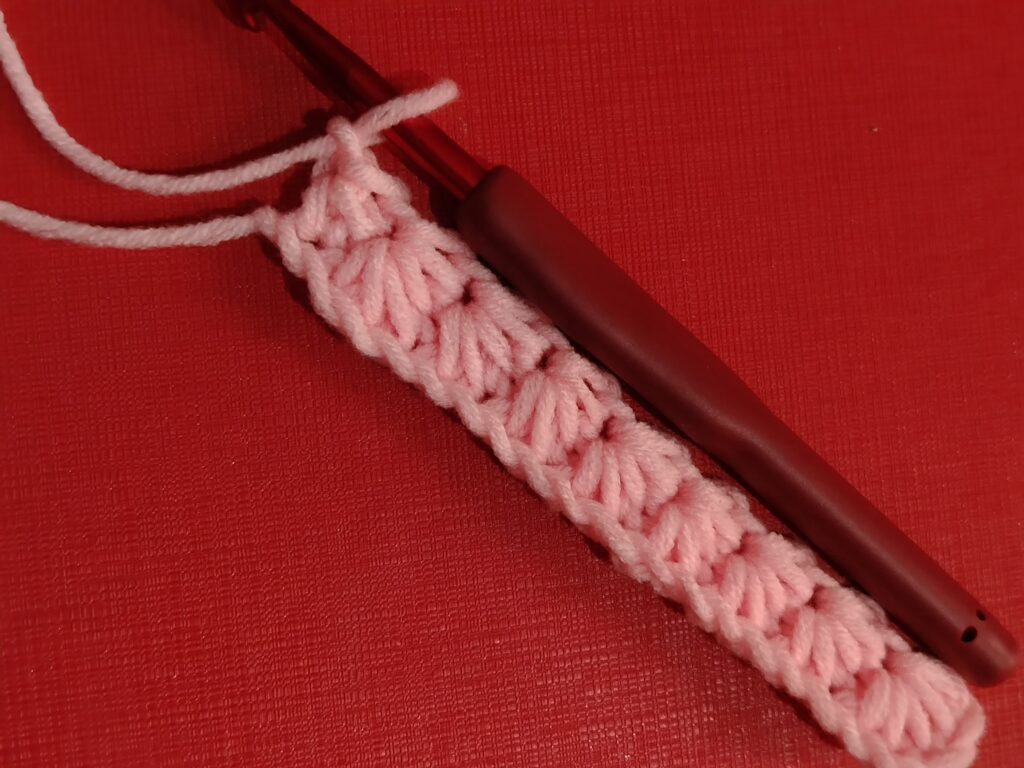
Row 2: Filling the Spaces
This row creates the base for the next row of stars.
1. Ch 2 and turn your work.
2. Work two hdc stitches into the eye of the first star.
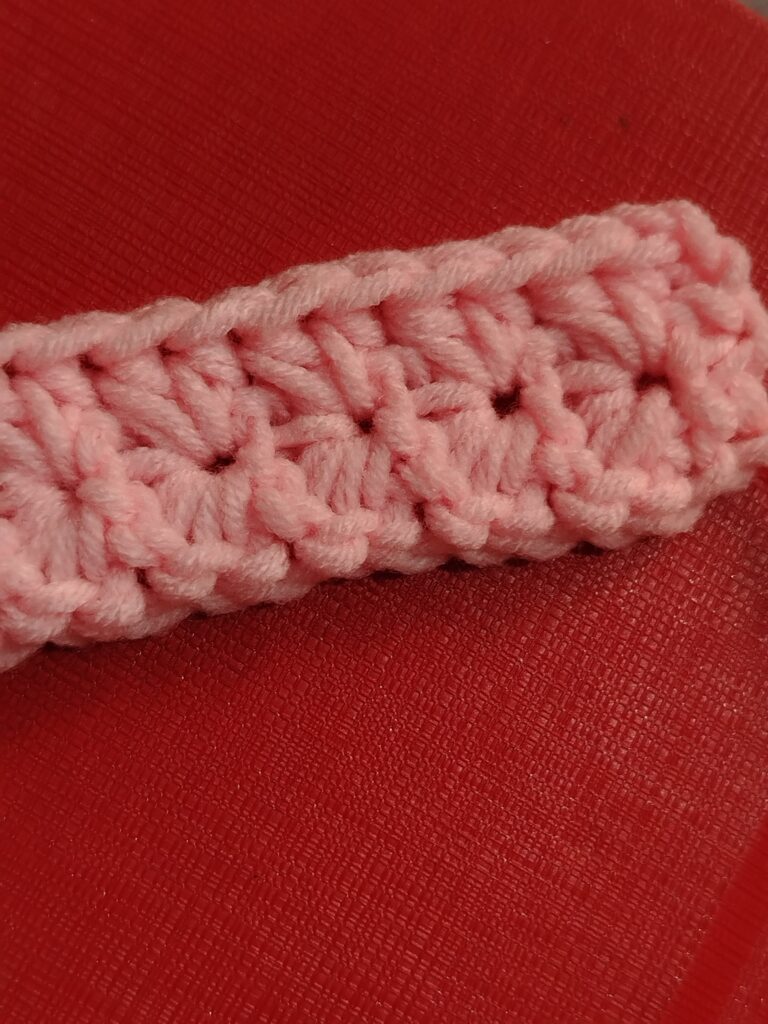
3. Continue working two half double crochet stitches into the eye of each star across the row.
4. Work one half double crochet into the final stitch at the edge.
Make sure your stitches are evenly spaced to keep the fabric looking neat.
Row 3: Creating the Next Row of Stars
Now that you have completed the supporting row, it’s time to make another row of stars.
1. Ch 3 and turn your work.
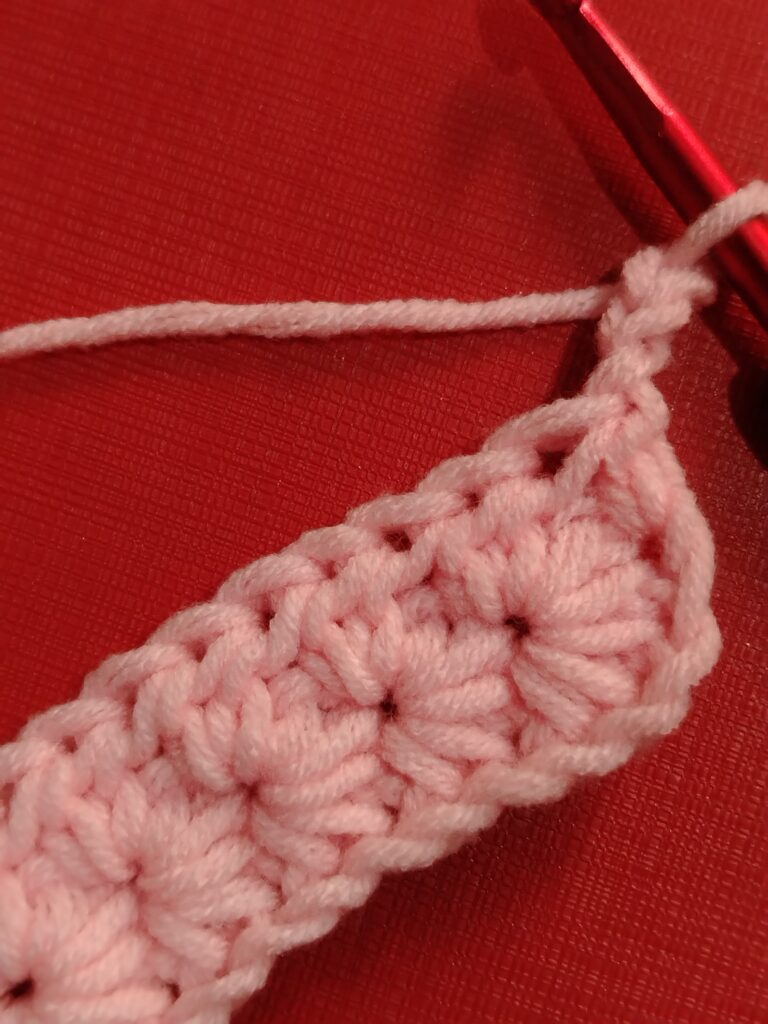
2. Insert your hook into the second chain from the hook, yarn over, and pull up a loop.
3. Insert your hook into the next chain and pull up another loop.
4. Insert your hook into the first stitch of the row and pull up a loop.
5. Insert your hook into the next two stitches – blo, pulling up a loop in each, until you have six loops on your hook.
6. YO and pull through all six loops, then ch 1 to close the star.
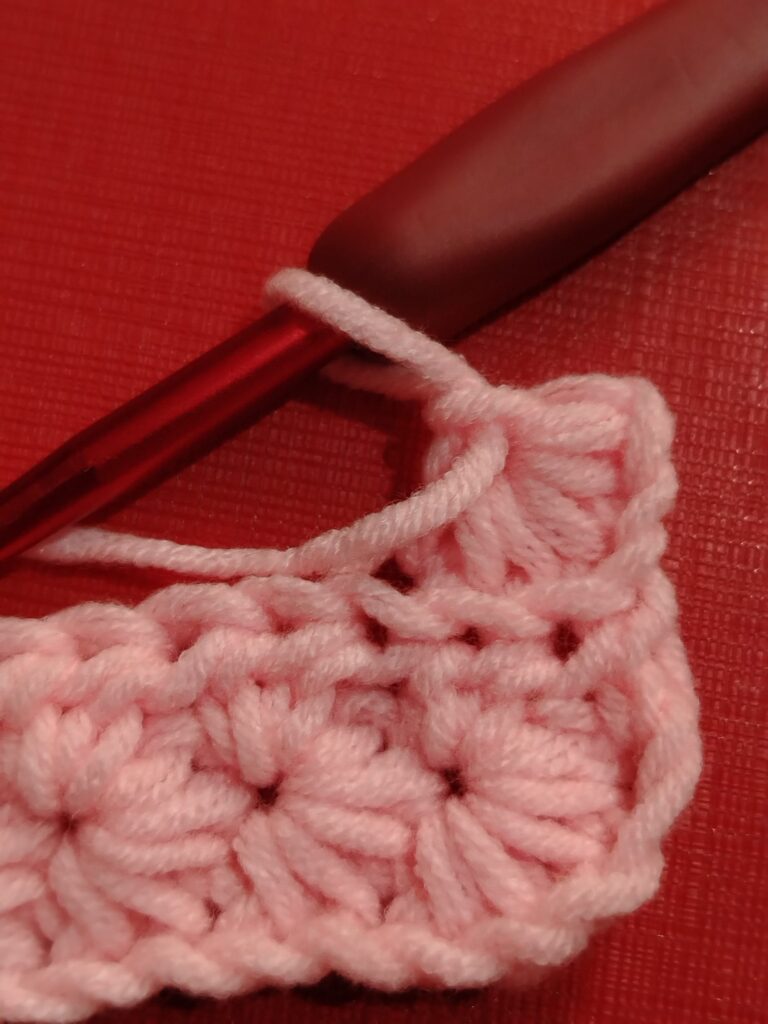
7. For the next star, pull up loops from the eye of the previous star, its last leg, and the next three stitches.
8. Continue repeating the process across the row.
Finish the row with a half double crochet in the final stitch to create the edge.
Repeat the Pattern
Continue alternating between the star stitch row and the half double crochet row until your project reaches the desired length.
As you work, you’ll see the star-shaped pattern become more defined, creating a lovely textured fabric.
Note: The exact starting chain and edge stitches can vary between star stitch patterns. Follow the stitch count and turning-chain method used in your chosen version to keep the edges consistent.
Tips for Crocheting the Star Stitch
If you’re trying the star stitch for the first time, don’t worry if it feels a little tricky. Here are some tips that may help:
– Keep your loops even. Pull up each loop to a consistent height so your stars have a uniform appearance.
– Avoid pulling too tightly. Tight loops can make it difficult to insert your hook into the next stitch. Keep a relaxed grip on your yarn.
– Count your loops. Make sure you have the correct number of loops on your hook before closing each star.
– Pay attention to the eye of the star. This is an important insertion point for creating the next star, so take your time to locate it.
– Practice with a small swatch. Before using the star stitch for a larger project, practice on a small piece of fabric to become familiar with the stitch pattern.
– Be patient with yourself. Like any new crochet technique, the star stitch may take a little practice before you get into a comfortable rhythm.
What Can You Make With the Crochet Star Stitch?
One of the things I love about learning new crochet stitches is discovering how many different projects can be made with them.
The star stitch creates a textured and relatively dense fabric, making it suitable for several handmade creations.
Here are a few project ideas:
– Crochet wallets: The star stitch’s lovely texture can add a decorative touch to small wallets and pouches.
– Crochet bags: Use the stitch to create unique bags with a beautiful textured finish.
– Scarves and cowls: The repeating star pattern can give winter accessories a cozy and interesting appearance.
– Blankets: The star stitch can make a beautiful textured blanket, especially when worked with soft yarn.
– Pillow covers: Add a little texture to your home decor with a star stitch pillow cover.
The possibilities are endless, and you can experiment with different yarn colors to create your own unique designs.
And That’s How the Stars Align ✨
Learning the star stitch is one of those little crochet adventures that reminds me why I enjoy this craft so much. It’s amazing how discovering a new stitch can open up so many possibilities for future projects.
I first learned about this stitch while searching for a wallet pattern as a beginner, and now I’m sharing a written tutorial for others who may want to try it, too.
If you’re new to the star stitch, give yourself time to practice. Your first few stars may not look perfect, and that’s completely fine. With a little patience and repetition, you’ll eventually find your rhythm and become more comfortable with the technique.
After all, crochet is not just about the finished project. It’s also about the little things we learn, the mistakes we make, and the progress we achieve along the way.
I hope this tutorial inspires you to try the crochet star stitch and perhaps use it in one of your own handmade creations.
Happy crocheting!
If you enjoyed this tutorial, feel free to explore more crochet tutorials and stories on my blog. You can also visit my online shop to discover more of my handmade creations. Thank you for being part of my crochet journey!