
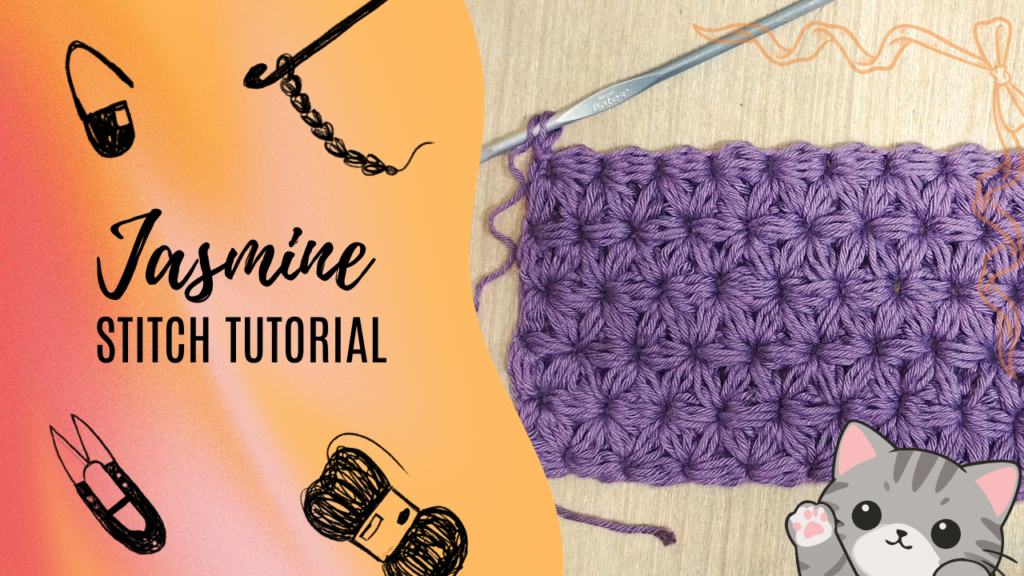
Have you ever started crocheting while listening to something in the background and suddenly realized you’ve been happily stitching away for an hour? 😂
That was exactly what I was doing when I decided to try the Jasmine Stitch.
I was crocheting while listening to my favorite radio DJ, PPJ, doing his live on TikTok. I had my yarn and hook in my hands, while PPJ was busy sharing advice, stories, and, of course, a few rants. 😂
If you know PPJ and have seen petty nights, you know what I’m talking about!
Every now and then, I’d stop crocheting because something he said caught my attention. Then I’d look back at my work and think, Okay… where was I again? Was that my second puff or my third? 🤣
But honestly, that’s one of the things I love about crochet. It can be your little companion while you’re listening to music, watching a favorite creator, catching up on a livestream, or simply enjoying someone’s stories.
And while I was enjoying the live, I worked my way through this beautiful Jasmine crochet stitch.
At first glance, the Jasmine Stitch looks complicated. There are all those loops and puffs happening at once, and you might look at it and think, Nope. That’s too fancy for me.
But don’t let those little flowers fool you.
Once you understand how the loops are formed and joined together, the stitch becomes wonderfully rhythmic.
Pull up a loop. Pull up another. Pull up another. Close them together. And suddenly… there’s a flower! 🌼
So if you’re ready to give this pretty crochet stitch a try, let’s do it together.
🌼 What Is the Jasmine Stitch?
The Jasmine Stitch is a beautiful textured crochet stitch made by joining elongated puff-like stitches together to create little flower or star-shaped motifs.
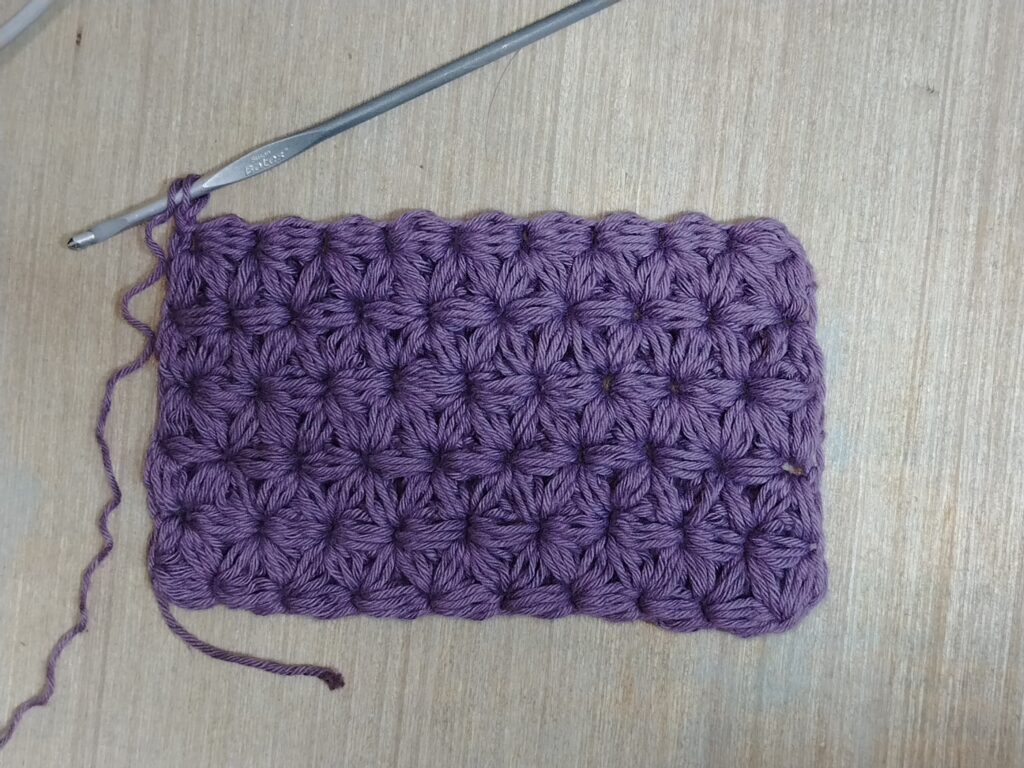
It produces a thick, plush fabric with lots of texture, making it perfect for cozy crochet projects.
The stitch may look complicated, but it is really about learning one repeated movement and getting comfortable with those elongated loops.
Once your hands get used to it, the stitch becomes much easier.
And dare I say… a little addictive. 😂
🧶 What You’ll Need
For this Jasmine Stitch tutorial, you’ll need:
- Yarn of your choice
- A crochet hook suitable for your yarn
- Scissors
- Yarn needle
For your first practice swatch, I recommend using a smooth yarn in a medium weight.
Avoid very fuzzy or highly textured yarn when you’re learning. You want to be able to clearly see your loops and the spaces where you’re inserting your hook.
And keep in mind that the Jasmine Stitch uses quite a bit of yarn, so make sure you have enough yarn if you’re planning a larger project.
🎥 Jasmine Stitch Video Tutorial
Are you more of a “show me how to do it” crocheter?
I get you. 😂
I’ve also included a video tutorial posted on Vimeo for the Jasmine Stitch so you can watch the stitch being worked while following along with the written instructions. Links will be posted below 👇👇👇
You can watch the video first, then use the written tutorial below as your step-by-step reference.
Or do what I usually do: watch a little, crochet a little, pause the video, rewind it, crochet again… and repeat until everything finally clicks. 😂
Don’t be afraid to pause and replay the tricky parts. The Jasmine Stitch has a few movements that are much easier to understand when you can actually see the hook going through the loops.
🌸 How to Crochet the Jasmine Stitch
Now let’s get into the fun part!
The most important thing to remember while learning the Jasmine Stitch is:
Don’t crochet your loops too tightly.
The loops need to be long enough and loose enough for your hook to move through them comfortably.
If you make them too tight, pulling through all those loops can become a wrestling match between you, your yarn, and your crochet hook.
And nobody invited the wrestling match. 😂
Step 1: Make Your First Chain
Start with a slip knot on your hook.
Chain 2.
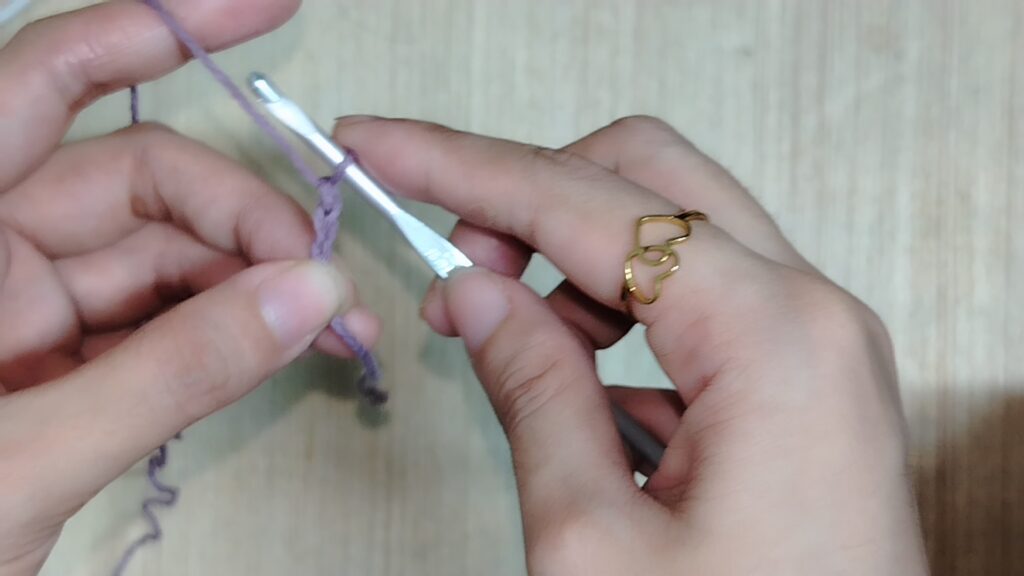
Now gently pull the loop on your hook upward.
This elongated loop will help establish the height of your first puff.
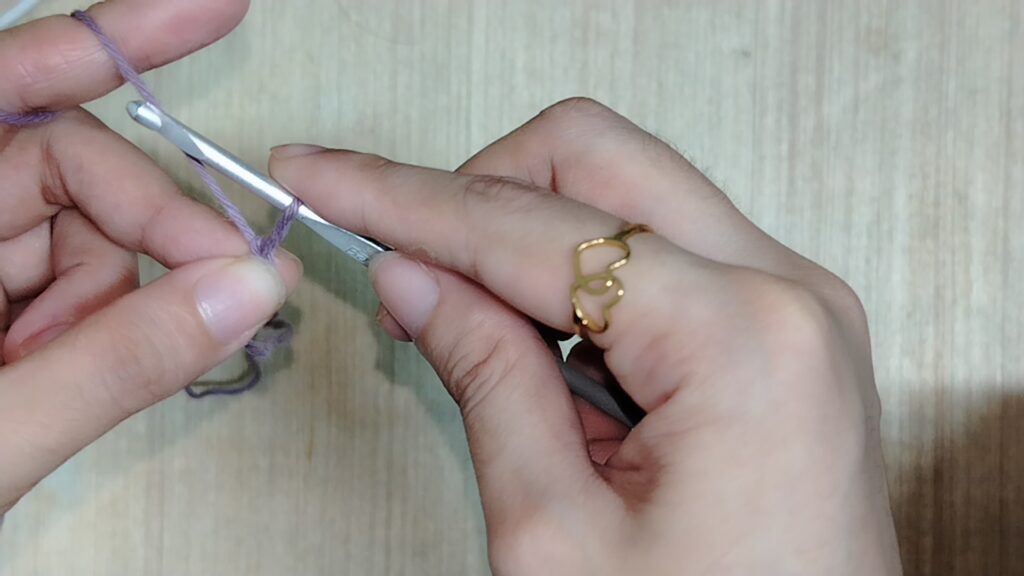
Try to keep this loop approximately the same height as the loops you’ll make later.
Step 2: Make the First Puff
Now we’re going to create the elongated loops that make the Jasmine Stitch possible.
Work the following sequence three times:
Yarn over, insert your hook into the chain, yarn over and pull up a long loop.
Repeat.
Then repeat one more time.
You should now have several loops sitting on your hook.
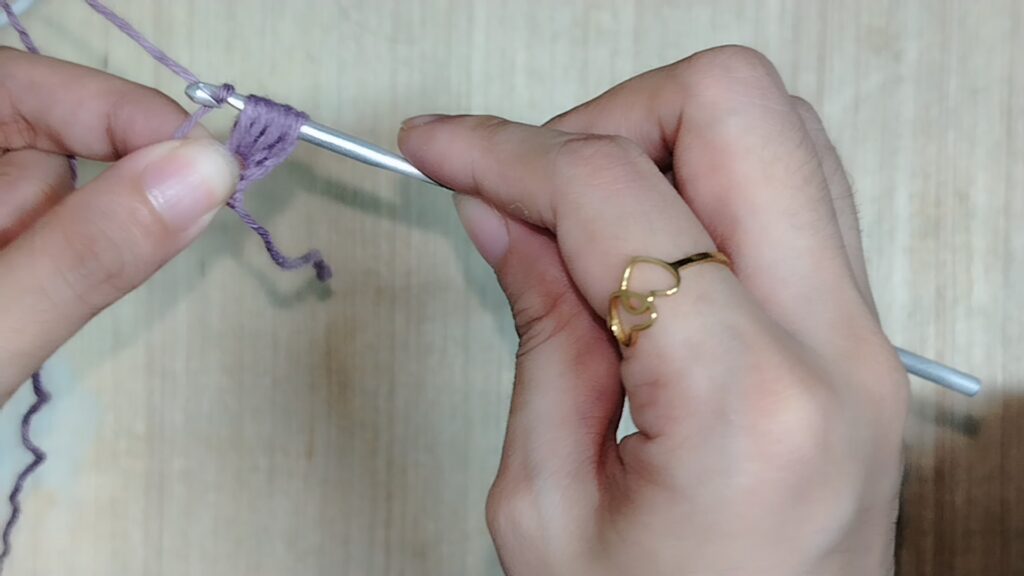
Don’t rush this part.
Keep your loops approximately the same height.
This consistency will make the rest of the stitch much easier.
Step 3: Close the Puff
Now comes the fun part.
Yarn over and carefully pull the yarn through all the loops on your hook.
Keep the working yarn controlled with your finger if necessary.
Once you’ve pulled through the loops, insert your hook underneath the strand you were holding.
Pull up a loop.
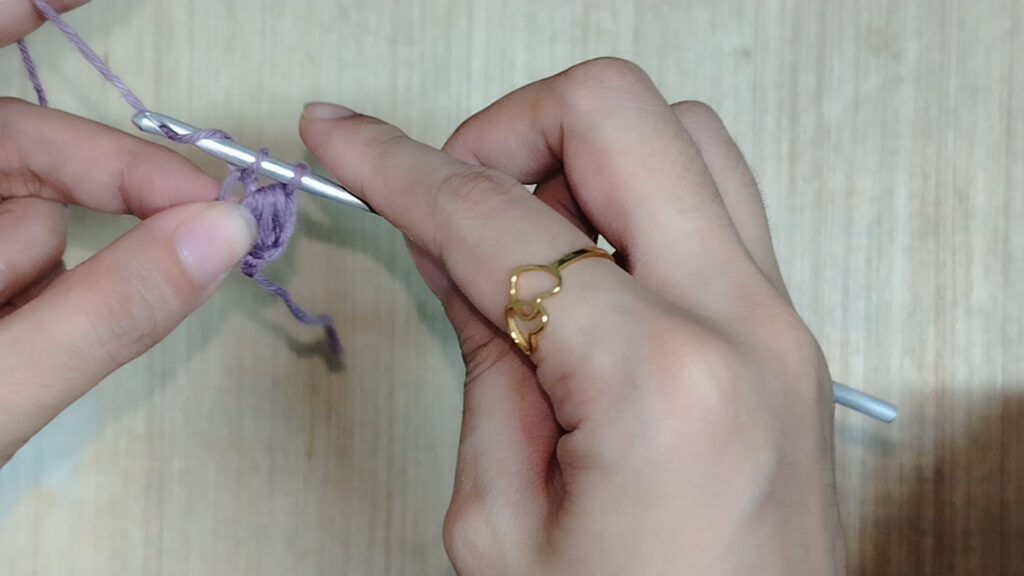
Then:
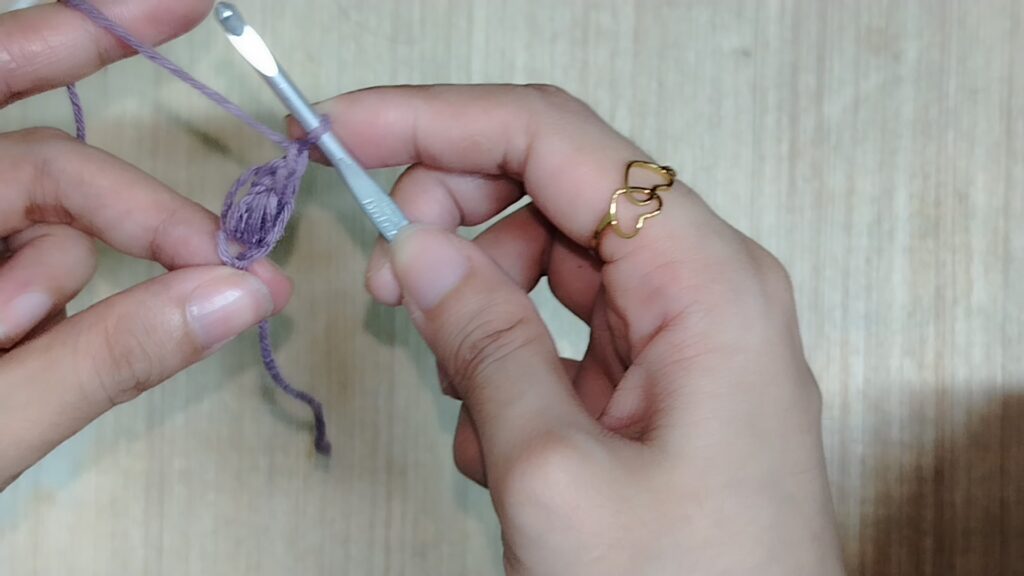
Yarn over and pull through the two loops on your hook.
Finish with:
Chain 1.
Congratulations!
🌼 You’ve just made your first Jasmine puff!
🌿 Making the Foundation
The Jasmine Stitch doesn’t start like many traditional crochet stitches where you simply make a long foundation chain and begin working into it.
Instead, we’re building the foundation using these little puff stitches.
Think of each puff as a tiny building block.
Step 4: Make the Next Puff
Look at the top of your previous puff.
You’ll see a little opening or “eye.”
Insert your hook into this opening.
Now repeat the puff sequence:
Yarn over → pull up a long loop
Do this three times.
Once again, you’ll have several loops on your hook.
Close the puff using the same method:
Yarn over → pull through the loops → secure the strand of working yarn → yarn over → pull through two loops → chain 1.
Step 5: Continue Across
Continue making your foundation puffs across the row.
Each new puff is worked into the opening of the previous puff.
For a practice swatch, try making around 6–10 foundation puffs.
Don’t worry about getting a perfect rectangle right away.
You’re learning the movement.
And remember, your first few Jasmine Stitch flowers may look a little… experimental. 😂
That’s completely normal.
Your hands are still learning where everything goes.
🌼 How to Make a Jasmine Flower
Now we’re getting to the really pretty part.
The Jasmine flower is created by combining three unfinished puff sections and closing them together.
This is what gives the stitch its beautiful flower-like shape.
And this is also the part where you might look at your hook and say:
What on earth am I doing? 😂
Don’t worry.
Let’s take it one step at a time.
Step 6: Make a Turning Puff
At the beginning of your row, make your turning puff.
This gives your work the height it needs to begin the next row.
Keep the loop loose and approximately the same height as the other elongated loops.
Step 7: Make the First Unfinished Puff
Now work into the top or eye of the previous puff.
Make your elongated puff:
[Yarn over, pull up a long loop] × 3
But this time, do not close the puff.
Leave the loops on your hook.
Step 8: Make the Second Unfinished Puff
Next, move your hook to the space at the bottom or base of the previous puff.
Again:
[Yarn over, pull up a long loop] × 3
Don’t close it.
Keep all those loops on your hook.
Step 9: Make the Third Unfinished Puff
Now move to the next space.
Again:
[Yarn over, pull up a long loop] × 3
You now have three unfinished puff sections sitting together on your hook.
This is where the Jasmine Stitch starts to look like magic.
🌼✨
Step 10: Close the Jasmine Flower
Now yarn over.
Carefully pull your yarn through all of the loops on your hook.
Take your time.
If you have trouble pulling through, don’t force it. Loosen your tension slightly and work through the loops gently.
Once you’ve pulled through everything, insert your hook underneath the strand you were holding.
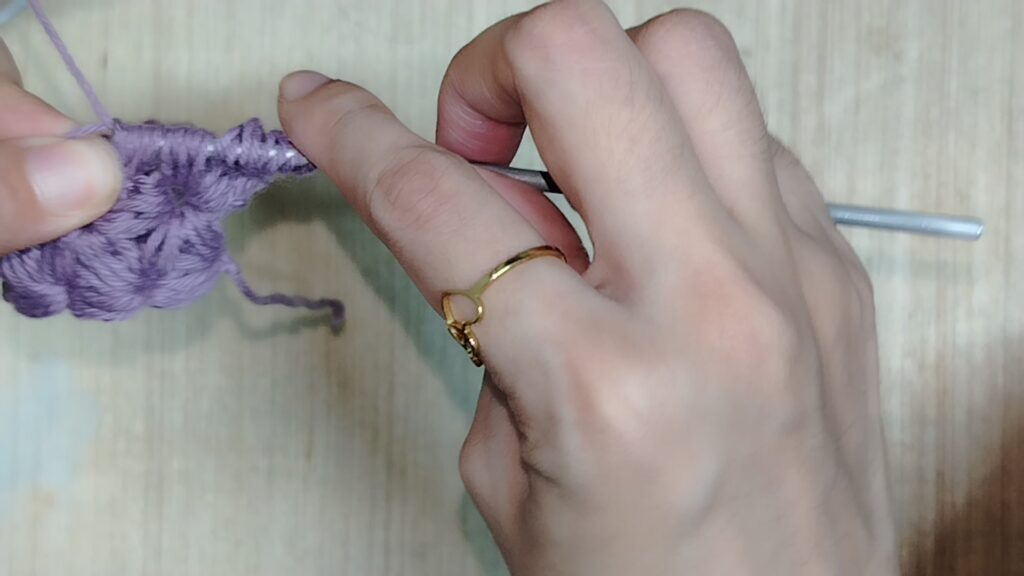
Pull up a loop.
Then:
Yarn over and pull through both loops on your hook.
Finish with:
Chain 1.
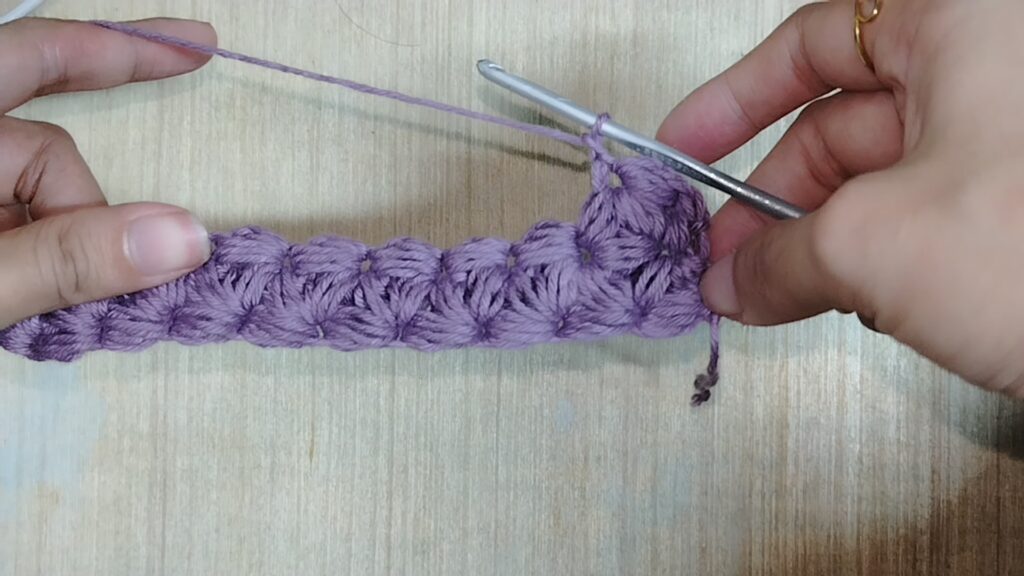
And there it is!
🌼 Your first Jasmine flower!
🌸 Repeat Across the Row
Now we simply repeat the same process across your work.
Create the three unfinished puff sections:
1. Work into the top/eye
2. Work into the bottom/base
3. Work into the next space
Then pull through all the loops together.
Secure the stitch.
Chain 1.
Repeat across the row.
Once you get into the rhythm, you’ll start to see those little flowers appear one after another.
💡 Tips for Crocheting the Jasmine Stitch
1. Keep Your Loops Consistent
This is probably the most important tip.
Try to make your elongated loops approximately the same height.
If one loop is tiny and another is very long, the finished flowers may look uneven and pulling through all the loops can become difficult.
2. Keep Your Tension Relaxed
The Jasmine Stitch needs room.
Don’t pull your yarn too tightly after every loop.
Think loose and relaxed rather than tight and controlled.
Your hook needs to be able to move through all those loops without a struggle.
3. Use Smooth Yarn While Learning
A smooth yarn makes it much easier to see the individual loops and spaces.
Once you’ve mastered the stitch, you can experiment with different yarn textures and fibers.
4. Don’t Panic When You Have a Lot of Loops
This is probably the funniest part of learning the Jasmine Stitch.
At some point you’ll look at your hook and think:
“There is no way I’m supposed to pull through all of that.” 😂
Yes.
You are.
Take a breath.
Keep your tension loose.
And slowly pull your yarn through.
You’ve got this.
5. Practice With a Small Swatch
Before starting a huge blanket, make a small sample.
Trust me on this one.
The Jasmine Stitch can use a lot of yarn, and you don’t want to discover halfway through a giant project that your tension is much tighter than expected.
A small swatch gives you a chance to practice your tension, understand the stitch placement, and get comfortable with the rhythm.
🌼 What Can You Make With the Jasmine Stitch?
Because the Jasmine Stitch creates a thick and highly textured fabric, it works beautifully for cozy crochet projects.
Here are a few ideas:
– Crochet scarves
– Cowls
– Blankets
– Baby blankets
– Crochet hats
– Headbands
– Bags
– Pillow covers
– Washcloths
– Crochet accessories
– Cozy home décor
The possibilities are endless once you get comfortable with the stitch.
Just remember that it can be a yarn-hungry stitch, so stock up before starting a large project. 😂🧶
🌸 Jasmine Stitch Quick Reference
Once you’ve learned the stitch, here’s a quick little cheat sheet you can come back to.
Basic Puff
[YO, pull up a long loop] × 3 → close → secure → ch 1
Foundation
Make your first puff, then continue making puffs into the previous puff’s opening.
Jasmine Flower
Create three unfinished puff sections:
Top → Bottom → Next
Then:
Close all loops → secure → ch 1
Repeat across.
❤️ Final Thoughts
I honestly love how crochet can turn an ordinary moment into something memorable.
What started as me sitting with my yarn and hook while listening to PPJ’s TikTok live became a little Jasmine Stitch experiment.
There I was, crocheting flowers while listening to advice, stories, and rants in the background. 😂
Sometimes crochet doesn’t have to be about finishing a project as quickly as possible.
Sometimes it’s just about sitting down, picking up your hook, listening to something you enjoy, and letting your hands make something beautiful.
And if you happen to get distracted by a particularly interesting rant?
Well…
Just pause your crochet and listen. 😂
The yarn will still be there.
So grab your favorite yarn, put on your favorite show, podcast, music, or livestream, and give the Jasmine Stitch a try.
And if your first few flowers don’t look perfect, don’t worry.
Keep going.
Puff. Puff. Puff. Pull through.
🌼 One little flower at a time.
Happy crocheting! 🧶💕
📌 Save This Jasmine Stitch Tutorial
If you enjoyed this tutorial, save it for your next crochet project and share it with a fellow crocheter who loves learning pretty crochet stitches.
And don’t forget to check out my other crochet tutorials, patterns, and handmade creations here on the blog and in my shop.
There are always more stitches to learn, more yarn to play with, and definitely more things to crochet. 😄