
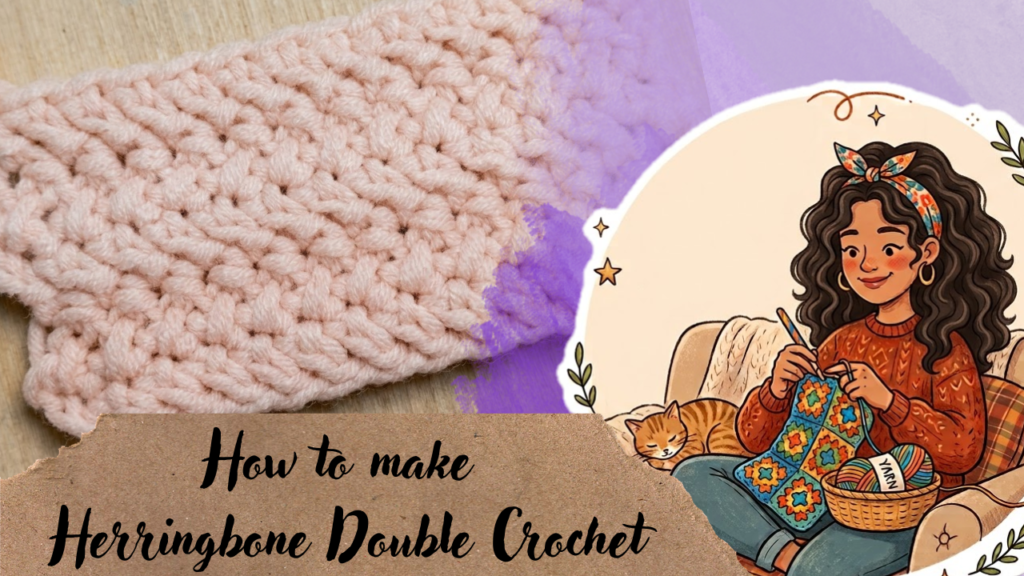
Have you ever looked at a crochet stitch and thought, “Ooh, that’s pretty! I need to try that!” 😂🧶 Well, that’s exactly the kind of feeling the Herringbone Double Crochet stitch gives me!
If you’re familiar with regular double crochet, you’re already halfway there. This stitch puts a little twist on the classic technique to create a lovely slanted texture that gives crochet fabric a woven, almost knitted appearance.
The best part? You don’t need to learn a completely complicated stitch to achieve a different look. A few changes in how you move the loops on your hook can make a beautiful difference!
In this tutorial, we’ll explore the Herringbone Double Crochet stitch, how it differs from regular double crochet, and how you can use it in your next crochet project. So grab your yarn and hook, and let’s get stitching!
What Is Herringbone Double Crochet?
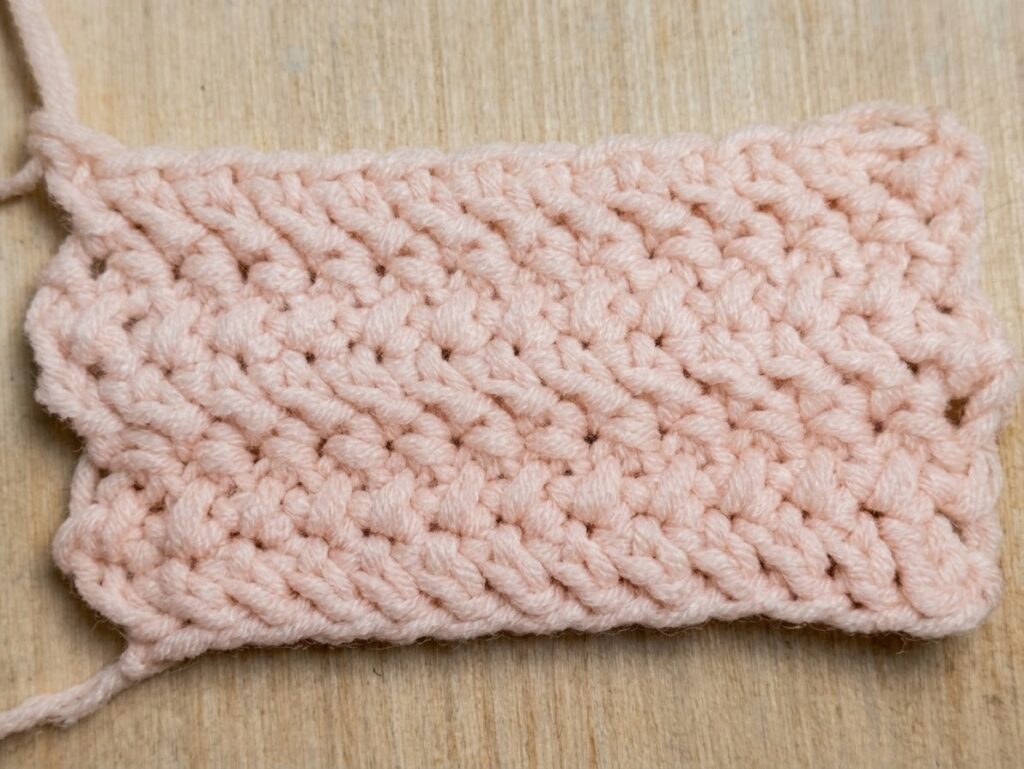
The Herringbone Double Crochet (HBDC) is a crochet stitch that creates a distinctive slanted appearance by changing the usual loop-pulling sequence of a regular double crochet.
While regular double crochet creates familiar vertical stitch posts, Herringbone Double Crochet produces a more diagonal, interlocking texture. The result is a fabric with a little extra character and a polished finish.
It’s a lovely stitch to explore if you enjoy experimenting with crochet textures or want to give a simple project a fresh look.
And honestly, who says we have to stick to the same old stitches every time? Sometimes, a little twist is all a project needs! 😉
Herringbone Double Crochet vs. Regular Double Crochet
Both stitches are based on double crochet, but their construction gives them different appearances.
Neither stitch is better than the other. They simply offer different looks, and that’s one of the things I love about crochet. The possibilities are endless!
Materials You’ll Need
Before starting your Herringbone Double Crochet swatch, prepare the following:
- Yarn of your choice
- A crochet hook suitable for your yarn
- Scissors
- Yarn needle for weaving in the ends
For your first attempt, I recommend using a smooth, light-colored yarn. It will make the stitches and loop movements easier to see. You can always experiment with textured or darker yarn once you’ve become comfortable with the technique.
Herringbone Double Crochet Stitch Tutorial
Let’s get to the fun part! If you already know how to make a regular double crochet, pay close attention to the loop movements because that’s where the magic happens.
Step 1: Yarn over, then insert your hook into the next stitch.
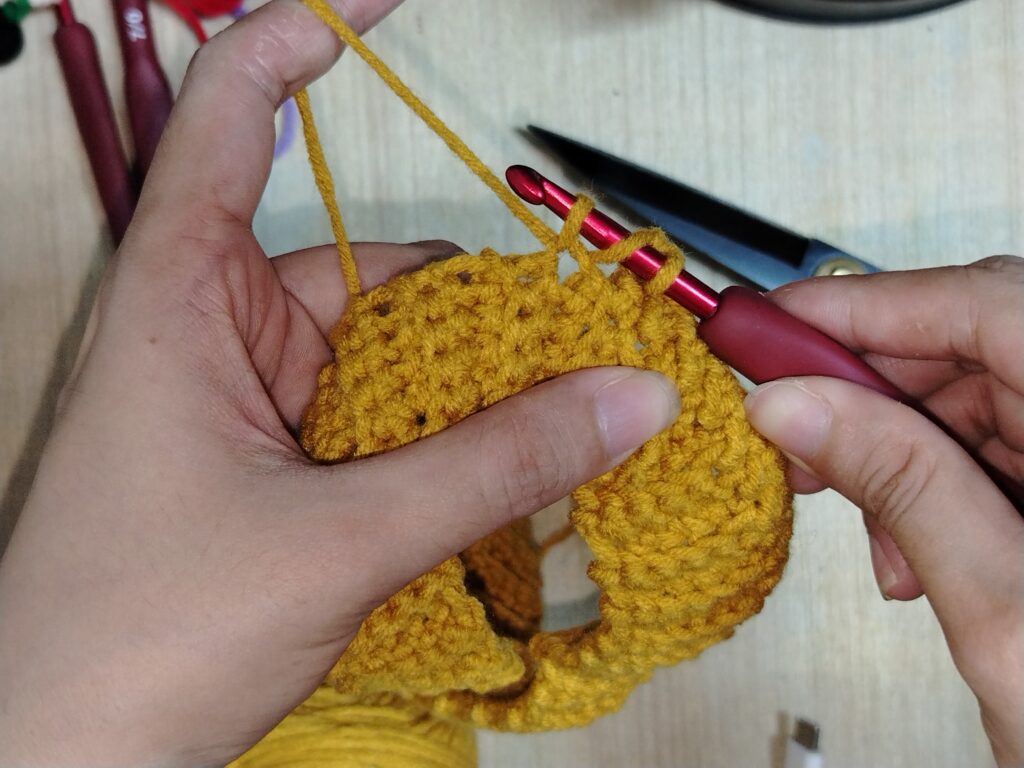
You should have 3 loops on your hook.
Step 2: Pull the first loop through the second loop, just as you would when making a slip stitch.
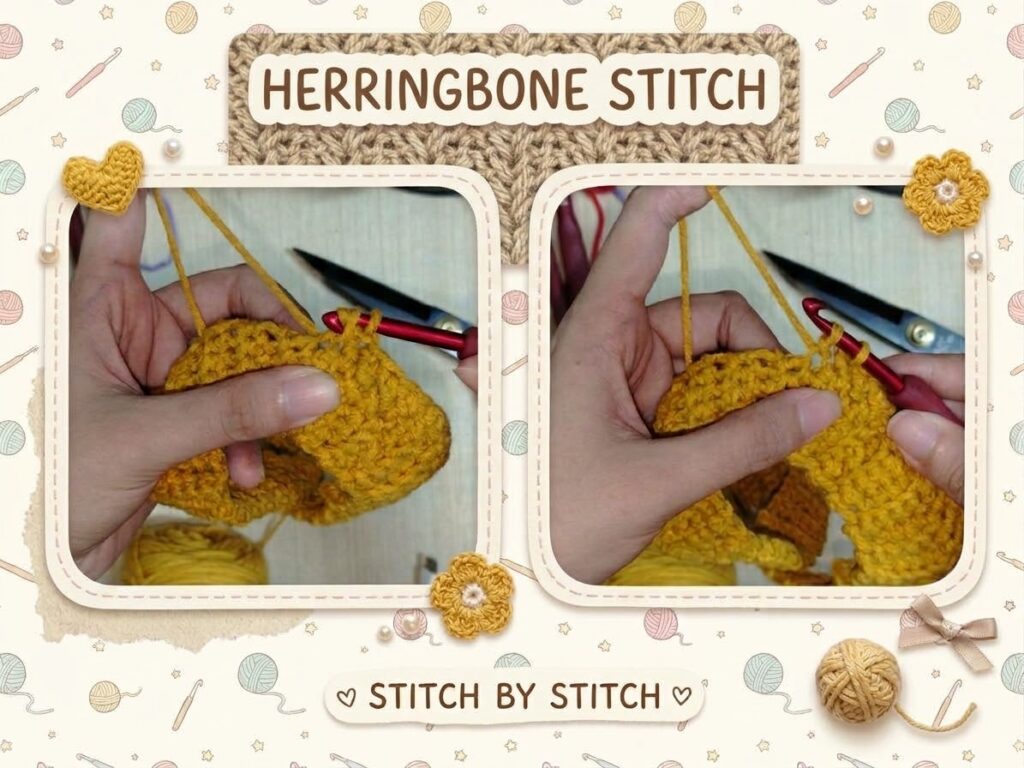
After this movement, you should have 2 loops on your hook.
Step 3: Yarn over and pull up a loop through the first loop on your hook.
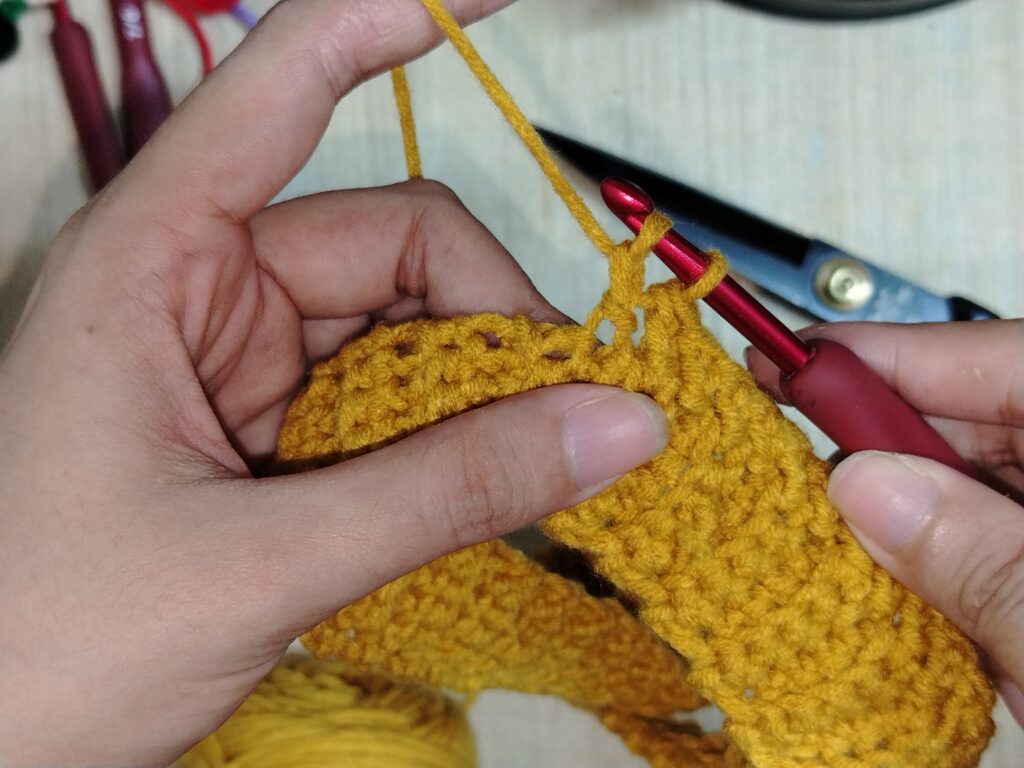
Take your time with this step so you can clearly see how the loops move around your hook.
Step 4: Yarn over once more and pull through the remaining 2 loops on your hook.
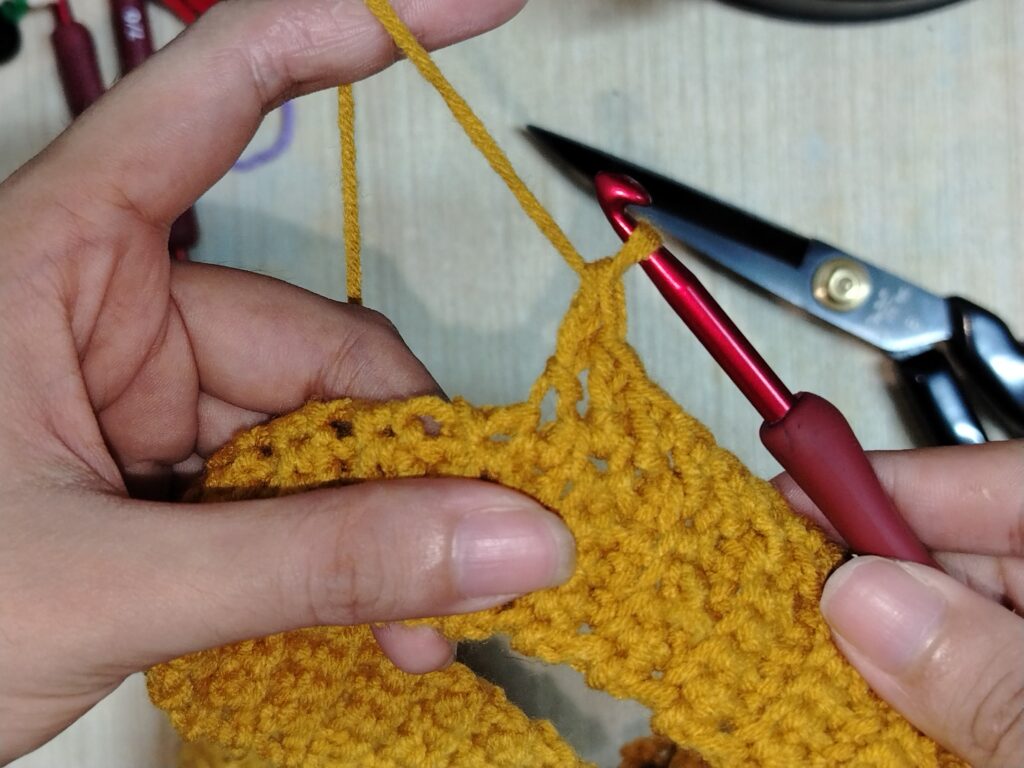
And there you have it! Your Herringbone Double Crochet stitch is complete. 🎉
Repeat these steps in the next stitch and continue across the row.
Crochet tip: If the stitch feels a little awkward at first, don’t worry. Your hands are simply getting used to a different sequence of movements. Make a few stitches slowly before trying to work at your usual pace.
What Can You Make With Herringbone Double Crochet?
One of the most exciting things about learning a new stitch is imagining all the projects you can make with it!
Here are a few ideas to get your creative wheels turning.
1. Sweaters and Cardigans
The slanted stitch texture can give handmade garments a lovely, polished appearance. Make a swatch first to check the fabric’s drape, stretch, and thickness before committing to a whole garment.
2. Scarves and Cowls
A scarf is a wonderful way to showcase a stitch pattern. The repeating diagonal texture can add visual interest without requiring complicated color changes or elaborate motifs.
3. Crochet Blankets
If you love textured blankets, this stitch is worth experimenting with. Try a solid color for a subtle, elegant look or alternate colors to make the stitch pattern stand out.
4. Bags and Accessories
Want to try something beyond garments and blankets? Experiment with Herringbone Double Crochet for pouches, bags, and other accessories. Make a sample first to see whether the resulting fabric provides enough structure for your project.
Tips for Better Herringbone Double Crochet Stitches
Here are a few things to keep in mind while practicing:
- Keep your tension consistent. Pulling loops too tightly can make the stitch difficult to work, especially during the first few rows.
- Watch your loops. The order of the movements matters, so take your time until the sequence becomes familiar.
- Use stitch markers if needed. They can help you keep track of the first and last stitches in each row.
- Make a test swatch. A small sample lets you examine the texture and measure your gauge before starting a larger project.
- Don’t be afraid to unravel. We’ve all had those moments when a stitch refuses to cooperate. Frog it, try again, and remember that even experienced crocheters have to undo their work sometimes! 😂
Is Herringbone Double Crochet Worth Learning?
Absolutely, especially if you enjoy discovering new ways to add texture to your crochet projects!
Herringbone Double Crochet offers a different visual effect from regular double crochet while building on a familiar foundation. Once you get comfortable with its loop sequence, you can experiment with different yarns, colors, and project ideas.
It may take a little practice to get the movements right, but that’s part of the fun. Every new stitch adds another possibility to your crochet toolbox.
And let’s be honest, we crocheters never really run out of things to learn, do we? Just when we think we’ve mastered one stitch, another pretty one comes along and tempts us into starting a whole new project. 😂🧶
Final Thoughts
The Herringbone Double Crochet stitch is a lovely reminder that small changes in technique can create a completely different look. With its distinctive slanted texture, it offers a fresh alternative to regular double crochet and opens up more possibilities for your handmade creations.
Give it a try, make a little swatch, and see how you like the result. You might discover a new favorite stitch along the way!
If you enjoyed this tutorial, don’t forget to explore more crochet tutorials and crafty stories on the blog. You can also visit my shop to discover more handmade creations. Thank you for being part of my crochet corner, where there’s always another stitch to learn and another project to dream about! 💕