
Have you ever wondered how to crochet a perfect circle, only to end up with something that looks suspiciously like a hexagon? 😂 Don’t worry, you’re definitely not alone! If your crochet circle has little corners instead of a smooth, round edge, the problem may not be your tension, your hook, or your stitches. It could simply be where your increases are placed.
In this tutorial, I’ll show you how to crochet a perfect circle using a simple staggered increase technique. We’ll also look at the difference between the traditional crochet circle method, where the increases are stacked in the same areas, and the staggered method, where the increases are shifted between rounds.
I’ll also share the little counting trick I use to make the process easier, because let’s be honest, keeping track of crochet increases can sometimes make our brains work harder than they signed up for. 😂🧶
Why Does My Crochet Circle Have Corners?
When making a flat crochet circle, we need to add increases as the circle grows. The traditional method is simple and very beginner friendly. You work your increases at regular intervals, usually following the same placement from one round to the next.
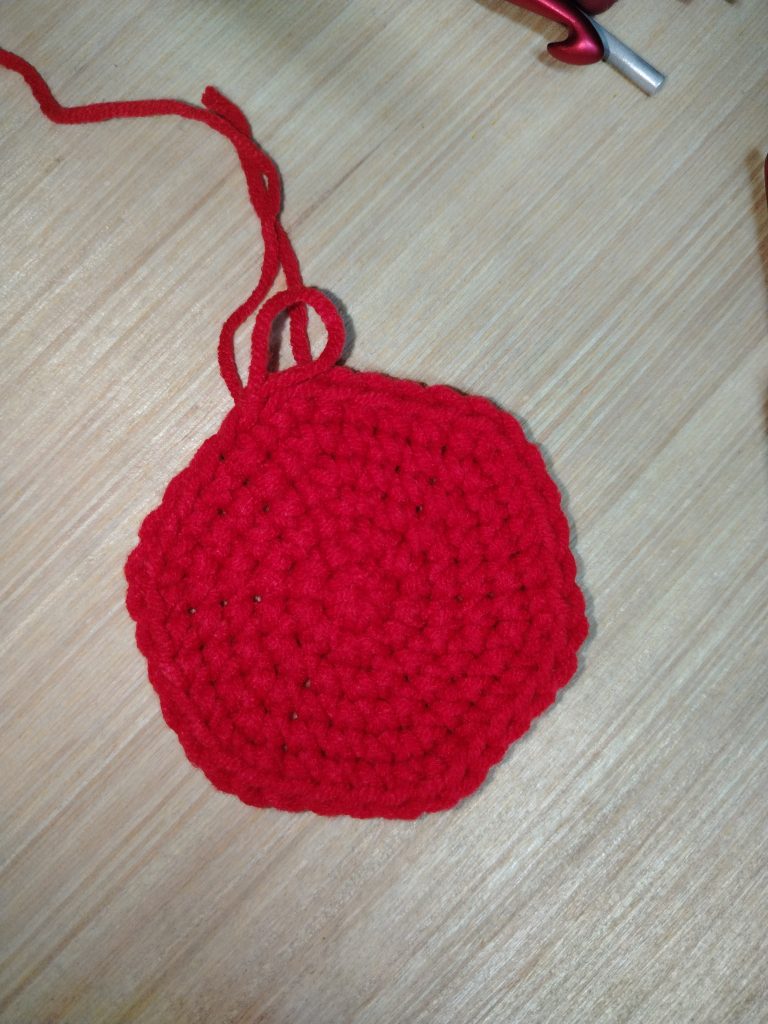
The problem is that those increases can end up stacking directly above one another.
As you continue crocheting, those areas can grow a little more prominently, creating visible points around the edge of your circle.
And suddenly, your beautiful circle is looking more like a hexagon.
Nothing is necessarily wrong with your crochet. It’s simply a result of increase placement.
This is where the staggered increase method can make a difference.
Traditional Crochet Circle vs. Staggered Crochet Circle
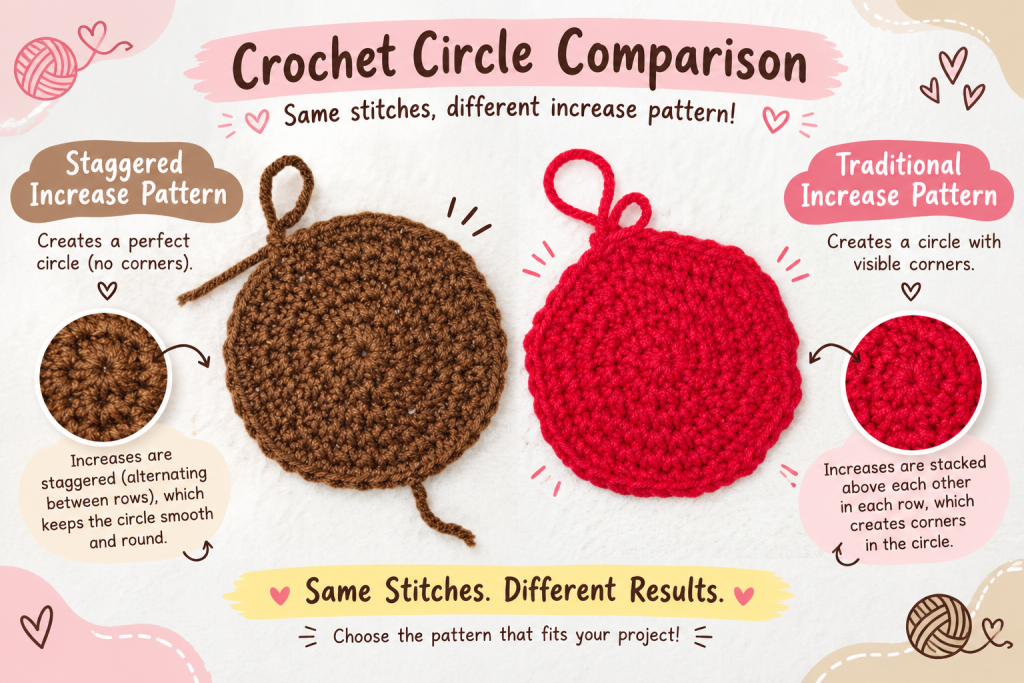
Let’s compare the two methods.
Traditional Increase Method
With the traditional method, your increases are placed at regular intervals and often line up from round to round.
The good things:
Easy to learn
Easy to count
Very predictable
Great for beginners
Works perfectly well for many crochet projects
The not so good things:
Increases can create visible lines
The edge may develop noticeable corners
Your circle can look more polygon-shaped as it grows
Again, this doesn’t mean the traditional method is wrong. It’s simply a different way of distributing your increases.
Staggered Increase Method
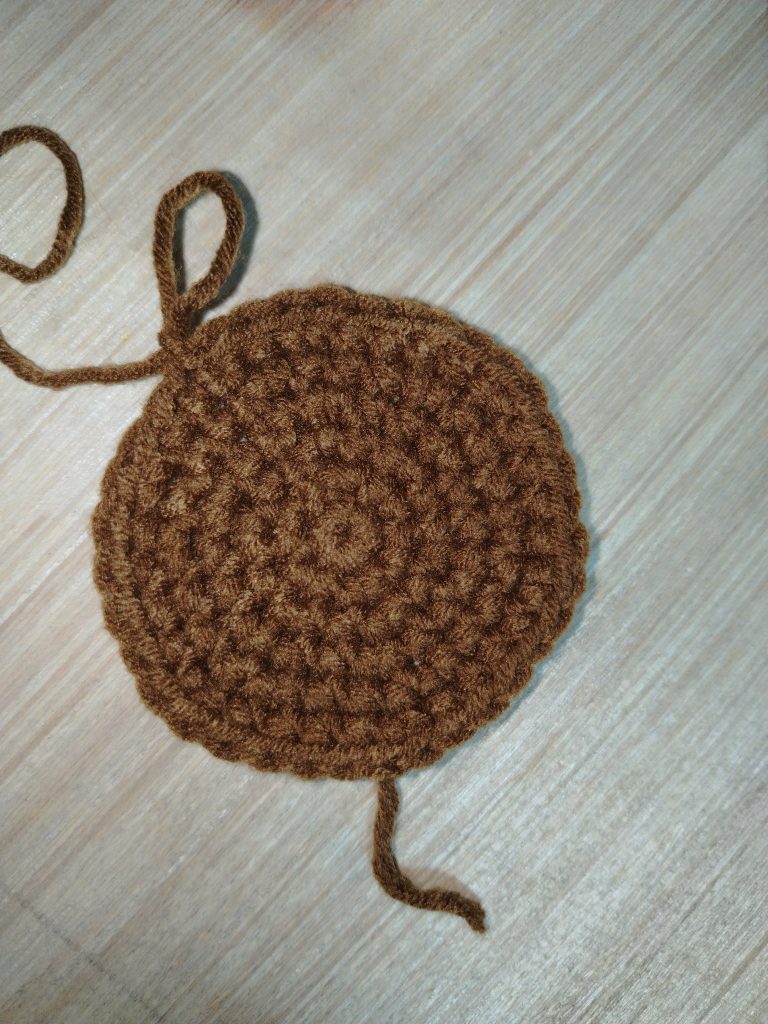
The staggered method moves the increases so they aren’t always sitting directly above the increases from the previous round.
Think of bricks on a wall. If every brick is stacked directly on top of the one underneath it, you get very obvious vertical lines. Move the bricks slightly, and everything becomes more evenly distributed.
That’s basically what we’re doing with crochet increases.
By staggering the increases, we can distribute the shaping more evenly around the circle, which can give us a smoother and more naturally rounded edge.
How to Crochet a Perfect Circle
Now let’s make one!
This example uses single crochet and starts with a magic circle.
Crochet Circle Abbreviations
sc = single crochet
sl st = slip stitch
ch = chain
inc = increase
st/sts = stitch/stitches
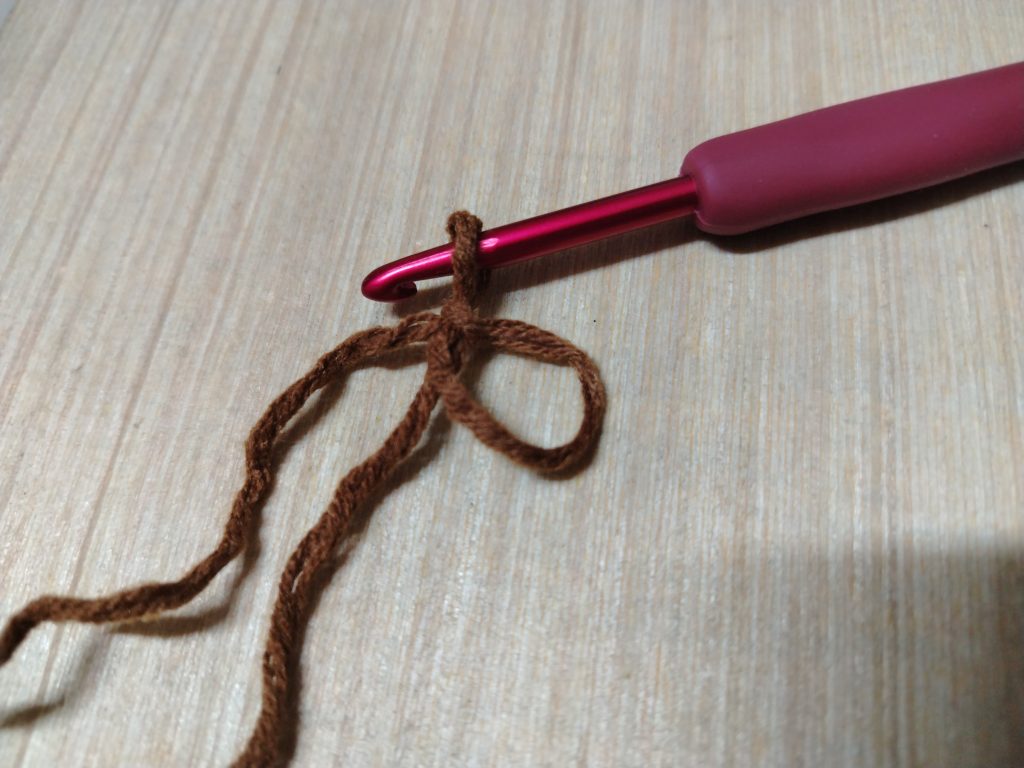
Start With a Magic Circle
Make a magic circle to begin your crochet circle.
Round 1
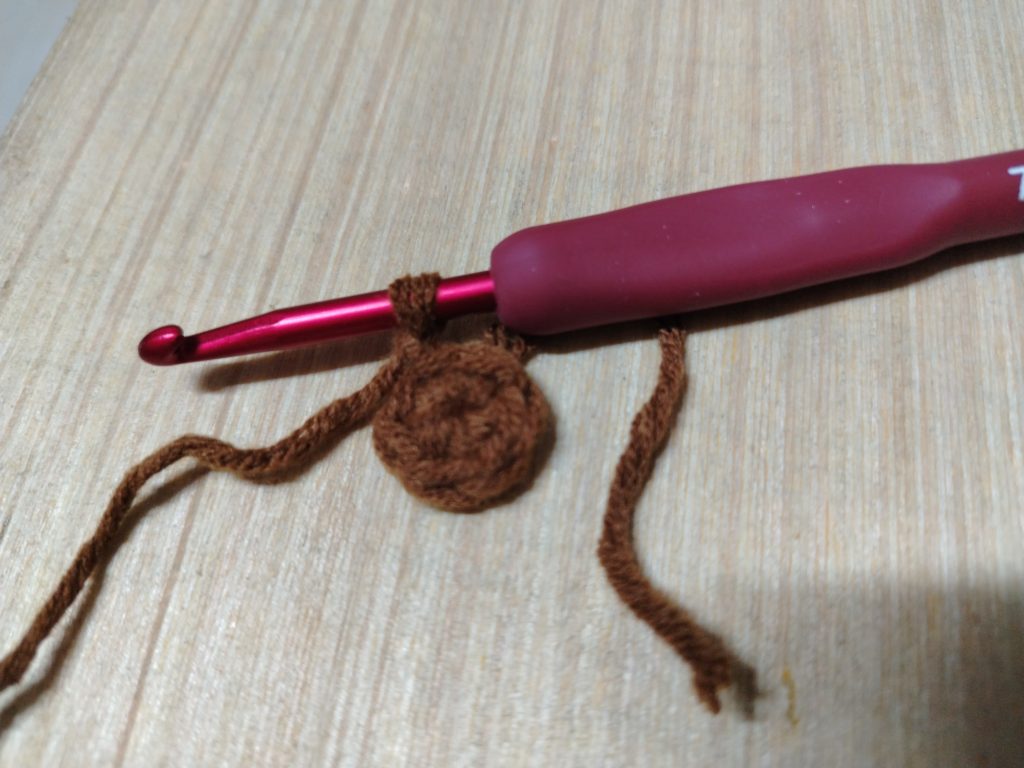
6 sc into the magic circle.
Join with a sl st to the first stitch, then ch 1.
Total: 6 sts
Round 2
Make an inc in each stitch around.
You will have:
Total: 12 sts
Join with a sl st to the first stitch, then ch 1.
So far, this is the traditional way of increasing.
Now we’re going to start staggering our increases.
Round 3: Start the Staggered Pattern
This is where the staggered increase pattern begins.
Work:
(1 sc, inc, 2 sc) repeat around
Continue this sequence around the circle.
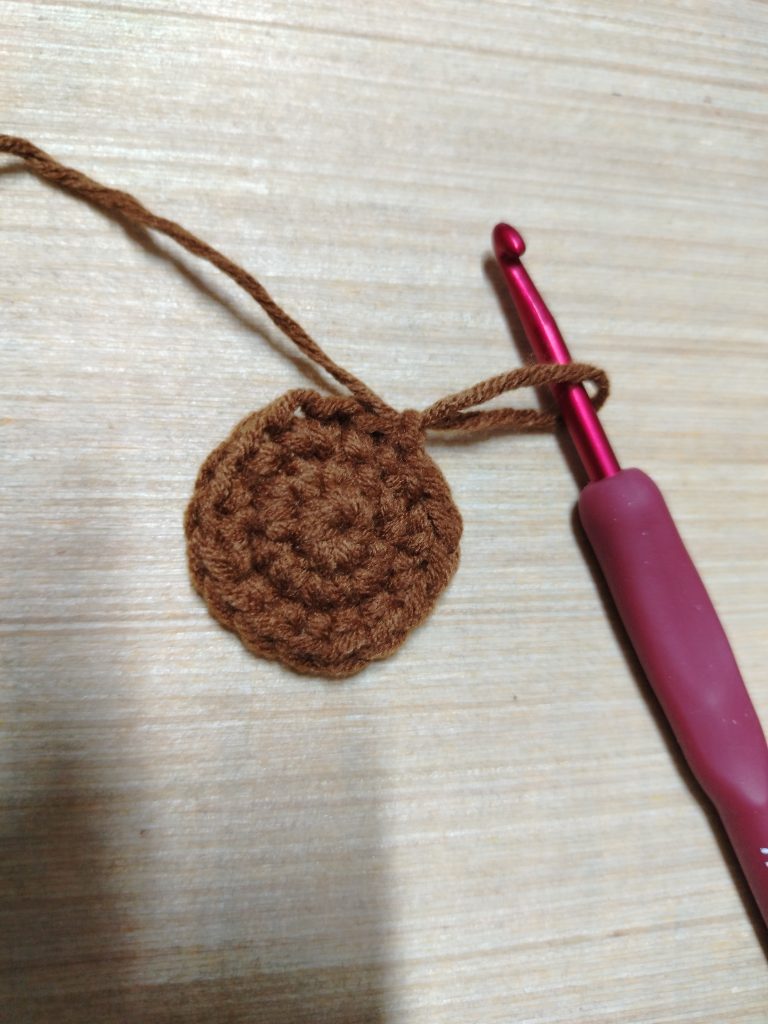
You should have:
Total: 16 sts
Join with a sl st to the first stitch, then ch 1.
A Little Note About Round 3
Usually, crocheters continue with a traditional 1 sc, inc repeat at this point.
I like to skip that and start my staggered pattern with 2 sc and an increase instead.
Why?
Because it gives me a simple system that I can continue following as the circle gets bigger. It also makes counting much less confusing for me later on.
And anything that makes crochet counting easier is a win in my book. 😂
Round 4
Continue the staggered pattern:
(3 sc, inc) repeat around
Repeat this sequence around the circle.
You should have:
Total: 20 sts
Join with a sl st to the first stitch, then ch 1.
Now you can start seeing the idea behind the pattern. We’re still adding increases, but we’re distributing them rather than stacking them in exactly the same places.
My Favorite Trick for Remembering the Increases
Here’s the little trick that makes this method much easier for me.
If you continue this pattern and eventually get lost while counting, don’t panic!
Just look at your round number.
For this staggered pattern, the round number tells you where to place your increase.
For example:
Round 3: increase at the 3rd position
Round 4: increase at the 4th position
Round 5: increase at the 5th position
Round 6: increase at the 6th position
So, if you’re working on Round 5, your increase goes at the 5th stitch position in your repeating sequence.
This little trick means you don’t necessarily have to memorize a long, complicated sequence of increases. Just keep track of the round you’re on.
It’s almost like giving yourself a little crochet cheat code. 🧶✨
Why I Prefer Starting With Even Numbers
Here’s another thing I’ve learned while making these circles.
I find it easier to start the staggered pattern when you have an even number of stitches that can be divided evenly at the beginning of the pattern.
This makes it easier to distribute your increases and keeps the counting less confusing.
So when you’re working your staggered crochet circle, pay attention to your stitch count and make sure your increases are distributed evenly around the round.
The goal isn’t to randomly move your increases around.
The goal is to stagger them in a controlled and repeatable way.
Why Do Staggered Increases Create a Smoother Circle?
When increases are repeatedly placed in the same locations, those areas can become more visually pronounced. Over several rounds, this can create the little corners we often see in traditional crochet circles.
Staggering the increases helps spread that extra width around the circle instead.
This can give you a smoother outer edge and a more rounded appearance.
Of course, your yarn weight, hook size, crochet tension, and stitch type can also affect the shape of your finished circle. So don’t worry if your result isn’t exactly identical to someone else’s.
Crochet has a funny way of reminding us that our hands are part of the pattern too. ❤️
Which Crochet Circle Method Should You Use?
Honestly, both methods are useful.
The traditional increase method is easy, predictable, and excellent when you’re learning crochet. It’s also the method you’ll find in many crochet patterns.
The staggered method is especially helpful when you want your crochet circle to have a smooth, round appearance with fewer noticeable corners.
I particularly like this technique for crochet coasters, bag bases, rugs, baskets, hats, amigurumi, and other projects where the shape of the circle really matters.
Final Thoughts
If your crochet circle has been secretly turning into a hexagon, don’t throw your project across the room just yet. 😂
Before blaming your tension or thinking you’ve somehow crocheted everything wrong, take a look at where your increases are sitting.
Sometimes, you don’t need a different stitch, a different yarn, or even a different hook.
You simply need to move those increases around a little.
The traditional method stacks increases in the same areas, while the staggered method distributes them more evenly around the circle. Both methods have their place, but they can give you noticeably different results.
For me, the staggered method is not only helpful for getting a smoother circle, but it also makes counting easier. Once I remember the round number, I know where to look for my increase.
And that’s one of the things I love about crochet. Sometimes, a tiny change in where we place a stitch can make such a big difference in the finished shape.
So the next time you’re wondering how to crochet a perfect circle, give staggered increases a try.
Your circle might just stop acting like a hexagon. 😉🧶
Same stitches. Different increase placement. Very different results. ❤️
A little appreciation for these vibrant Monaco Milk Yarn. 100% soft acrylic, 5-ply worsted weight, 50 grams per ball. Perfect for beginners! 🥰
🧶 If you enjoyed this tutorial, come visit us again! There are more crochet tutorials and stories waiting on the blog, plus plenty of newly made goodies in my shop. 💕