
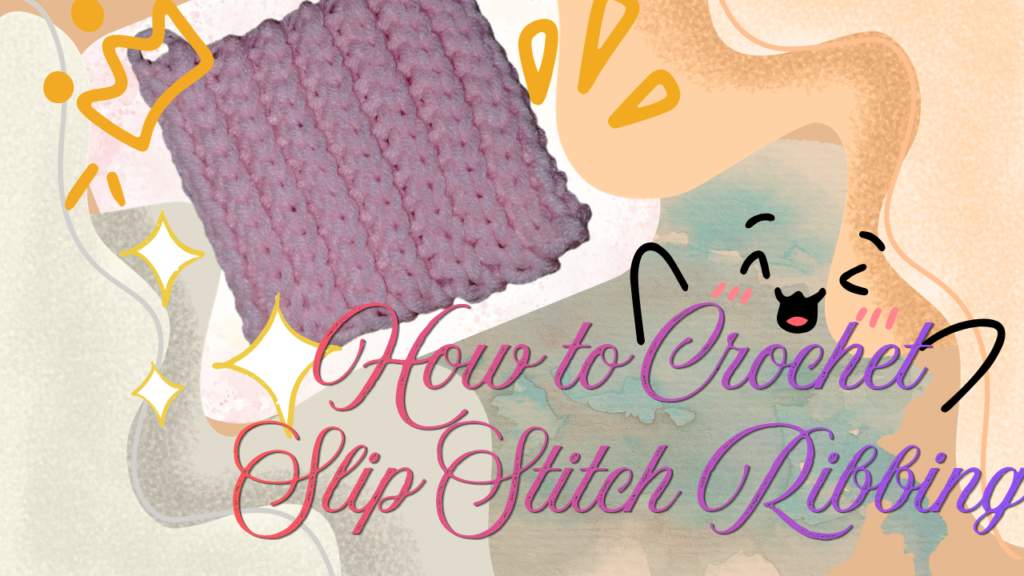
Discover the Beauty of Slip Stitch Ribbing
Sometimes, the simplest crochet stitches create the most beautiful results. If you’re looking for a way to add texture and a classic ribbed appearance to your projects, slip stitch ribbing is a technique worth exploring!
Slip stitch ribbing crochet creates a fabric with raised ridges that can resemble knitted ribbing. It’s a lovely option for adding texture to accessories, garment edges, and other handmade creations.
The best part? You don’t need complicated stitches to achieve this look. With a little practice, some yarn, and your trusty crochet hook, you can create a beautiful ribbed fabric using a simple crochet technique.
In this tutorial, we’ll explore slip stitch ribbing, helpful tips for working the stitch, and some ideas for using it in your future projects.
Let’s get our hooks ready!
What Is Slip Stitch Ribbing in Crochet?
Slip stitch ribbing is a crochet technique that creates a textured fabric with alternating ridges and grooves. It is commonly worked in rows, often using slip stitches worked into the back loop only.
Working into the back loop helps create the raised ridges that give the fabric its characteristic ribbed appearance. Depending on the method you use, the finished fabric may have a knitted look with a compact texture.
Because slip stitches are short, this technique can produce a dense fabric. The final result will depend on your stitch pattern, yarn, hook size, and tension.
Slip stitch ribbing is a useful technique to learn if you want to expand your crochet skills and experiment with different fabric textures.
For beginners, a smooth, medium-weight yarn is a good choice because it makes the stitches and ridges easier to see.
How to Crochet Slip Stitch Ribbing
Slip stitch ribbing is a useful technique to practice when learning how different stitch placements affect the texture of your crochet fabric.
The following steps introduce the basic process. Follow the exact stitch sequence and stitch counts for the particular slip stitch ribbing method you’re using.
Step 1: Make Your Foundation Chain
Begin by making a foundation chain to the desired width of your swatch or project.
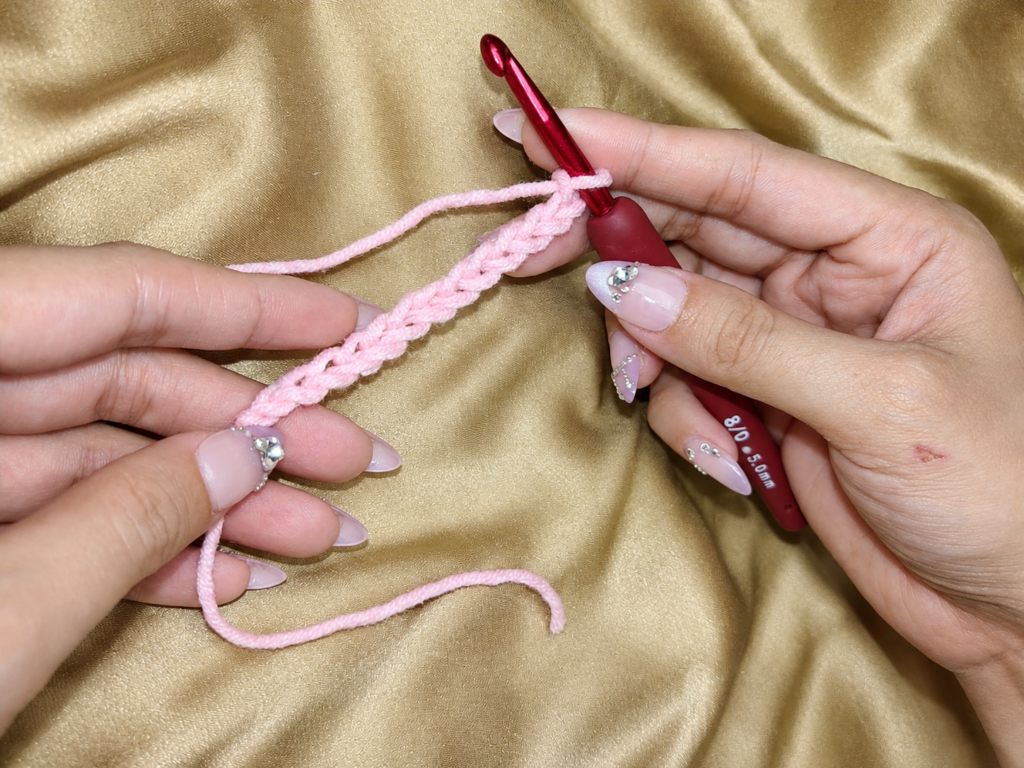
The number of chains you need will depend on your chosen pattern, so check your stitch instructions before starting.
For this tutorial I made 13 chains, as what I usually make for sweater cuffs.
Step 2: Work the First Row
💡I like to work my slip stitches into the back bumps of my foundation chain. Why? Because those tiny holes from working into the regular chains? Yeah… we’re not inviting them to this party! 😂🧶 I prefer a neater, tidier edge, and working into the back bumps helps me get that clean finish. It’s a small little trick, but sometimes, it’s the tiniest details that make our crochet projects extra lovely! 💜
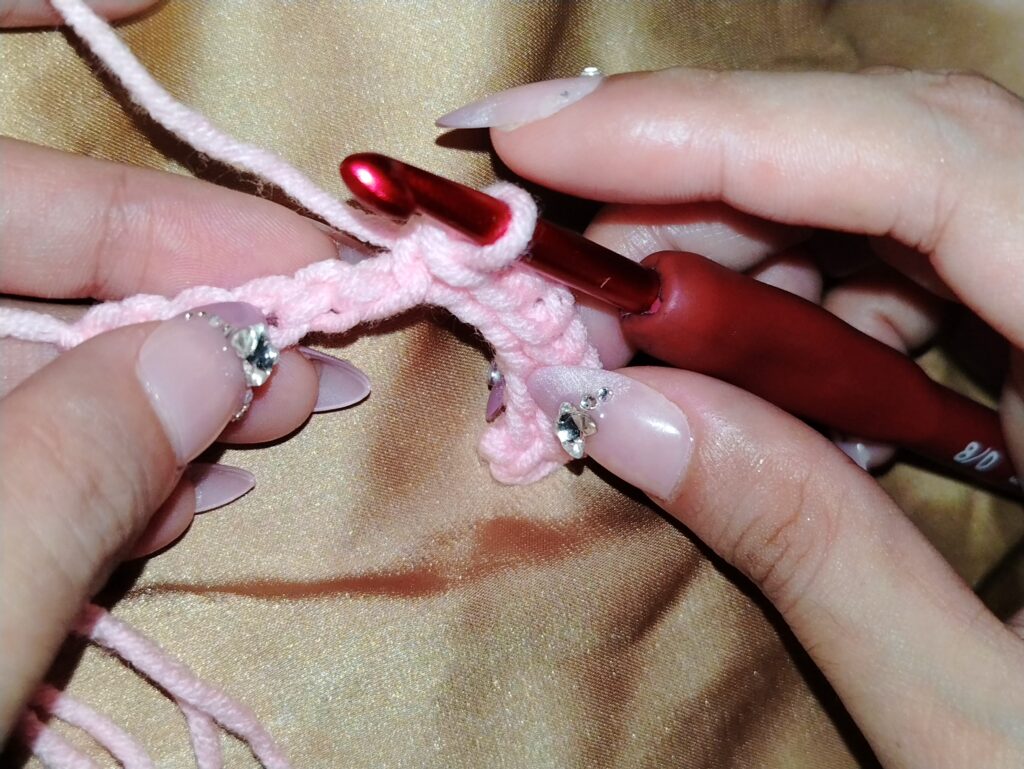
Try to keep your stitches even and avoid pulling your working yarn too tightly. Slip stitches are naturally short, and tight tension can make it difficult to insert your hook into the next stitch.
Step 3: Work Into the Correct Loop
For a back-loop-only method, insert your hook into the back loop of each designated stitch before completing the slip stitch.
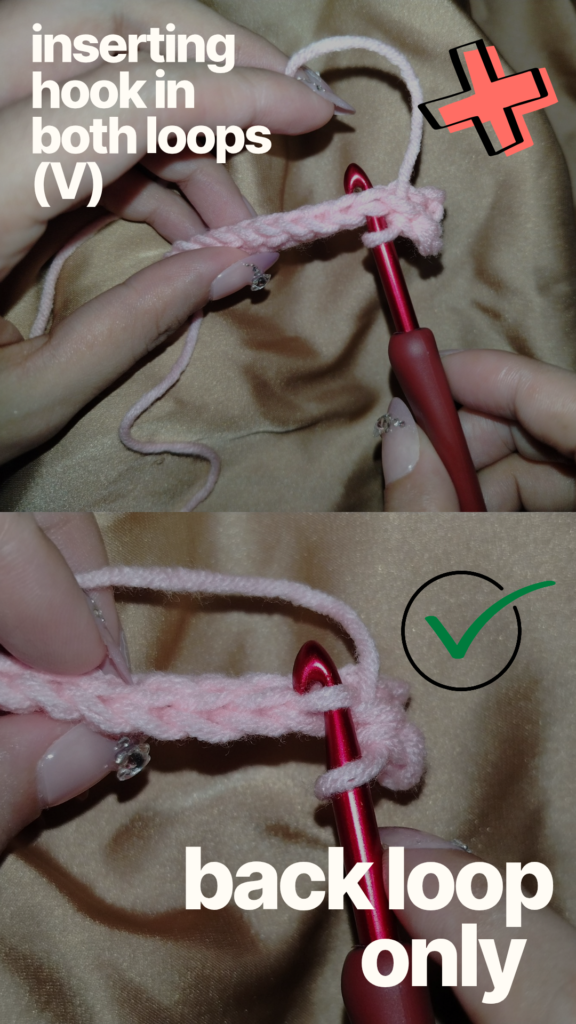
Working into the back loop leaves the other loop unworked, helping form the ridges that create the ribbed texture.
Make sure you’re identifying the correct loop consistently throughout the row.
Step 4: Continue Working Back and Forth
Follow these instructions for turning your work and repeating the rows.
As you continue, you’ll begin to see the ridges develop. Keep your stitch count consistent and pay attention to the placement of your stitches.
Don’t worry if the texture isn’t immediately obvious. Sometimes, the ribbing becomes more noticeable as you work additional rows.
Step 5: Finish Your Swatch
Continue until your swatch reaches the desired length.
Fasten off your yarn according to your pattern and use a yarn needle to weave in any loose ends.
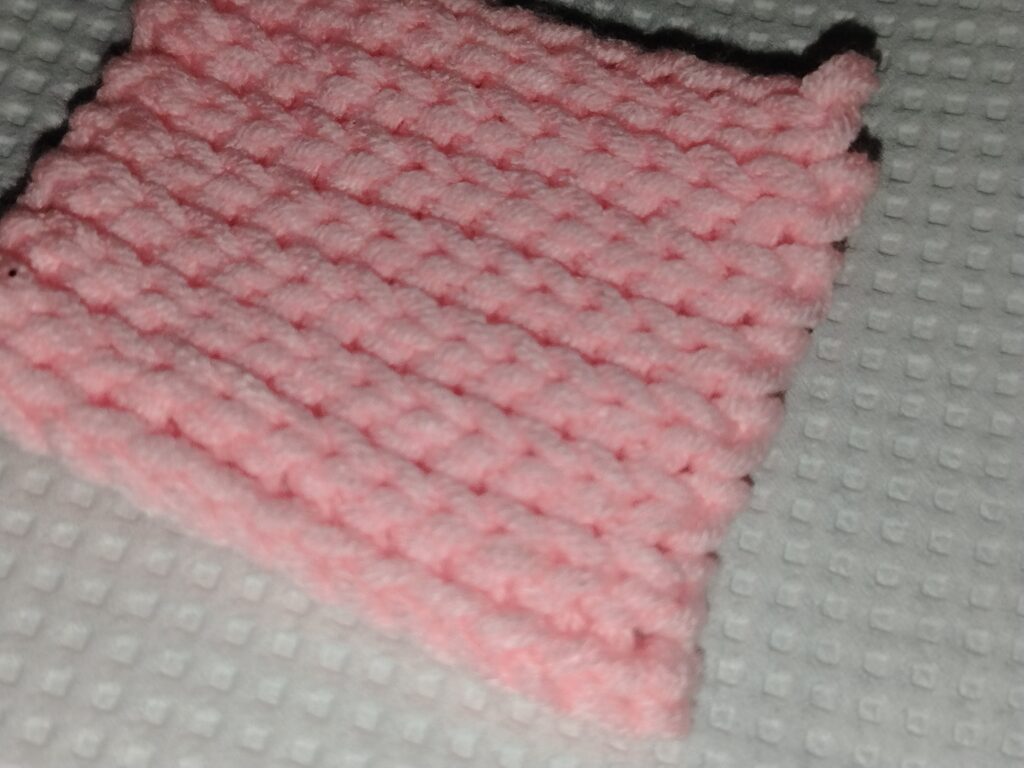
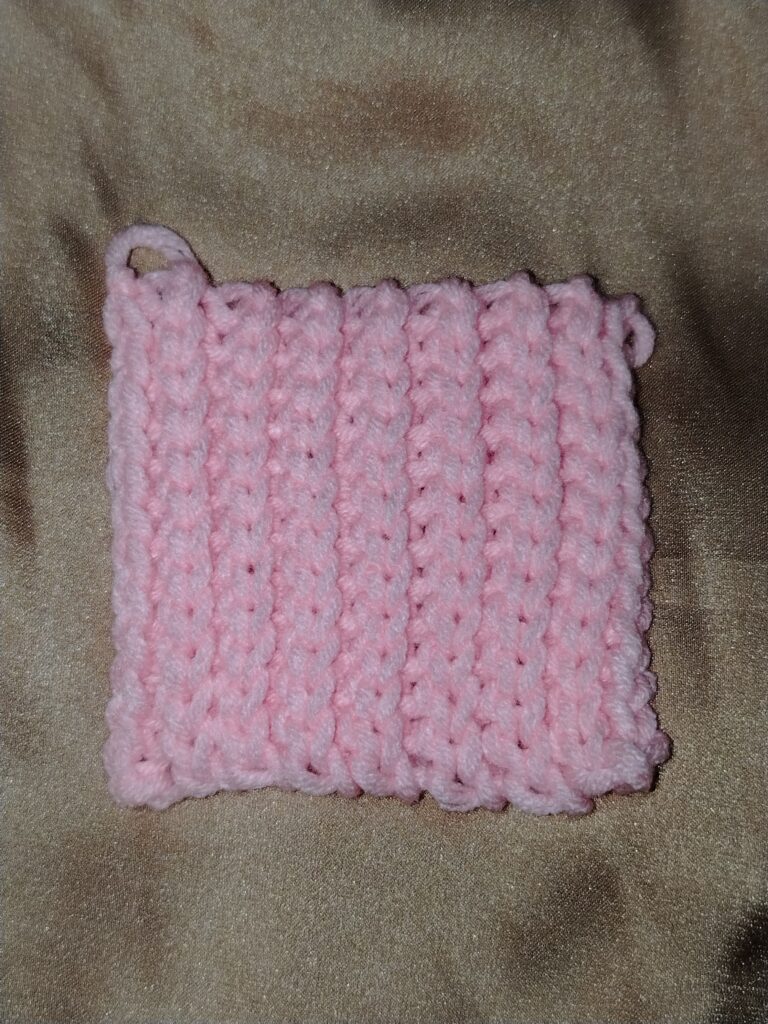
Take a moment to admire the texture you’ve created! Even a small swatch can help you understand how the stitch behaves and whether you’d like to use it for a larger project.
Tips for Beautiful Slip Stitch Ribbing
A few simple habits can make working slip stitch ribbing easier and help you achieve a more consistent result.
1. Keep Your Tension Relaxed
Slip stitches can become difficult to work into when they’re too tight. Try to maintain a comfortable tension that allows your hook to move easily through the loops.
2. Pay Attention to Stitch Placement
If your pattern calls for back-loop-only slip stitches, make sure you’re working into the correct loop. Consistent stitch placement is what helps create the characteristic ridges.
3. Count Your Stitches
It’s easy to miss a stitch when working with short, compact rows. Counting your stitches at the end of each row can help you maintain an even width.
4. Practice With a Small Swatch
Before starting a large project, make a small sample to see how your yarn, hook, and tension work together.
A swatch also lets you check the texture and stretch before committing to a finished item.
5. Experiment With Hook Sizes
If your fabric feels too stiff or your hook struggles to enter the stitches, try a different hook size. Compare your results to find a comfortable working tension and a fabric suitable for your project.
What Can You Make With Slip Stitch Ribbing?
Slip stitch ribbing can be used in many crochet projects, especially when you want a textured finish.
Here are a few ideas to inspire your next creation.
- Beanies and hats: Create a ribbed brim for a classic look.
- Scarves: Add texture and visual interest to a simple design.
- Sleeve cuffs and hems: Use ribbing as a decorative or functional finishing detail.
- Headbands and ear warmers: Experiment with ribbed textures for cozy accessories.
- Bags and other accessories: Incorporate the stitch into designs where a compact fabric works well.
Keep in mind that the stretch and drape of your finished fabric depend on the stitch pattern, yarn, hook size, and tension. Make a swatch first, especially when working on fitted garments or accessories that need a particular amount of stretch.
Is Slip Stitch Ribbing Beginner-Friendly?
Slip stitch ribbing can be a great technique for beginners who already know how to make a foundation chain and work a slip stitch.
The main challenges are maintaining consistent tension and identifying the correct loops. Once you become comfortable with these basics, repeating the rows can become much easier.
If your first swatch looks uneven, don’t be discouraged. Every new technique takes practice, and each project gives you another opportunity to improve your skills.
Remember, learning crochet isn’t about getting every stitch perfect on the first try. It’s about enjoying the process and discovering what your hands can create, one stitch at a time.
A Little Reminder Before You Go 💜
Just as every stitch has its place in a crochet project, every little act of kindness has its place in this world.
We may never know what someone else is going through, what battles they’re quietly facing, or how much a simple kind word could mean to them. So, as we go about our day, let’s always choose to be kind. Be patient, be gentle with our words, and give others the grace we’d hope to receive ourselves.
We don’t have to do something extraordinary to make a difference. Sometimes, a little encouragement, a genuine smile, or simply choosing not to hurt someone with our words is already enough.
And just as we patiently work through every stitch, let’s remember to give one another a little patience, too. After all, we’re all learning and growing in our own ways.
Keep creating, keep growing, and always choose kindness. You never know how much light you might bring into someone’s day.
Final Thoughts 🪡
Slip stitch ribbing is a wonderful technique to add to your crochet skills. With its raised ridges and textured appearance, it offers another way to bring character to your handmade projects.
Take your time learning the stitch, experiment with different yarns, and remember to make a test swatch before using it in a larger project.
Most importantly, enjoy the process. Every new stitch you learn opens the door to more possibilities, and every finished project represents the time, patience, and creativity you’ve put into it.
Happy crocheting, everyone! 🧶💜
Want to explore more? Please check out other tutorials and stories on the Knot and Curls blog, and discover more handmade creations in my shop. Thank you for being part of this little crochet corner of the world. Keep creating and always choose kindness!