
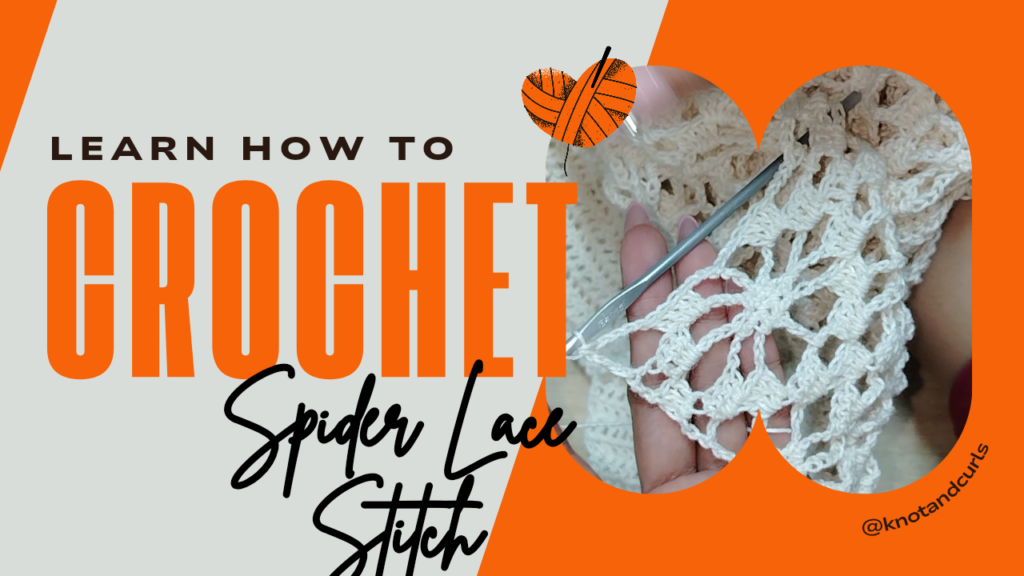
Is it just me, or does spider lace crochet feel extra appropriate when Halloween is just around the corner? 🤭🎃
With its delicate, web-like spaces and pretty diamond-shaped motifs, this stitch brings a little spooky-season magic to our crochet projects. And the best part? No actual spiders are required! 😂🕷️
Spider lace crochet is a beautiful openwork pattern made with a combination of double crochet, single crochet, treble crochet, and chain spaces. As the rows come together, the stitches create a lovely repeating design that looks intricate without requiring dozens of different stitches.
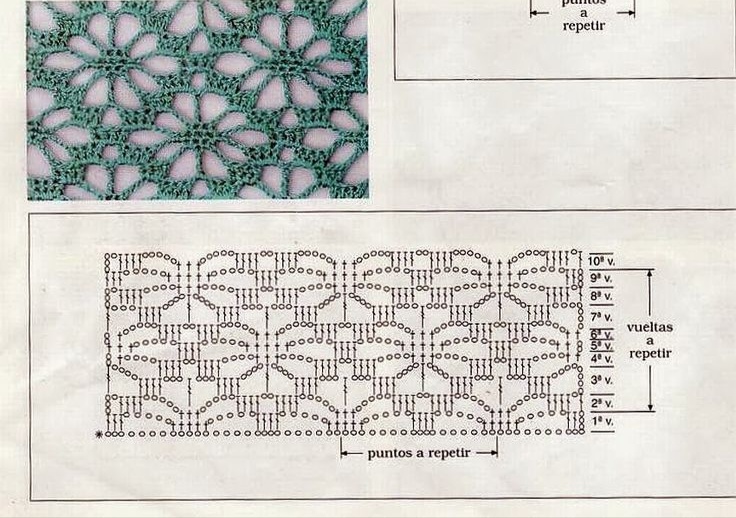
For this tutorial, I’m using a crochet diagram as my reference and sharing the written instructions row by row. I’ll also show you how I calculate the foundation stitches for 13 motifs across and explain a little trick for keeping the diamond borders consistent.
So, grab your favorite yarn, prepare your hook, and let’s weave some crochet magic!
And don’t worry if you’re not in the Halloween mood. This pretty lace pattern deserves to be enjoyed all year round. 🧶💚
What Is Spider Lace Crochet?
Spider lace crochet is an openwork stitch pattern that uses stitches and chain spaces to create a decorative lace fabric.
The spaces between the stitches give the fabric its airy appearance, while the arrangement of the stitches creates the repeating diamond-shaped motifs.
Depending on your yarn and the size of your project, this pattern could be lovely for:
- Lightweight shawls and scarves
- Crochet tops and cardigans
- Decorative table runners
- Crochet curtains
- Lightweight blankets and throws
You can also experiment with different yarn colors to create different looks. Imagine this pattern in classic black for Halloween, warm cream for a cozy home, or soft pastels for a delicate spring project!
One stitch pattern, plenty of possibilities. That’s the beauty of crochet!
Understanding the Spider Lace Crochet Pattern
Before we begin, let’s talk about the foundation and the repeating motifs.
For my project, I worked 13 diamond motifs across.
Each complete motif requires 17 foundation stitches, with an additional 5 stitches included in the foundation calculation.
Here’s the calculation:
17 × 13 + 5 = 226 foundation stitches
For this project, I made 226 double crochet foundation stitches instead of working a regular chain first.
I will also be sharing a separate tutorial on how to make a double crochet foundation chain because it’s a technique worth learning! 🤭
Using a double crochet foundation gives us a foundation row of double crochet stitches to work into for the next row.
A little note: The number 226 is for my particular project with 13 motifs across. If you want a different width, adjust the foundation according to the motif repeat and the edge stitches.
Materials and Abbreviations
For this tutorial, I used the Monaco 4ply cotton yarn and my 3.5mm hook.
I’ll be using the following abbreviations throughout the written pattern.
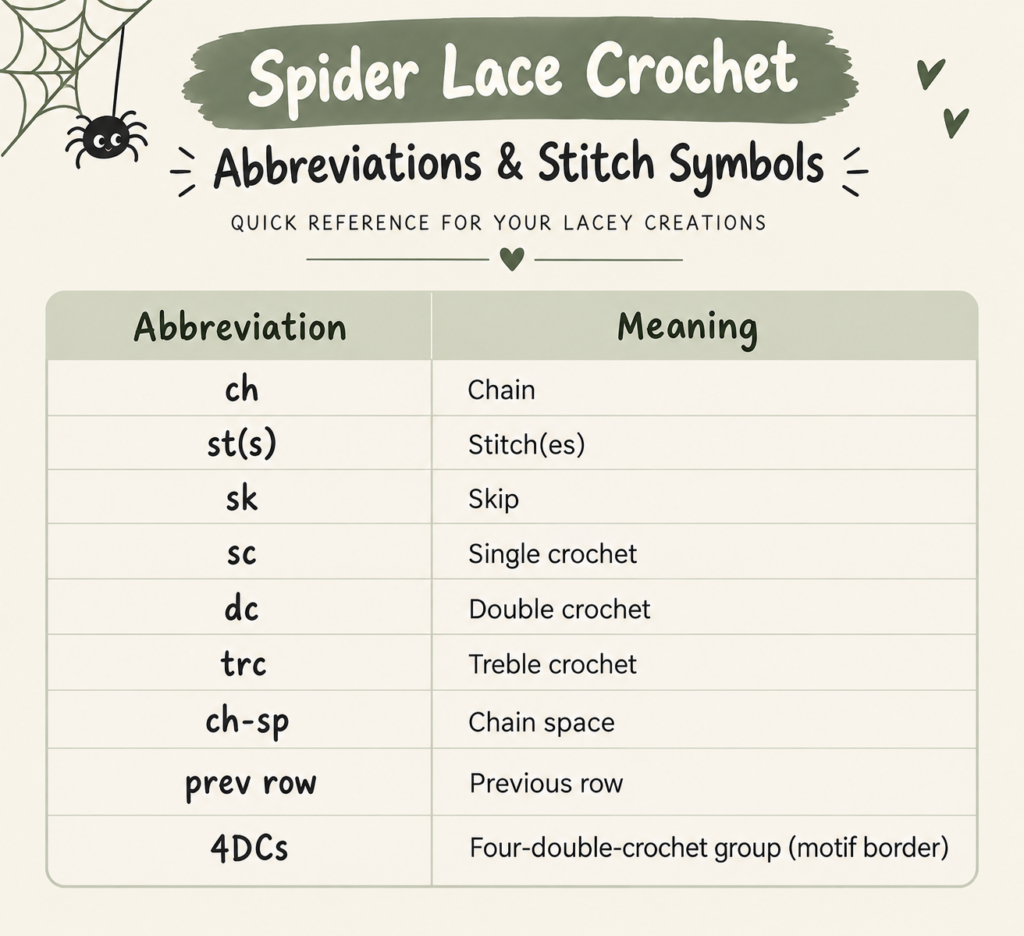
Important: This tutorial uses US crochet terminology.
What Does 4DCs Mean in This Pattern?
To save us from repeating the same long explanation throughout the tutorial, I’ll use 4DCs to refer to the four-double-crochet group that forms the borders of the diamond motifs.
This group consists of one double crochet worked into a stitch from the previous row and three double crochets worked into the designated chain space.
The order depends on which side of the motif you’re working on.
- Right side of the motif: Work 3 DC in the chain space first, then 1 DC into the appropriate stitch from the previous row.
- Left side of the motif: Work 1 DC into the appropriate stitch from the previous row first, then 3 DC in the chain space.
Think of these four double crochets as the little borders that help define the diamond shapes.
Once you get used to the placement, calling them 4DCs will make the instructions much easier to follow.
You’re welcome! We’re saving ourselves from a whole novel of repeated instructions. 🤣😂
Spider Lace Crochet Written Pattern
Row 1: Foundation
For my project, I made 226 double crochet foundation stitches.
This gives me enough width for 13 diamond motifs across, following the calculation above.
If you’re unfamiliar with the double crochet foundation technique, you can follow my separate tutorial on how to make a double crochet foundation chain.
Row 2
Skip the first 4 foundation stitches from the hook and make 1 DC in the 5th stitch.
Make another DC in the next stitch.
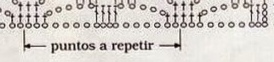
Repeat the following sequence:
Ch 5, skip 4 sts, SC in the next 5 sts, skip 4 sts, DC in the next 4 sts.
Repeat this sequence until there are only 7 sts left.
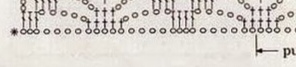
Ch 5, skip 4 sts, DC in the last 3 sts.
Row 3
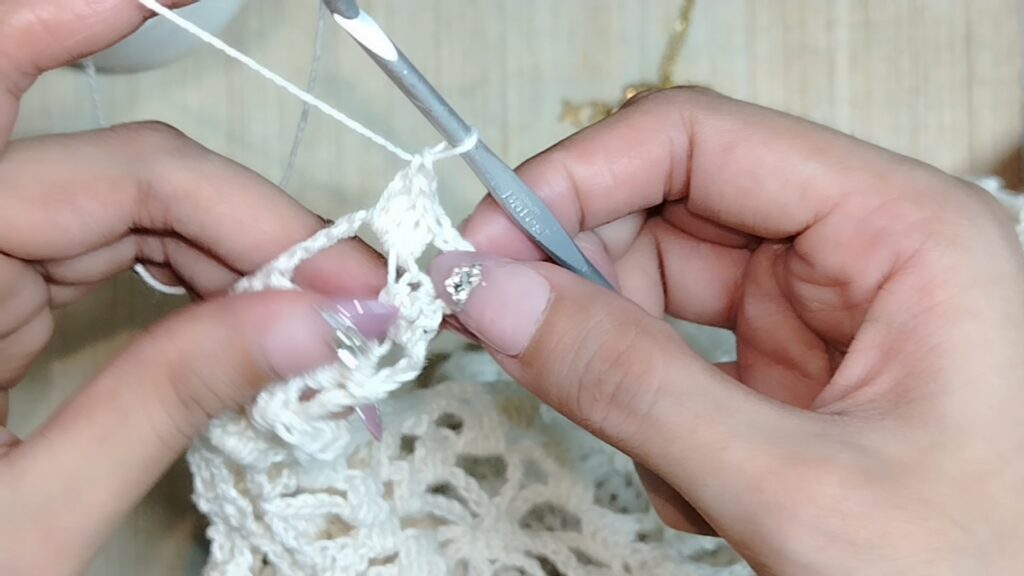
Ch 4 and turn your work. The first 3 chains serve as a DC, and the remaining chain serves as a ch-1 space.
Skip a stitch and make 1 DC in the third DC of the previous row.
Make 3 DC in the ch-5 space.
Ch 5, skip the first SC, SC in the next 3 sts, ch 5, make 3 DC in the ch-5 space, then make 1 DC in the next stitch.
Repeat the following sequence:
Ch 2, skip the next 2 DC, DC in the 4th DC of the previous row, 3 DC in the ch-5 space, ch 5, skip the first SC and SC in the next 3 sts, ch 5, make 3 DC in the ch-5 space, DC in the next stitch.
Repeat the sequence across the row.
Ch 1, then make 1 DC in the top chain of the ch-3 turning chain from the previous row.
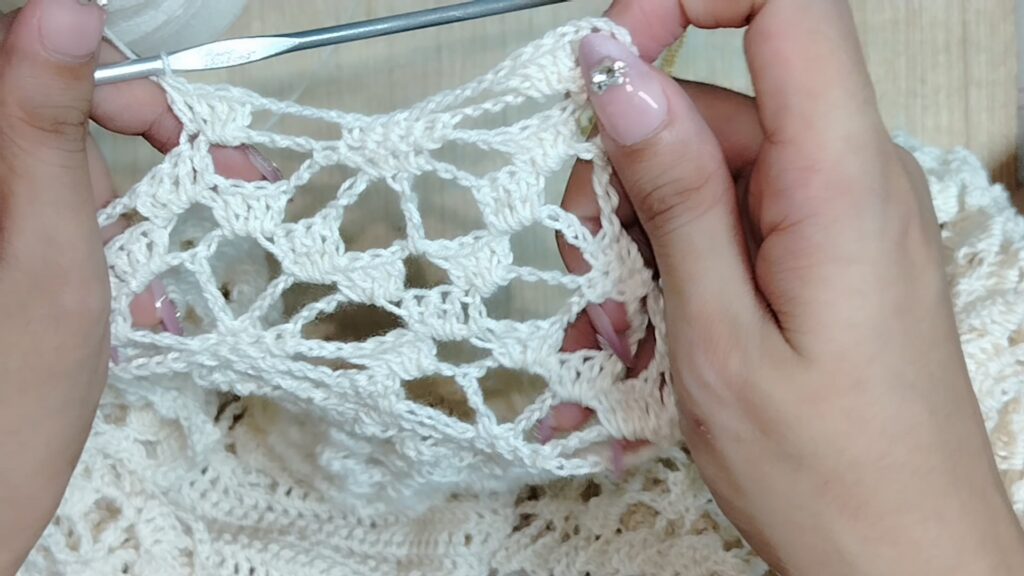
Important note about the 4DCs: Remember that the DC groups form the borders of the diamond motifs. When working on the right side of a motif, make the 3 DC in the chain space before working the DC into the previous row. When working on the left side, work the DC into the previous row first, followed by the 3 DC in the chain space.
Row 4
Ch 8, then make the 4DCs.
Ch 3, TRC in the second SC of the previous row, ch 3, make the 4DCs.
Ch 4, TRC in the ch-2 space.
Repeat the following sequence:
Ch 4, DC in the 4th DC of the previous row, 3 DC in the ch-5 space, ch 3, TRC in the second SC of the previous row, ch 3, 3 DC in the ch-5 space, DC in the first DC of the previous row, ch 4, TRC in the ch-2 space.
Repeat the sequence across the row.
Make the final TRC in the top chain of the ch-3 turning chain from the previous row.
Ch 2 and turn your work.
Remember: When making a TRC in the middle of a group of SC stitches, use ch 3 on either side of the TRC. When the TRC is worked into a chain space, use ch 4 instead.
Those little differences matter, so keep an eye on where you’re placing your TRC!
Row 5
Skip the TRC.
SC in the ch-4 space, ch 4, make the 4DCs.
Make 3 DC in the ch-3 space, ch 2, then make 3 DC in the next ch-3 space.
Make the 4DCs, then ch 4.
Repeat the following sequence:
SC in the ch-4 space, SC in the TRC from the previous row, SC in the next ch-4 space, ch 4, make the 4DCs, 3 DC in the ch-3 space, ch 2, 3 DC in the next ch-3 space, then make the 4DCs.
Repeat the sequence across the row until you reach the ch-8 space from the previous row.
Ch 4, make 1 SC in the ch-8 space, then make 1 SC in the top chain of the ch-4 turning chain from the previous row.
Ch 2 and turn your work.
Row 6
Skip the first SC and make 1 SC in the second SC of the previous row.
Make 1 SC in the ch-4 space, ch 5, make the 4DCs, then make 2 DC in the ch-2 space.
Make the 4DCs, then ch 5.
Repeat the following sequence:
SC in the ch-4 space, SC in the next 3 sts, SC in the next ch-4 space, ch 5, make the 4DCs, 2 DC in the ch-2 space, make the 4DCs, then ch 5.
Repeat the sequence across the row until you reach the final ch-4 space.
Make 1 SC in the final ch-4 space, 1 SC in the next stitch, and 1 SC in the ch-2 space.
Ch 2 and turn your work.
Row 7
Skip the first SC and make 1 SC in the next stitch.
Ch 5, make the 4DCs, ch 2, make the 4DCs, then ch 5.
Repeat the following sequence:
Skip the first SC, SC in the next 3 sts, skip the 5th SC, ch 5, make the 4DCs, ch 2, make the 4DCs, then ch 5.
Repeat the sequence until you reach the last 2 SC of the previous row.
Skip the first SC and make 1 SC in the last SC of the previous row.
Make 1 SC in the ch-2 space.
Ch 7 and turn your work.
Row 8
Skip 2 SC from the previous row.
Make the 4DCs, ch 4, TRC in the ch-2 space, ch 4, then make the 4DCs.
Repeat the following sequence:
Ch 3, TRC in the second SC of the previous row, ch 3, make the 4DCs, ch 4, TRC in the ch-2 space, ch 4, then make the 4DCs.
Repeat the sequence across the row.
Ch 3, TRC in the ch-2 space, ch 4, and turn your work.
Row 9
Skip the TRC.
Make the 4DCs, ch 4, SC in the ch-4 space, SC in the TRC from the previous row, SC in the next ch-4 space, ch 4, then make the 4DCs.
Repeat the following sequence:
Ch 2, make the 4DCs, ch 4, SC in the ch-4 space, SC in the TRC from the previous row, SC in the next ch-4 space, ch 4, then make the 4DCs.
Repeat the sequence across the row.
Work the final 3 DC into the ch-7 space.
Ch 1, make 1 DC in the ch-7 space, then ch 3 and turn your work.
Row 10
Skip the DC and make 1 DC in the ch-1 space.
Make 1 DC in the first DC of the previous row.
Ch 5, SC in the ch-4 space, SC in the next 3 sts, SC in the next ch-4 space, then ch 5.
Repeat the following sequence:
DC in the 4th DC of the previous row, 2 DC in the ch-2 space, DC in the first DC of the previous row, ch 5, SC in the ch-4 space, SC in the next 3 sts, SC in the next ch-4 space, then ch 5.
Repeat the sequence until you reach the last 4DC cluster.
Make 1 DC in the 4th DC of the previous row, then make 2 DC in the ch-4 space.
Ch 4.
And that’s Row 10 complete! 🎉
Continue following the pattern repeat for the desired length of your project, using the chart as your reference for the subsequent rows.
Tips for Crocheting Beautiful Spider Lace
Now that we’ve covered the first ten rows, here are a few tips to help you get the most out of this pattern.
1. Keep Your Tension Consistent
Lace patterns look their best when the stitches and chain spaces are reasonably consistent.
Try not to pull your chain stitches too tightly. Those open spaces are part of the design, so give them room to shine!
2. Pay Attention to the 4DCs
The 4DCs are essential to forming the diamond borders in this pattern.
Remember that the order changes depending on which side of the motif you’re working on. If your diamond shapes don’t look right, double-check the placement of those four DCs.
3. Use a Stitch Marker if You Need One
If you find yourself losing track of the repeating motifs, a stitch marker can help you identify where one repeat ends and the next begins.
It’s a small trick, but it can save you from having to count everything again.
4. Make a Small Swatch First
Before committing to a large project, try making a smaller sample of the pattern.
A swatch helps you check your tension and see how the lace looks with your chosen yarn and hook.
It’s also a great way to become familiar with the repeating sections before making a larger piece.
5. Don’t Be Afraid to Frog a Few Stitches
Sometimes, we need to undo a few stitches to get the pattern looking right.
And that’s okay!
Crochet is a learning process. Every project gives us another opportunity to learn something new, so don’t let a little frogging discourage you.
Besides, the yarn isn’t going anywhere. It can always become something beautiful again! 😂
What Can You Make With Spider Lace Crochet?
The openwork design makes spider lace a fun pattern to experiment with.
Here are a few ideas to inspire your next project.
Lightweight shawls and scarves: The repeating motifs can create an elegant lace accessory.
Decorative table runners: A spider lace runner could add a delicate handmade touch to your home.
Crochet garments: Consider incorporating the pattern into a top or cardigan if you love openwork designs.
Lightweight blankets: The lace pattern may also work beautifully for decorative throws, depending on your yarn and the fabric you want to create.
And because Halloween is just around the corner, you could even experiment with black, orange, or purple yarn for a spooky-season project! 🕷️🎃
Final Thoughts
Spider lace crochet is a lovely reminder that a combination of simple stitches can create something truly beautiful.
With its open spaces, repeating diamond motifs, and delicate appearance, this pattern is a fun addition to any crocheter’s stitch collection.
I hope this tutorial helps you understand the pattern and gives you the confidence to try it yourself.
And if you happen to crochet this pattern in black yarn for Halloween, please tell me I’m not the only one who thinks that would look absolutely fabulous! 🤣🕷️
As always, take your time, enjoy the process, and remember that every stitch brings you one step closer to creating something handmade and special.
Please check out other tutorials and stories on our blog, and discover newly made crafts in my shop.
Happy crocheting, everyone! 🧶💚