
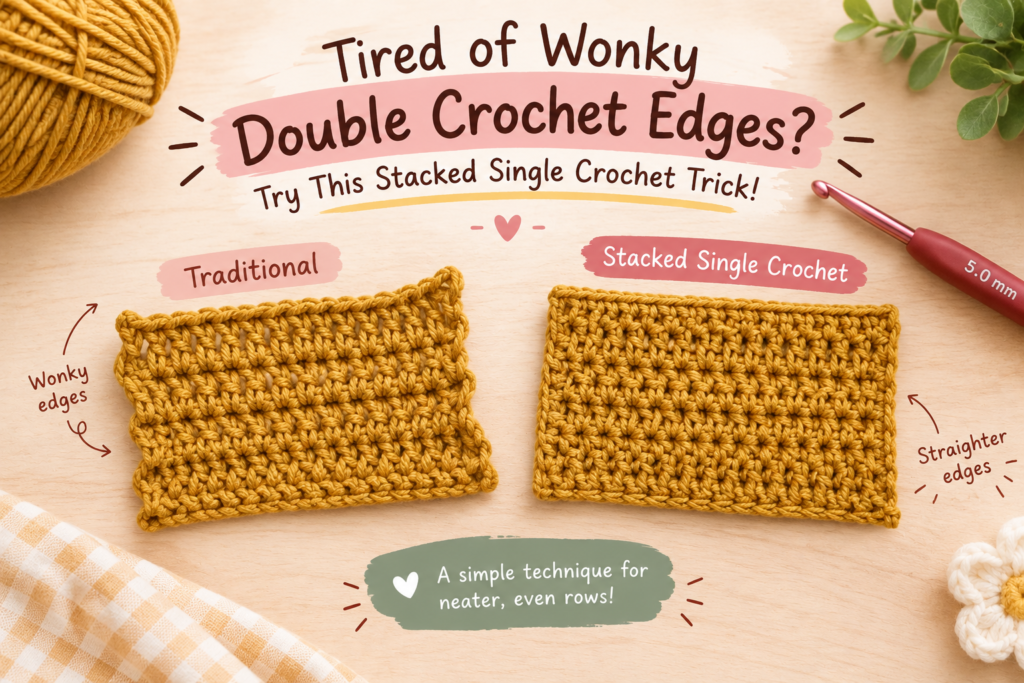
Have you ever finished a few rows of double crochet, only to notice that your edges aren’t as straight as you hoped? You start with a beautiful, even row, but as you continue, the sides begin to look a little wonky. Sound familiar? 🙋♀️
I’ve been curious about ways to create straighter edges in my crochet projects, especially when working on double crochet panels. Sometimes, the traditional way of starting a row doesn’t give me the clean edge I’m looking for, so I decided to try a different approach.
That’s when I started experimenting with stacked single crochet for straighter edges.
Instead of beginning a new row with the usual chain 2 and double crochet in the first stitch, I use two single crochets stacked on top of each other. It’s a small adjustment, but it gives me another way to start my double crochet rows while working toward a neater-looking edge.
In today’s tutorial, I’ll share how I use stacked single crochet, why I decided to try it, and how you can experiment with this technique in your own crochet projects.
Let’s grab our hooks and get started! 🧶💕
Why Do Double Crochet Edges Sometimes Look Wonky?
When working rows of double crochet, a common way to begin is to make 2 chains and then work a double crochet into the very first stitch.
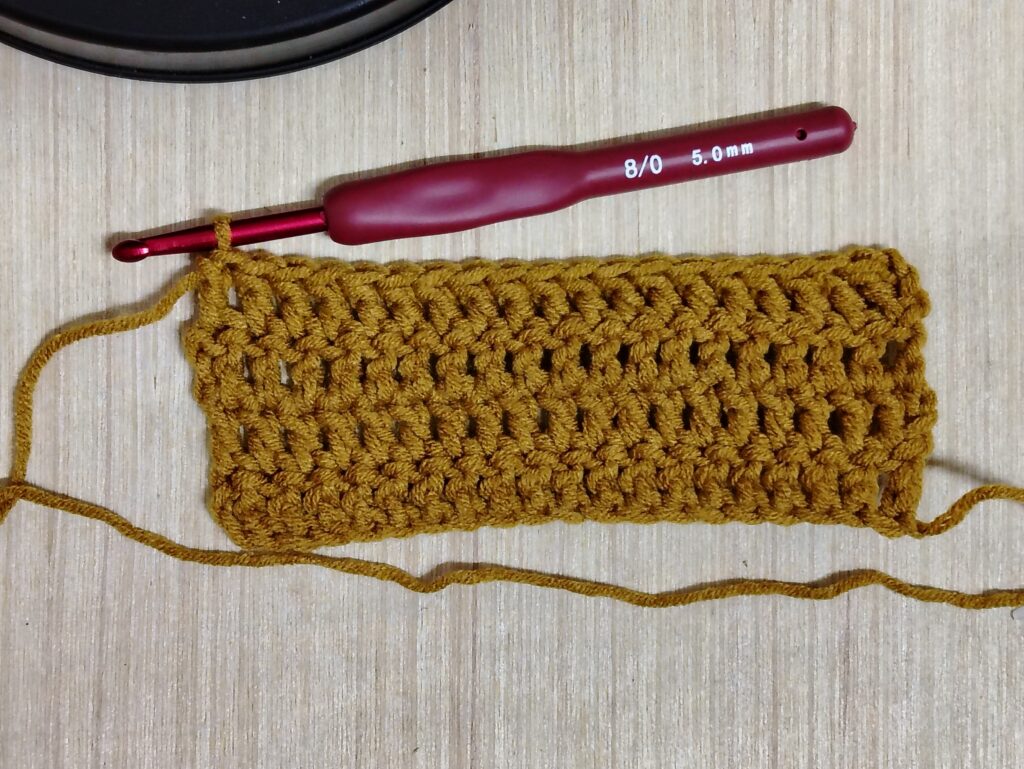
This method is widely used, but depending on your tension, turning chain, and stitch placement, the edge of your project can sometimes look uneven. The turning chain may lean outward, leave a noticeable gap, or make the sides look less consistent.
I’ve noticed that this can be frustrating, especially when you’re working on a crochet panel where you want the edges to look straight and tidy.
Of course, uneven edges can have different causes, including tension, stitch counting, and how the turning chain is handled. But instead of simply accepting the result, I wanted to try another method.
And that’s the fun part of crochet! Sometimes, a little experimenting can lead to a technique that works better for you.
What Is Stacked Single Crochet?
Stacked single crochet is a technique that uses two single crochet stitches stacked on top of each other to create a taller starting stitch.
Rather than relying on a traditional chain 2 to begin a double crochet row, I start with a single crochet and then work another single crochet into the leg or post of the first one.
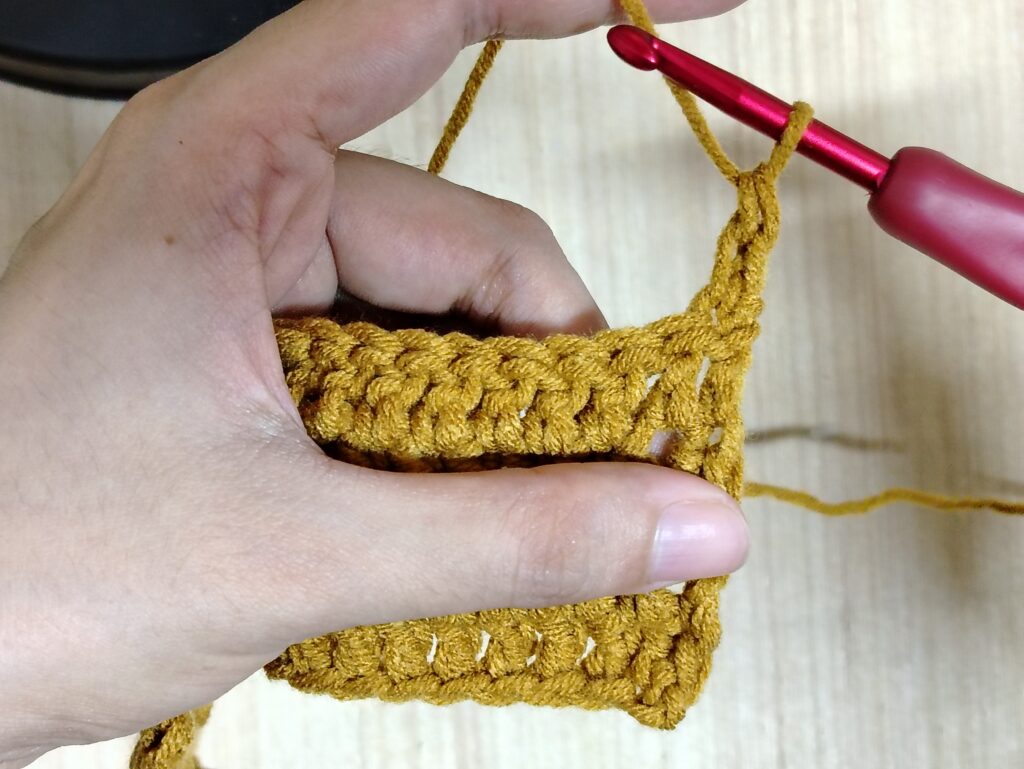
This creates a stacked stitch that serves as my starting point before continuing with double crochet.
The idea is to create a more compact starting stitch that can help the edge of your project look straighter and more consistent.
It may take a little practice to get comfortable with the stitch placement, but once you understand the movement, it becomes a useful technique to experiment with.
How to Make Stacked Single Crochet for Straighter Edges
Now, let’s get into the technique!
For this tutorial, I’ll be demonstrating how I begin a new row of double crochet using stacked single crochet.
What You’ll Need
– Yarn of your choice
– A crochet hook suitable for your yarn
– A double crochet panel or a small crochet swatch
You don’t need anything fancy. A small swatch is more than enough to practice and see how the technique works for you.
Step 1: Turn Your Work
Once you’ve completed your previous row of double crochet, turn your work to begin the next row.
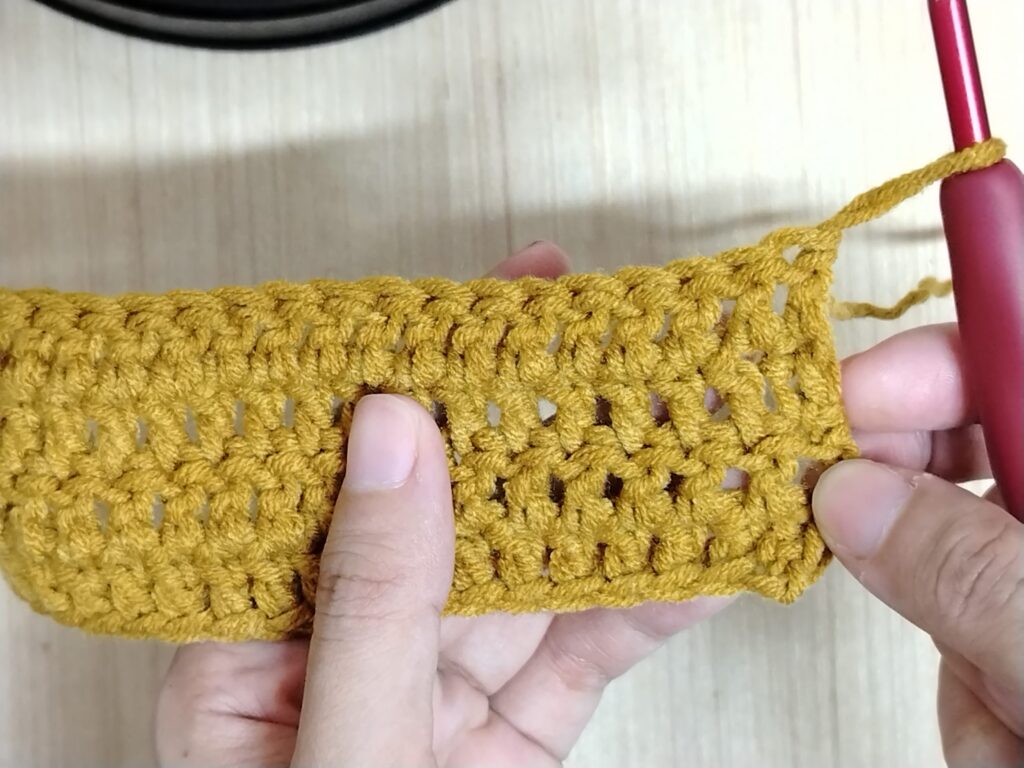
This is where we do things a little differently.
Instead of making the usual chain 2, we’ll begin with a single crochet.
Simple enough, right? 😊
Step 2: Make One Single Crochet
Insert your hook into the first stitch of the row and make one single crochet.
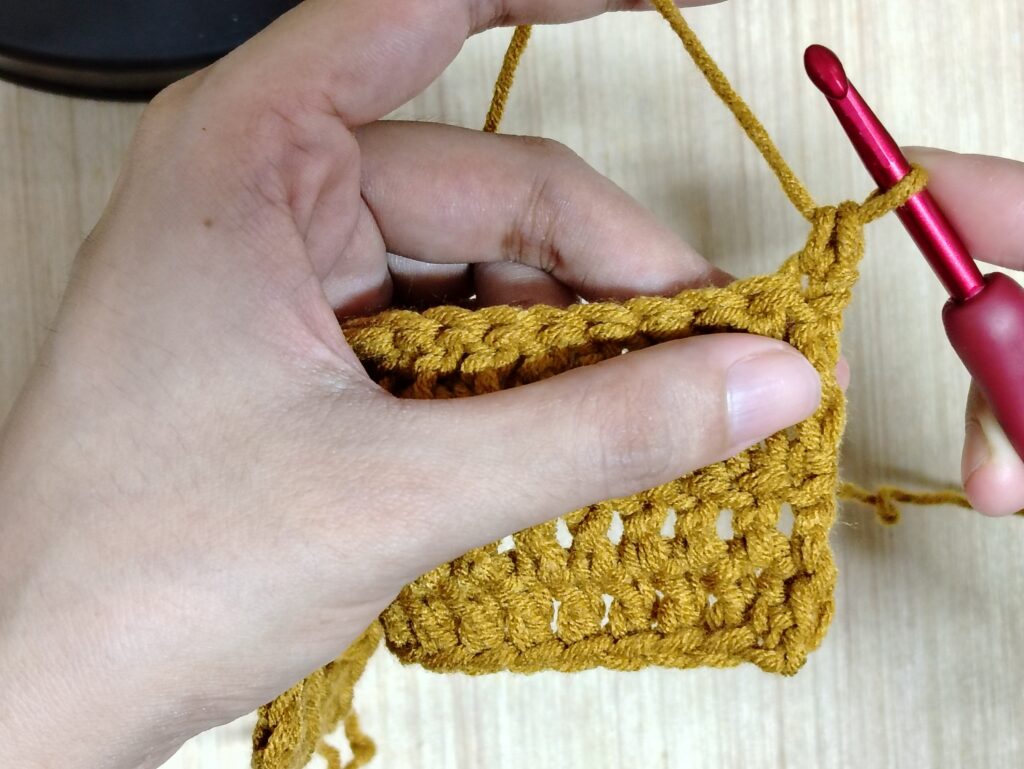
This first single crochet will serve as the foundation for the stacked stitch.
Take your time and make sure the stitch is worked comfortably. You want to avoid pulling your yarn too tightly, as this can affect the appearance of your starting stitch.
Step 3: Insert Your Hook Into the Leg or Post
Here’s the part that makes this technique different!
After making your first single crochet, look at the stitch you just created. Insert your hook into its leg or post, following the placement shown in your tutorial photo.
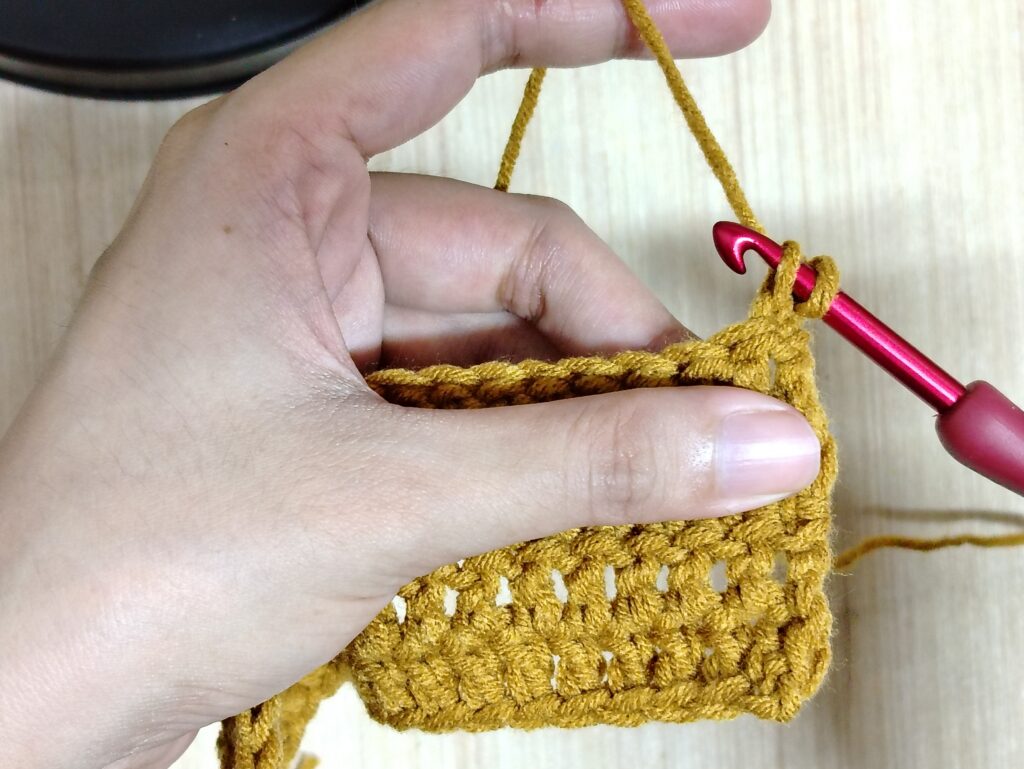
This is where you’ll work the second single crochet.
If you’re trying this for the first time, don’t worry if you need a little practice identifying the correct insertion point. Crochet stitches can look confusing when you’re learning a new technique, so a close-up photo can be really helpful.
Step 4: Make the Second Single Crochet
Once your hook is inserted into the leg or post of the first single crochet, work another single crochet.
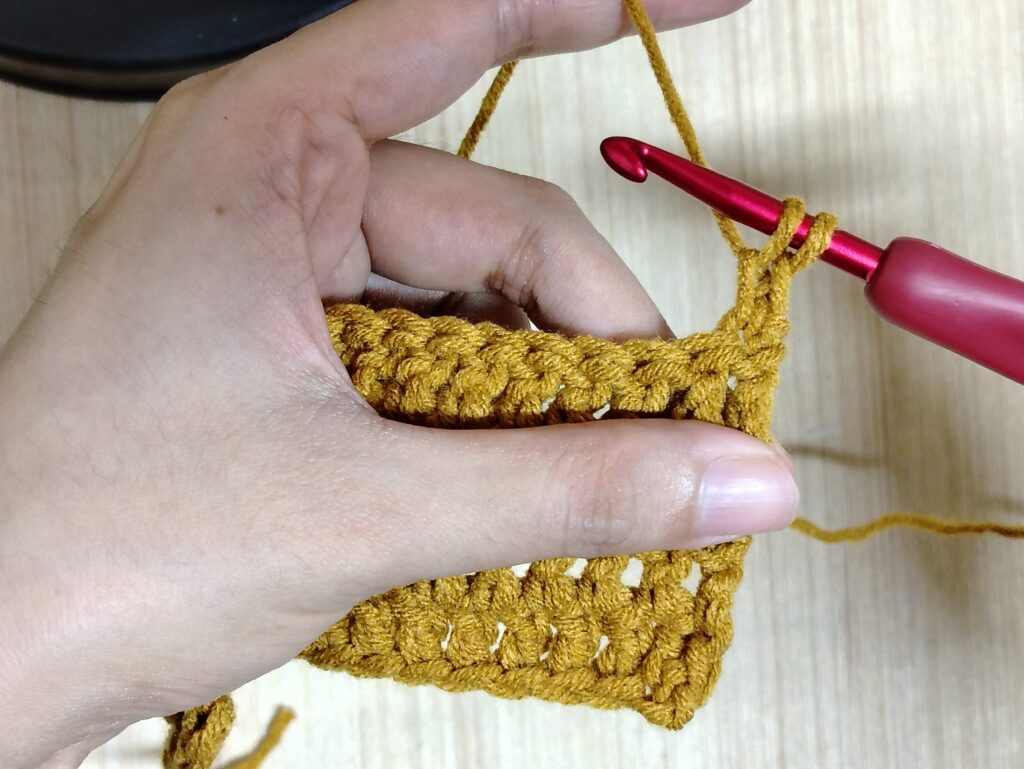
You now have two single crochets stacked on top of each other.
These stacked stitches create the height of your starting stitch, giving you an alternative to the traditional chain 2 turning method.
And there you have it! Your stacked single crochet is ready. 🎉
Step 5: Continue With Double Crochet
After completing your stacked single crochet, continue working double crochet stitches across the row according to your pattern.
Keep your stitch placement and tension consistent as you work.
The stacked single crochet serves as your starting stitch, so be mindful of how your pattern counts that first stitch. Depending on the pattern, the stitch-counting instructions may differ.
If you’re following a specific pattern, make sure your starting method fits the pattern’s construction.
Why I Like Using Stacked Single Crochet
The main reason I wanted to try this technique was simple: I wanted straighter edges.
When working on a double crochet panel, I like the look of sides that are neat and consistent. Uneven edges can be a little frustrating, especially when you’re making a project that will eventually be joined, bordered, or used as part of a larger design.
Using stacked single crochet gives me another option when starting a new row. Instead of automatically reaching for the chain 2, I can try a different approach and see how it affects the shape and appearance of my edges.
I also love how crochet encourages us to experiment. There are so many ways to work with the same stitches, and sometimes a small change can help us discover a method that suits our hands and our style.
That doesn’t mean every technique will work exactly the same for everyone. Our tension, yarn, and hook size can all influence the final result.
But isn’t that part of the joy of crochet? We get to learn, try, adjust, and find what works best for us. 💗
Stacked Single Crochet vs. Traditional Chain 2
Let’s take a quick look at the difference between the two starting methods.
Traditional Double Crochet Start
Typically, you would:
1. Turn your work.
2. Chain 2.
3. Make a double crochet in the first stitch, following your pattern’s instructions.
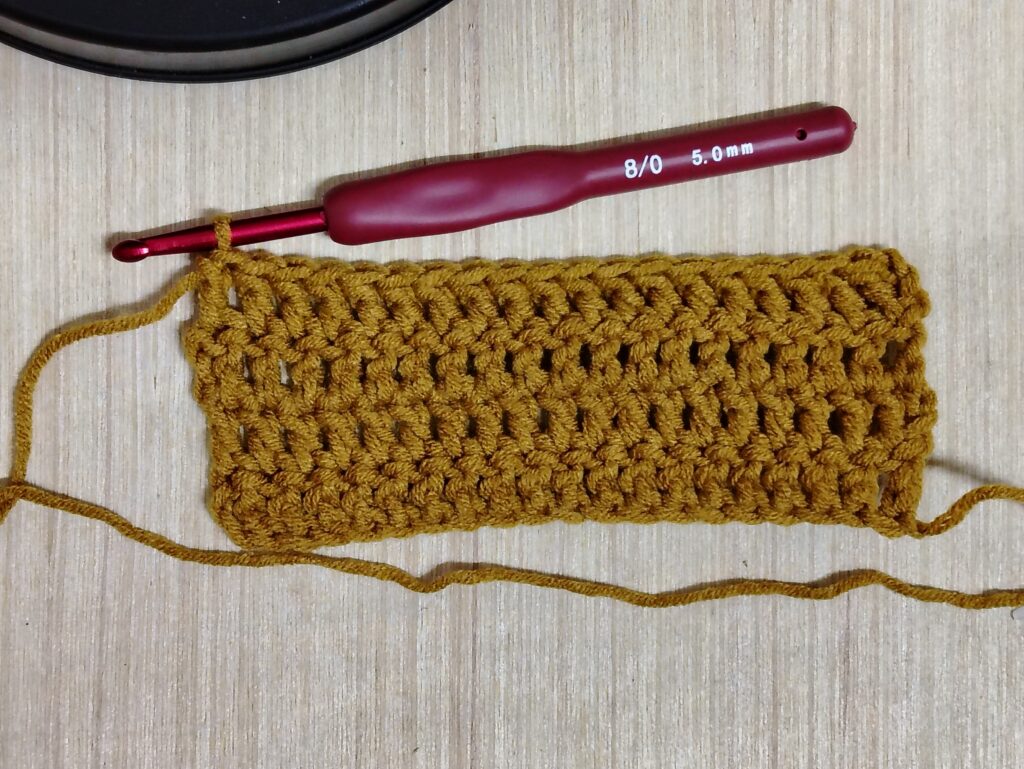
This is a common way to begin a double crochet row, and many crocheters use it successfully.
Stacked Single Crochet Start
With the method I’m sharing:
1. Turn your work.
2. Make one single crochet in the first stitch.
3. Insert your hook into the leg or post of that single crochet.
4. Make a second single crochet.
5. Continue with double crochet across the row.
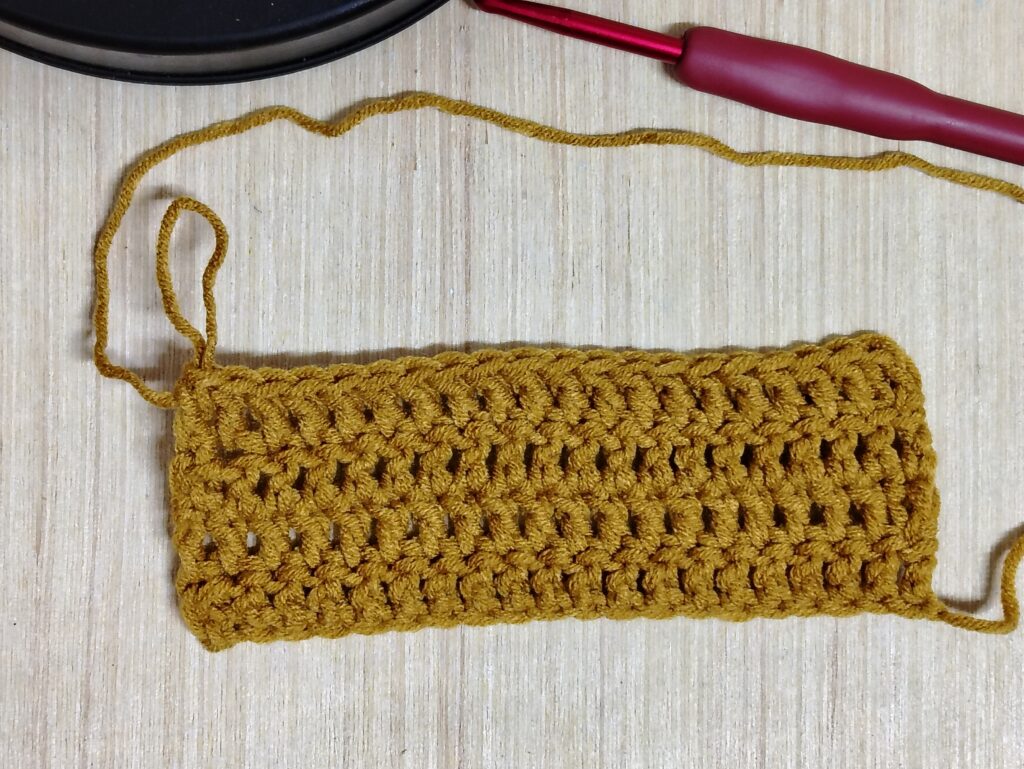
The stacked single crochet provides an alternative starting stitch that you can try when you’re looking for a straighter-looking edge.
Both methods have their place, and the best choice depends on your personal preference, the pattern you’re following, and the result you’re trying to achieve.
Tips for Practicing Stacked Single Crochet
If you’re new to this technique, here are a few tips to help you along the way.
1. Start With a Small Swatch
Before trying the technique on your main project, make a small double crochet panel.
This allows you to practice the stitch placement and compare how the edge looks with your usual method.
It’s always better to experiment on a swatch than to worry about getting everything perfect on your finished project.
2. Pay Attention to Your Tension
Your tension can affect how your stacked single crochet looks.
Try to keep your stitches comfortable and consistent. If you pull too tightly, the starting stitch may become difficult to work into or affect the shape of the edge.
Give yourself room to practice. Your hands will become more familiar with the movement over time.
3. Follow Your Stitch Count
When trying a different starting method, pay attention to how the pattern counts the first stitch.
The stacked single crochet method may need to be adapted depending on the pattern’s instructions and stitch count.
If you’re working on a project where stitch placement is important, check your count as you go.
4. Use Photos to Guide Your Placement
The leg or post of a single crochet can be tricky to identify when you’re learning this technique.
A close-up photo showing where to insert your hook can make the process much easier to understand.
Keep Creating, Keep Learning 🧶
And there you have it! If your double crochet edges have ever turned out a little wonky, I hope this stacked single crochet technique gives you something new to try. Crochet is all about experimenting, learning from each project, and finding little tricks that make the process more enjoyable.
If you enjoyed this tutorial, I invite you to explore more crochet tips, creative ideas, and handmade stories here on my blog. And if you love handmade crochet creations, don’t forget to visit my shop where you can discover my latest handmade pieces.
Thank you for stopping by, and remember, every stitch is part of the learning process. Keep your hook moving, stay curious, and happy crocheting! 💛