
If you’re looking for a granny square that’s a little more interesting than the traditional cluster-style design, this Willow Sunburst Granny Square might just be what you need!
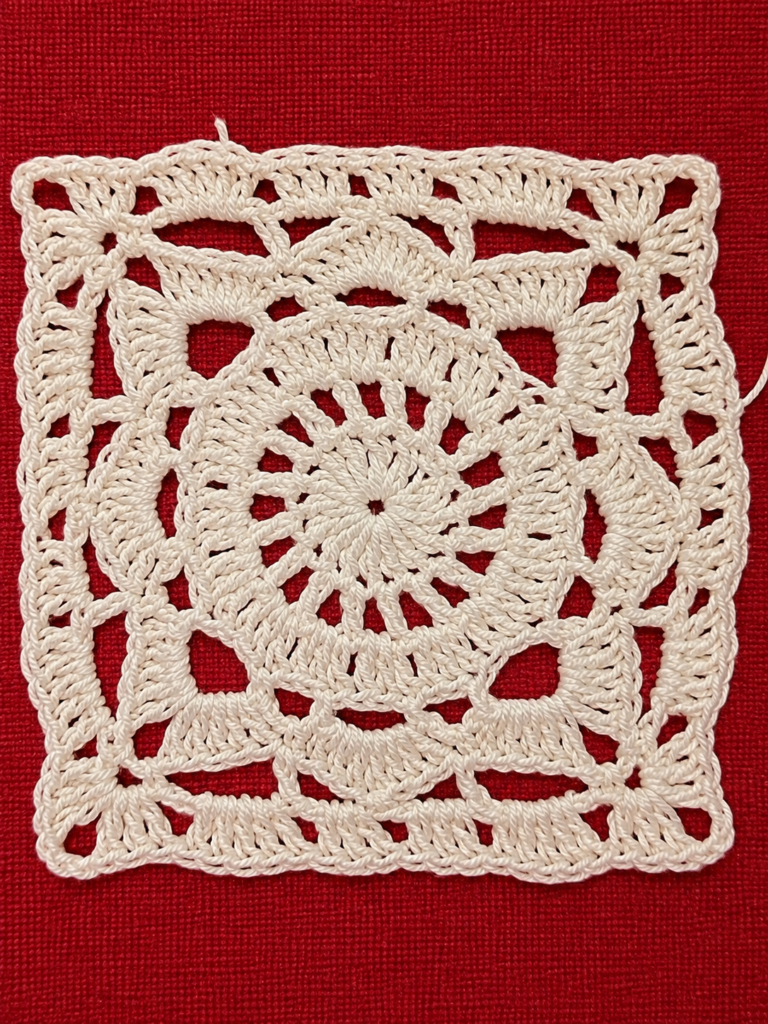
Unlike the usual granny square that begins with a simple square center, this design starts with a beautiful circular sunburst. As you work through the rounds, the circle gradually transforms into a square, revealing delicate openwork details and lovely textured sections along the way.
What I particularly love about this Willow Sunburst Granny Square is that it doesn’t need multiple yarn colors to stand out. Even when made using just one shade, the different stitch combinations create enough texture and visual interest to make the finished motif beautiful.
In this tutorial, we’ll work through the pattern round by round using US crochet terminology. So grab your favorite yarn and hook, and let’s make a little crochet magic!
Crochet Pattern Details
- Pattern: Willow Sunburst Granny Square
- Skill level: Intermediate
- Construction: Worked in joined rounds
- Colorwork: Single color
- Terminology: US crochet terms
- Pattern format: Written instructions
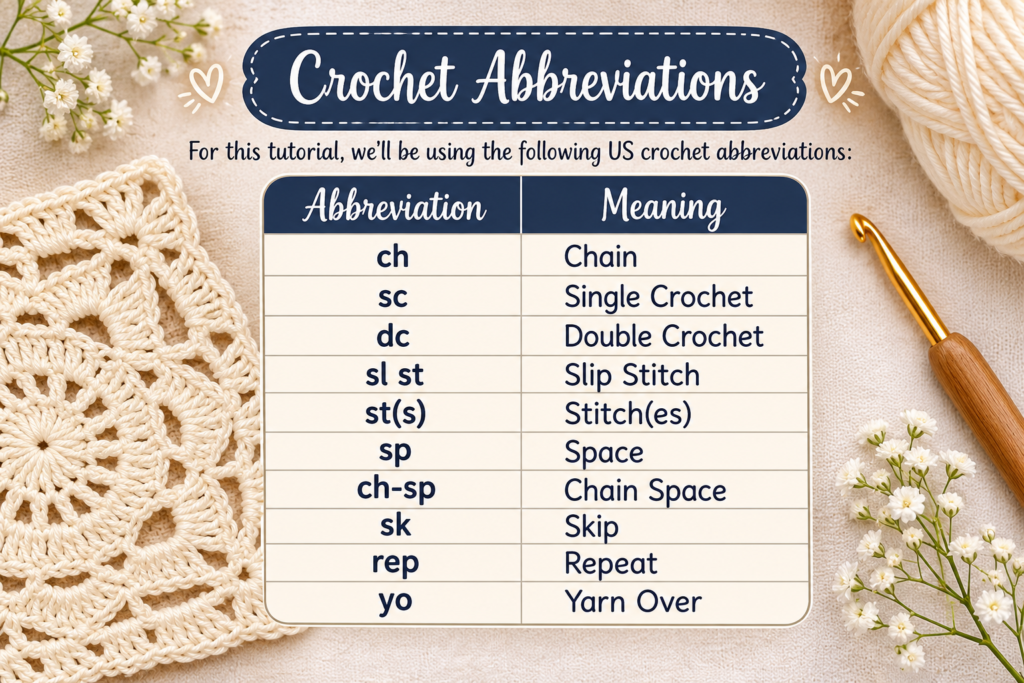
Crochet Abbreviations
Here are the abbreviations used throughout this tutorial:
Pattern Notes
1. This pattern uses US crochet terminology.
2. The square is worked in joined rounds, beginning at the center.
3. The starting chain 3 counts as one double crochet unless otherwise specified.
4. Chain spaces are created by working the indicated number of chains between stitches.
5. The pattern uses one yarn color throughout, but you may change colors between rounds if desired.
6. Work the stitches into the chain spaces wherever indicated.
How to Crochet a Willow Sunburst Granny Square
Round 1: Creating the Sunburst Center
Start with a magic ring or chain 4 – Sl st in first chain.
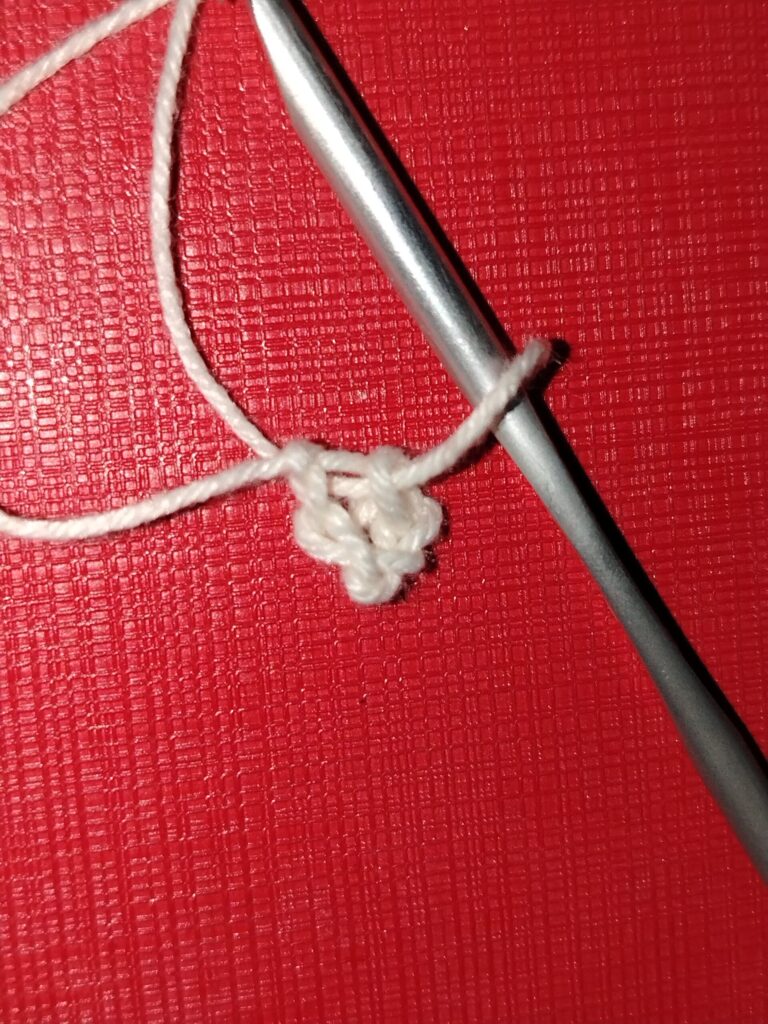
Ch 3 (counts as 1 dc), then work 15 dc into the magic ring.
Join with a sl st to the top of the beginning ch-3.
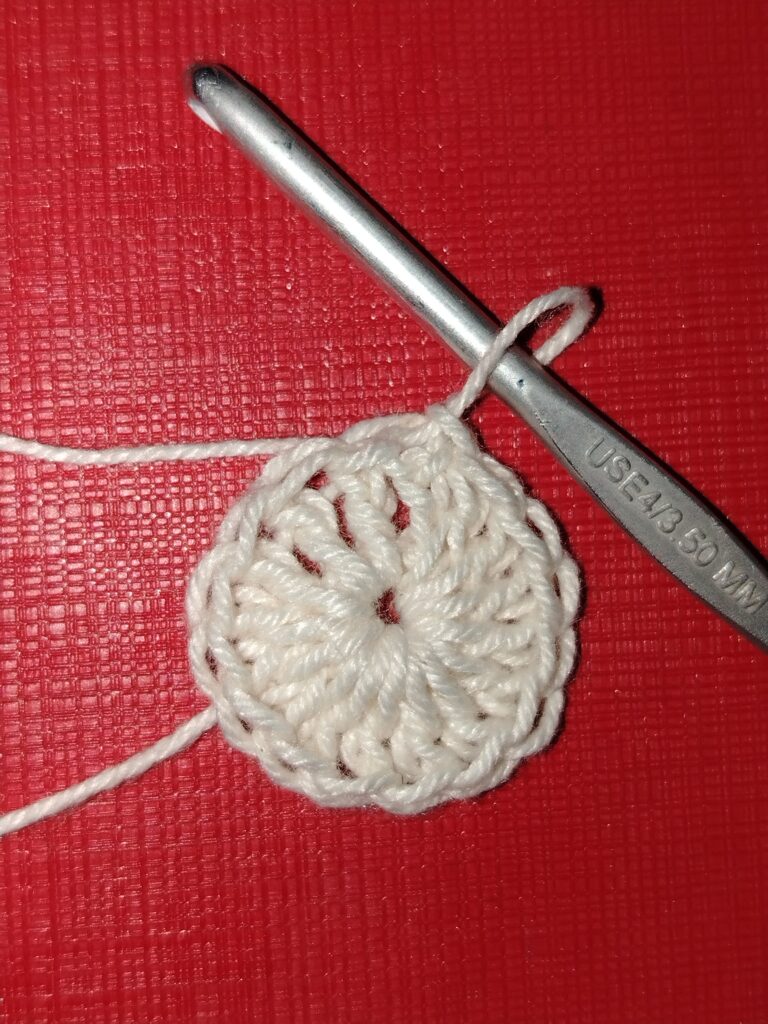
Stitch count: 16 dc
This creates the circular foundation of your sunburst granny square.
Round 2: Creating the First Layer
Ch 3 (counts as 1 dc), ch 1.
*Dc in the next st, ch 1.
Repeat from * around until you have worked into all 16 stitches.
Join with a sl st to the top of the beginning ch-3.
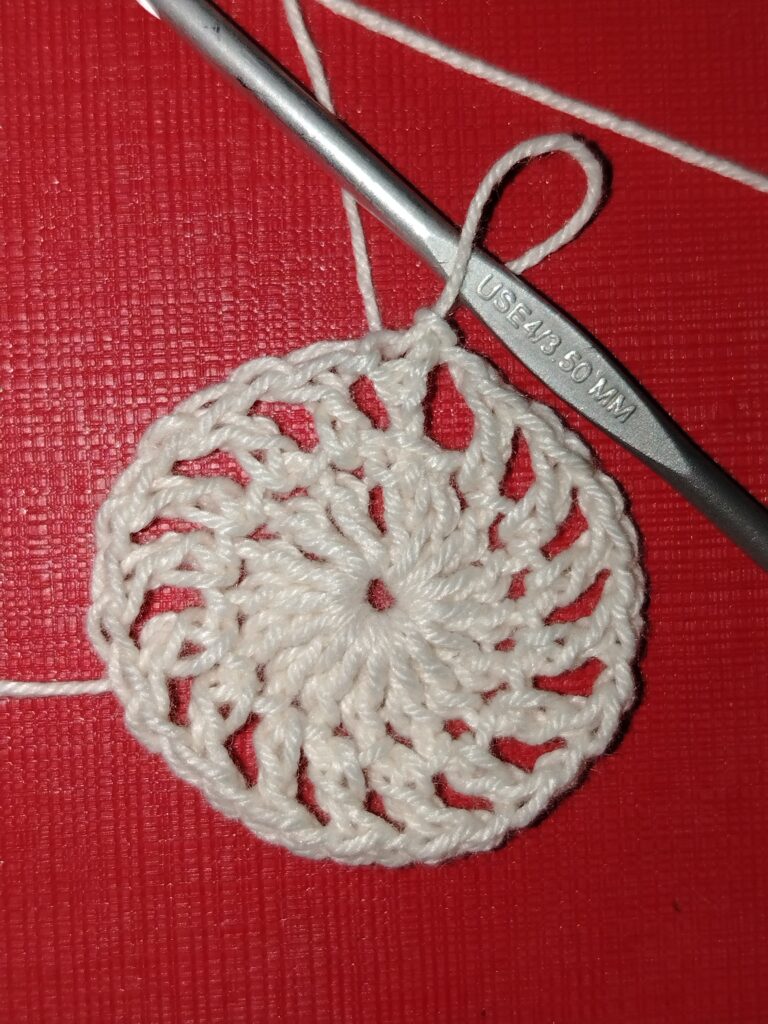
Stitch count: 16 dc and 16 ch-1 spaces.
You should now have a circular arrangement of double crochets separated by small chain spaces.
Round 3: Building the Sunburst Texture
Ch 3 (counts as 1 dc).
Work 2 dc into the next ch-1 space.
*Dc in the next dc, 2 dc in the following ch-1 space.
Repeat from * around.
Join with a sl st to the top of the beginning ch-3.
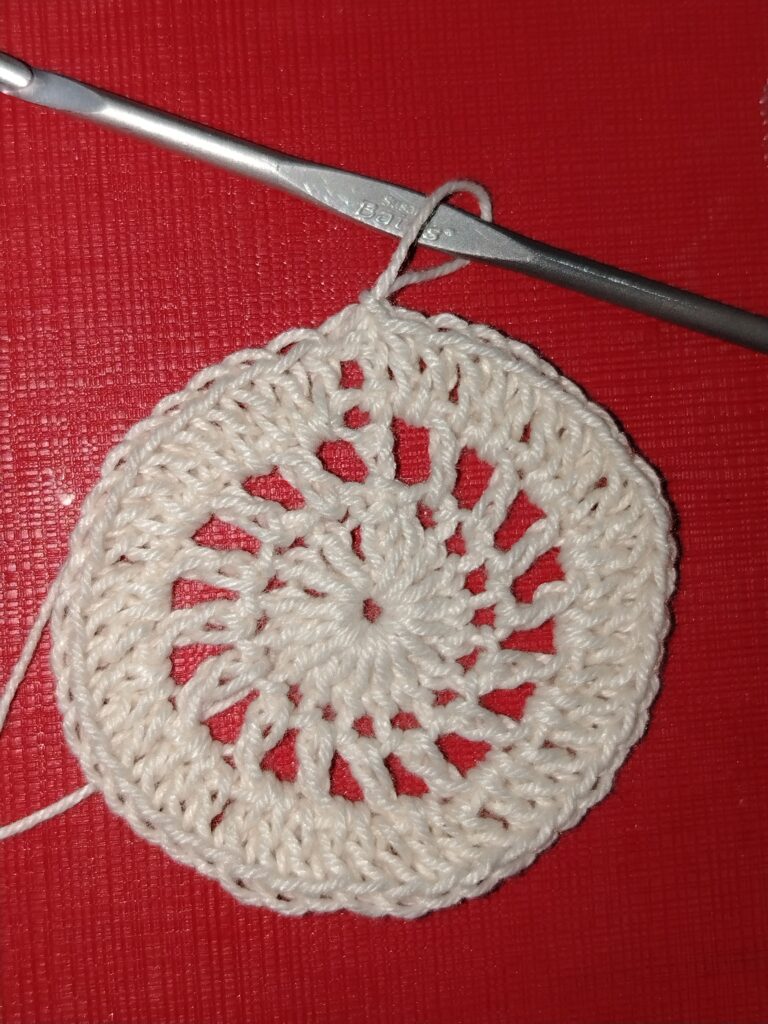
Stitch count: 48 dc.
This round adds more fullness to the center and creates the foundation for the decorative openwork sections.
Round 4: Creating the Openwork Spaces
Ch 1 (does not count as a stitch), sc in the same stitch.
Ch 5, sk 2 sts, sc in the next st.
Ch 3, sk 2 sts, sc in the next st.
Ch 4, sk 2 sts, sc in the next st.
Ch 3, sk 2 sts, sc in the next st.
Repeat the sequence around the motif three more times, beginning each repeat with ch 5.
Join with a sl st to the first sc.
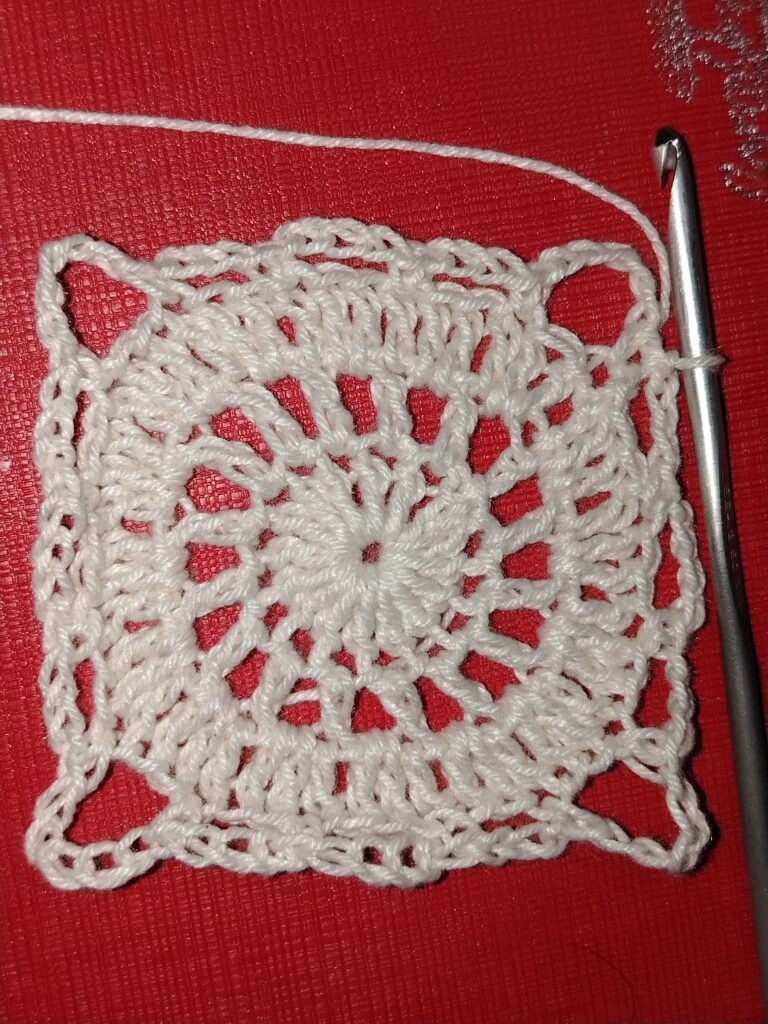
You should now have four larger ch-5 spaces that will become the corners of your square, along with smaller chain spaces between them.
Round 5: Turning the Circle into a Square
This is where the transformation begins!
Work all stitches into the chain spaces.
Sl st into the next ch-5 space.
Work (5 dc, ch 3, 5 dc) into the same ch-5 space. This forms your first corner.
Sc in the next ch-3 space.
Work 7 dc into the next ch-4 space.
Sc in the next ch-3 space.
Repeat the sequence around:
(5 dc, ch 3, 5 dc) in the next ch-5 space, sc in the next ch-2 space, 5 dc in the next ch-3 space, sc in the next ch-2 space.
Join with a sl st to the beginning of the round.
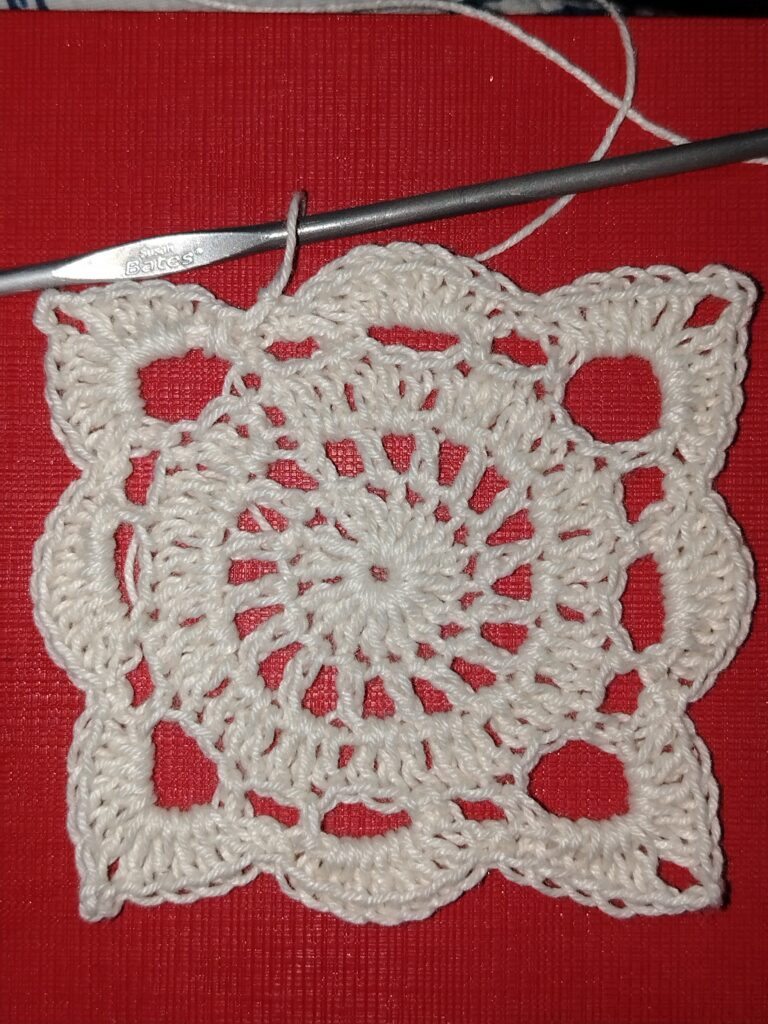
You should now see four defined corners and the beginnings of a square shape.
Round 6: Adding the Decorative Chain Spaces
Ch 3 (counts as 1 dc), ch 5.
Work (sc, ch 3, sc) into the next corner ch-3 space.
Ch 5, sk the next 5 dc, dc in the next sc.
Ch 3, sk 3 sts, sc in the 4th dc.
Ch 3.
Repeat the following sequence three more times:
Dc in the next sc, ch 5, (sc, ch 3, sc) in the next corner ch-3 space, ch 5, sk 5 dc, dc in the next sc, ch 3, sk 2 sts, sc in the next dc, ch 3.
Join with a sl st to the top of the beginning ch-3.
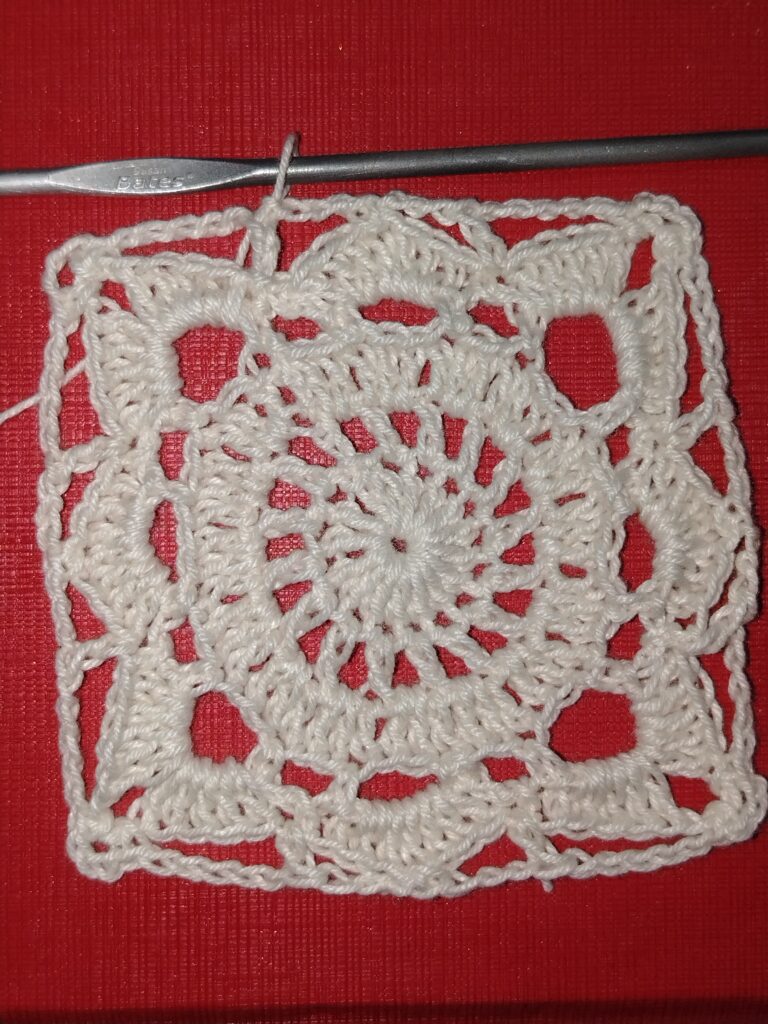
This round creates the beautiful open spaces that give the Willow Granny Square its delicate, lace-like appearance.
Round 7: Completing the Square
This final round fills the chain spaces with double crochets and gives the motif its finished square shape.
Sl st into the next ch-5 space.
Ch 3 (counts as 1 dc), then work 4 dc into the same space.
Work (3 dc, ch 3, 3 dc) into the next corner ch-3 space.
Work 5 dc into the next ch-5 space.
Work 3 dc into each of the next two ch-3 spaces.
Repeat the following sequence three more times:
5 dc into the next ch-5 space, (3 dc, ch 3, 3 dc) into the next corner ch-3 space, 5 dc into the next ch-5 space, 3 dc into each of the next two ch-3 spaces.
Join with a sl st to the top of the beginning ch-3.
Fasten off and weave in all loose ends.
And there you have it! Your Willow Sunburst Granny Square is complete!
Finishing Your Granny Square
Once you’ve finished the last round, gently stretch and shape your square to even out the edges and corners.
Blocking is recommended, especially if you want the openwork details to become more defined and the corners to sit neatly.
You can use your finished motif as a standalone decorative piece or make several squares to join together for a larger crochet project.
What Can You Make With a Willow Sunburst Granny Square?
One of the best things about granny squares is their versatility. A single motif can become part of something much bigger!
Here are a few project ideas you can explore:
- Crochet blankets: Join several motifs together for a beautiful textured blanket.
- Cardigans: Use the squares to create decorative panels for a handmade cardigan.
- Crochet tops: Combine multiple motifs to create a unique and delicate summer top.
- Bags: Turn your granny squares into a charming handmade handbag or tote.
- Home decorations: Use individual squares for coasters, table runners, or cushion covers.
The possibilities are endless, and you can always experiment with different yarn weights and colors to achieve a completely different look.
Final Thoughts
I absolutely love how this Willow Sunburst Granny Square combines a circular sunburst center with delicate openwork and a structured square border.
It’s one of those crochet motifs that looks intricate without needing a complicated color combination. Using just one shade of yarn allows the stitch details to take center stage, which is exactly what makes this cream-colored version so lovely.
If you’re a granny square enthusiast like me, this is definitely a motif worth adding to your crochet collection!
If you enjoyed this tutorial, please check out our other crochet tutorials and stories on the blog, and discover more of our newly made crafts in the shop.
Happy crocheting! 🧶