
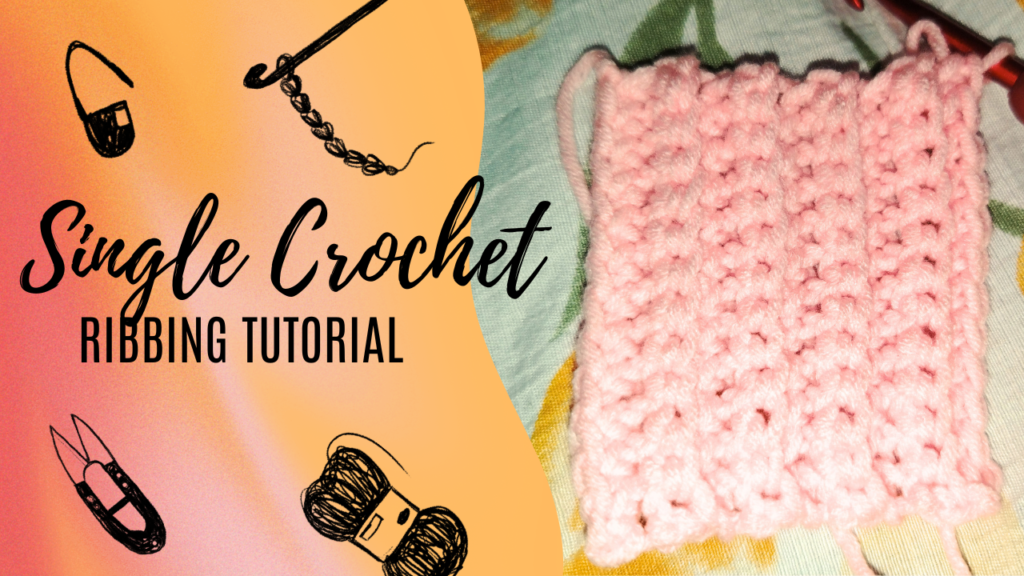
Who knew a tiny change in where you insert your crochet hook could give your stitches a whole new personality? 😂 That’s one of the things I love about crochet! Sometimes, you don’t need fancy stitch combinations to create something beautiful. You just need to know where to put that hook!
Today, we’re giving the humble single crochet stitch a little makeover by turning it into single crochet ribbing.
If you’ve been following my crochet ribbing tutorials, you’ve probably already met slip stitch ribbing and half double crochet ribbing. Now, it’s time to welcome another member of our little ribbing family!
Each technique has its own texture and character, and single crochet ribbing brings a neat, compact look to the table. It’s a lovely option for adding texture to sweater cuffs, beanie brims, cardigan edges, and other crochet projects that need a tidy finish.
So, if you’re ready to add another technique to your crochet skills, let’s get stitching! 🧶
🪄 A Little Back-Loop Magic: The Secret to Single Crochet Ribbing
Who knew that changing where you insert your crochet hook could give your stitches a whole new personality? The secret is in the back loop! 😍
Single crochet ribbing creates a lovely, ridged texture by working single crochet stitches into the back loops of previous rows. Instead of inserting your hook under both loops of a stitch, you work into the back loop only, allowing those beautiful ridges to form as you build row after row.
The result? A neat, textured fabric that adds a lovely finishing touch to your handmade creations!
You can use this technique for:
- Sweater cuffs and sleeve edges
- Beanie brims
- Cardigan borders
- Bag openings
- Waistbands
- Decorative edging on crochet garments
Keep in mind that the stretchiness of your finished ribbing depends on your yarn, hook size, tension, and construction method.
It’s a simple technique, but sometimes, the smallest changes make the prettiest difference. And that’s another reason why crochet never gets boring! 🧶💕
How to Crochet Single Crochet Ribbing
Let’s take it one row at a time!
Step 1: Make Your Foundation Chain
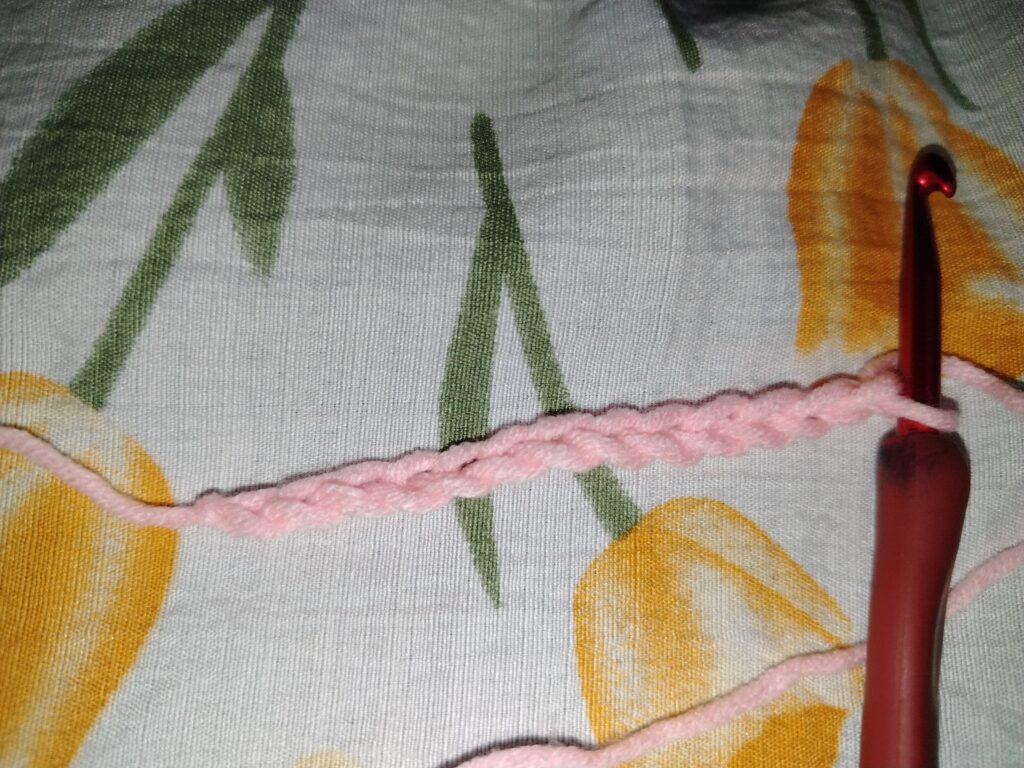
Start by making a foundation chain to your desired length.
For this practice swatch, chain 13.
The number of chains determines the width of your ribbing, so you can adjust it depending on the project you’re making.
Step 2: Work Single Crochet Stitches Across the Foundation Chain
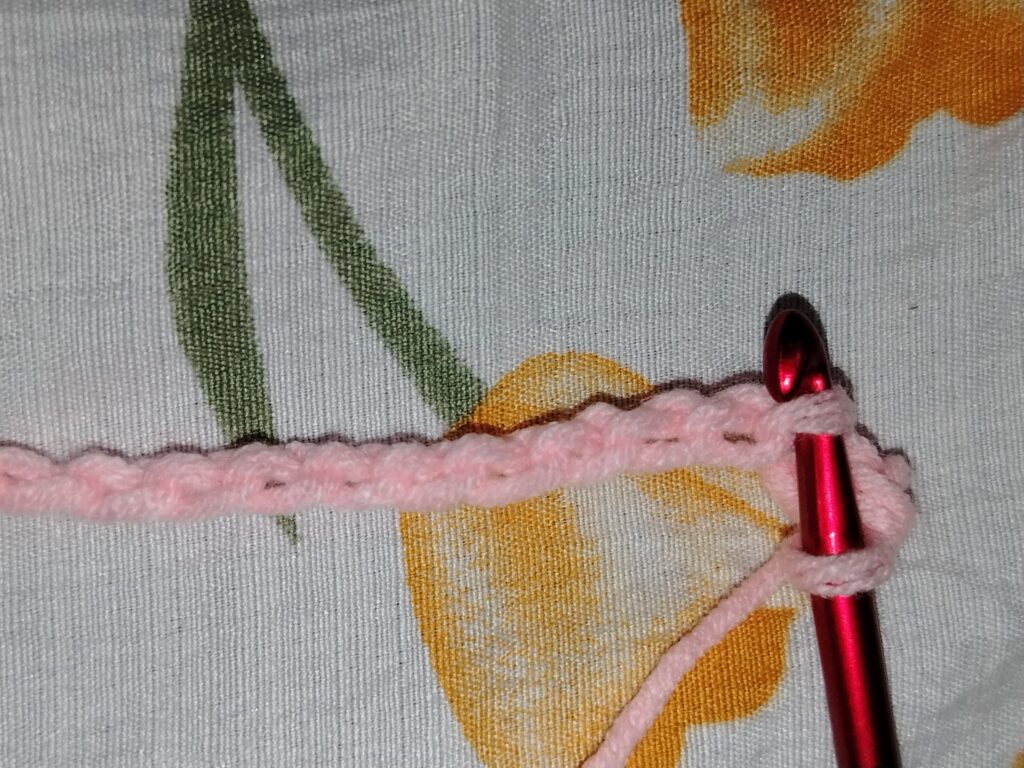
Insert your hook into the second back bump from the hook and make one single crochet.
Continue working one single crochet into each back bumps across the row.
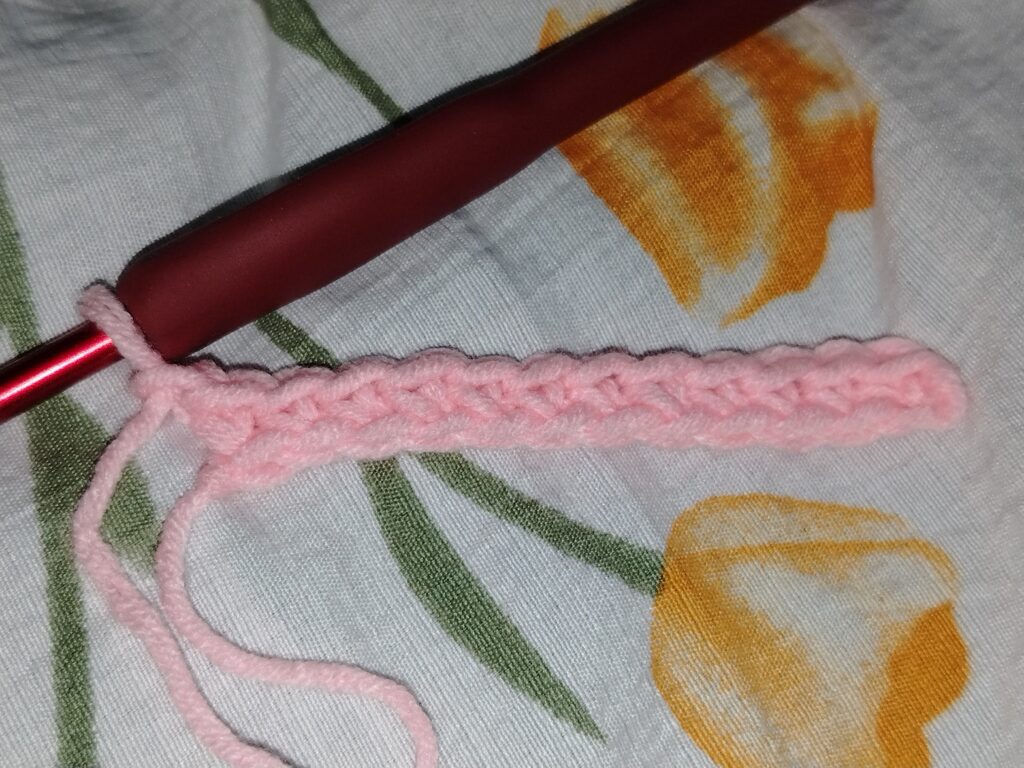
You should have 12 single crochet stitches.
Chain 1 and turn your work.
Step 3: Work Into the Back Loop Only
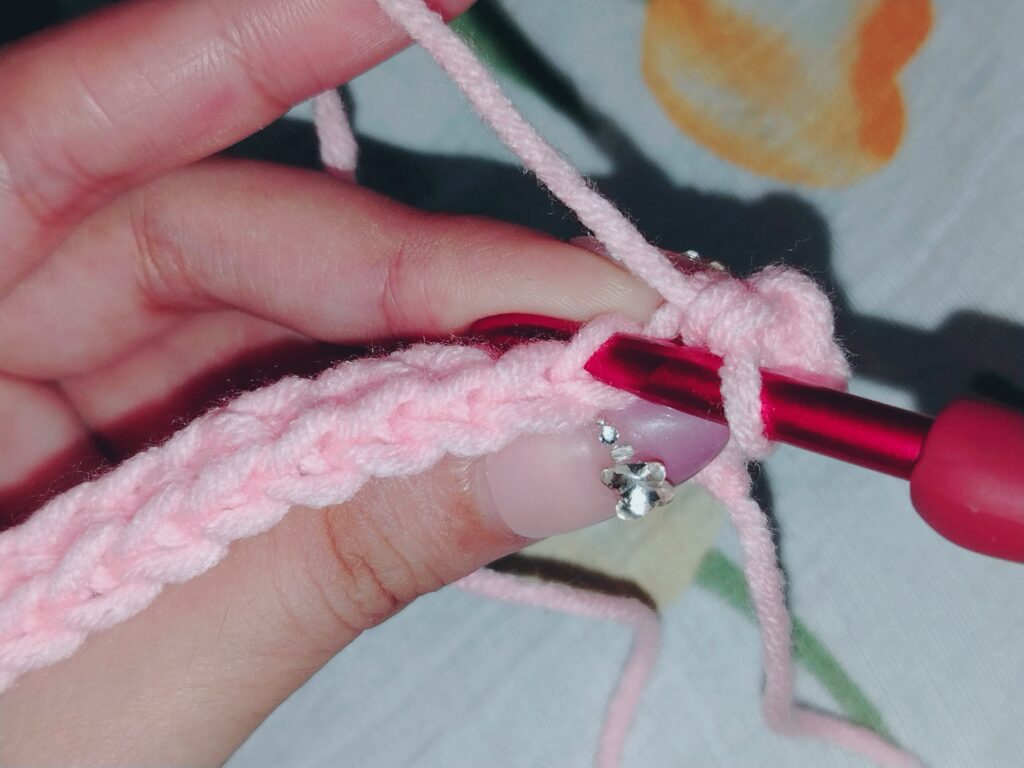
Here’s where the magic happens!
Look at the top of your stitches. You’ll notice that each stitch has two loops: a front loop and a back loop.
Instead of inserting your hook under both loops, insert it into the back loop only.
Make one single crochet into the back loop of each stitch across the row.
When you reach the end, chain 1 and turn your work.
Step 4: Repeat Until You Reach Your Desired Length
Continue making one single crochet into the back loop only across every row.
After each row, chain 1 and turn your work.
As you build more rows, you’ll begin to see the ridges forming across your swatch.
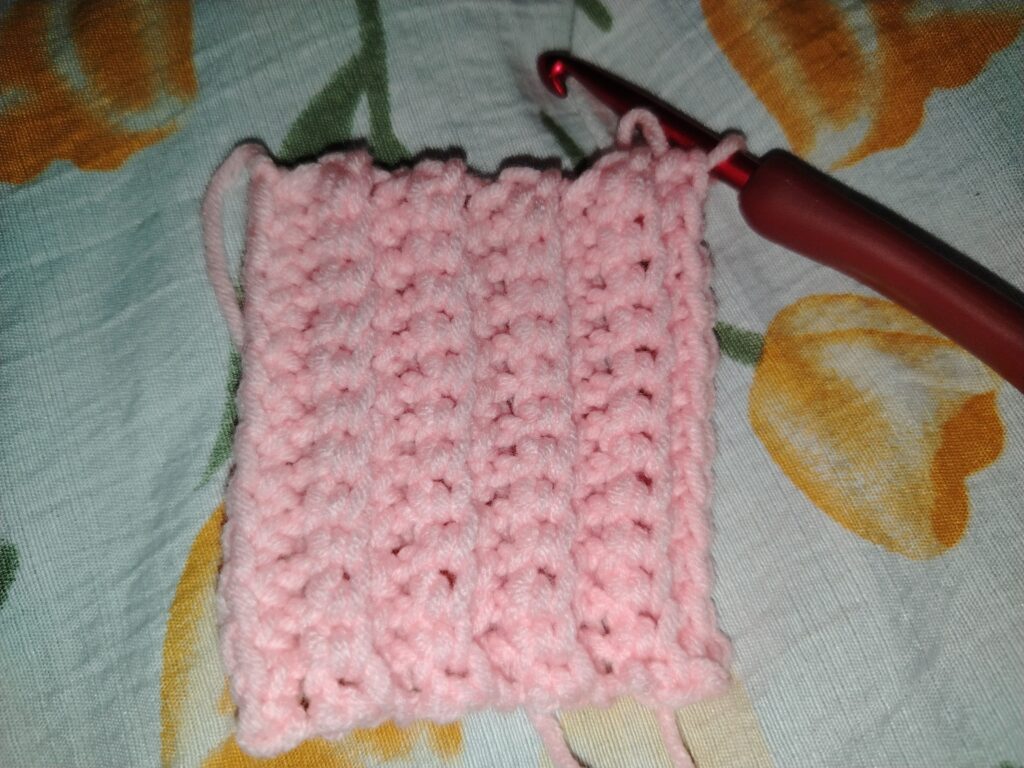
Keep going until your ribbing reaches your desired length.
And there you have it! Your very own single crochet ribbing. 🥳
Simple, neat, and wonderfully textured without requiring any complicated stitch combinations.
Tips for Neater Single Crochet Ribbing
Even the simplest crochet techniques have a few little tricks that can make a difference.
Here are some tips to help you get a beautiful result.
1. Keep your tension consistent.
Try to maintain the same tension throughout your rows. Uneven tension can make some ridges look more pronounced than others.
2. Count your stitches.
It’s easy to accidentally skip a stitch at the beginning or end of a row. Counting your stitches helps keep your ribbing straight and even.
3. Remember to work into the back loop only.
This is the key to creating the ribbed texture. If you accidentally work under both loops, that section may look different from the rest of your swatch.
4. Don’t pull your turning chain too tight.
Keep your turning chain relaxed enough to work comfortably without creating a tight edge.
5. Make a small swatch first.
Before adding ribbing to a larger project, practice with a small sample. This lets you check the texture, width, and flexibility before committing to your actual project.
Trust me, a little practice now can save you from having to frog an entire section later. And we all know how emotionally complicated that relationship with our yarn can get. 🤣
Single Crochet Ribbing vs. Slip Stitch Ribbing vs. Half Double Crochet Ribbing
If you’ve been following my crochet ribbing series, you already know that changing the stitch can make a noticeable difference in the finished fabric.
Let’s compare the three techniques we’ve explored so far!
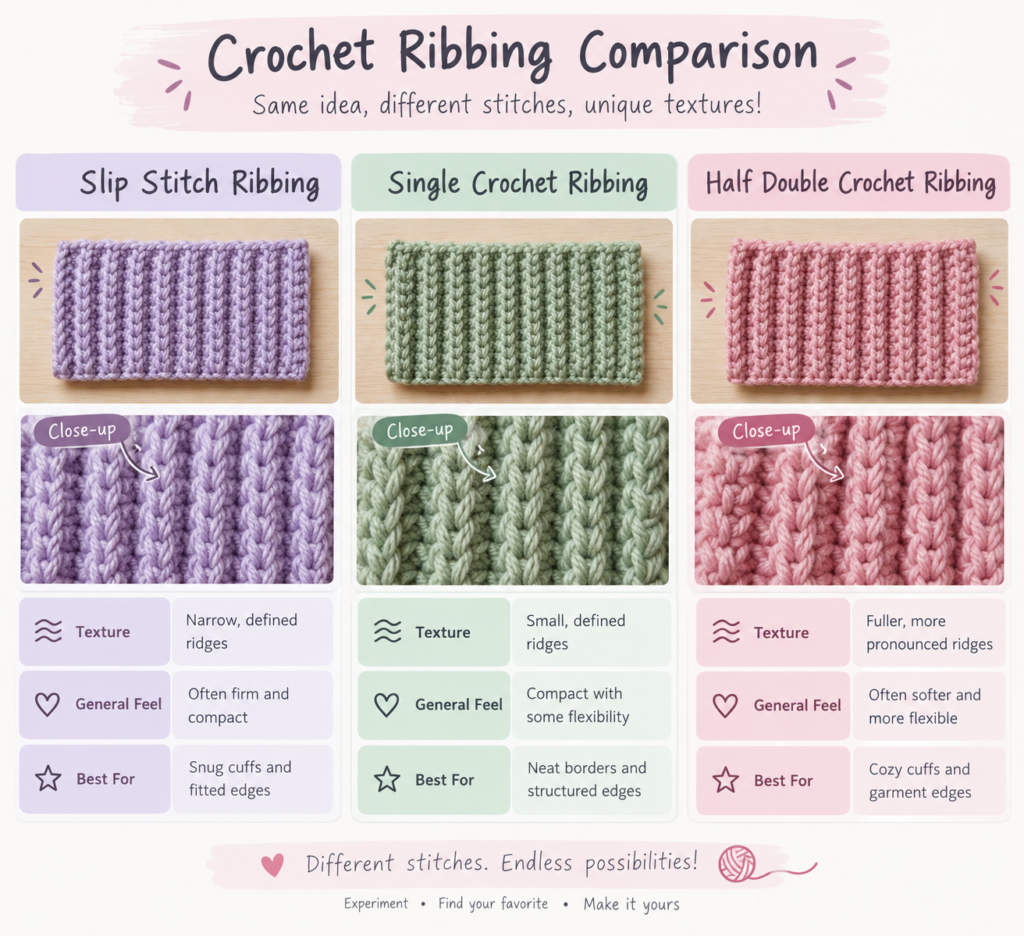
These are general characteristics, as the final results will depend on your yarn, hook size, tension, and stitch construction.
You may visit my comparison post, 6 Crochet Ribbing Patterns, to explore more ribbing techniques and decide which one suits your next project.
Because choosing a ribbing style should be fun, not another reason to stare at your yarn for three hours before making a decision. 😂
Is Single Crochet Ribbing Stretchy?
Single crochet ribbing can provide some flexibility, especially when worked into the back loop only. However, it may be less stretchy than some other ribbing techniques.
Its flexibility depends on several factors, including your yarn, hook size, tension, and the way the ribbing is constructed.
If you’re making something that needs a snug fit, such as a beanie brim or sweater cuff, I recommend making a small swatch first and testing how much it stretches and recovers.
You want your handmade creation to fit comfortably, not make you feel like you’re negotiating with your own crochet project. 😆
Can You Use Single Crochet Ribbing for Sweaters?
Absolutely!
Single crochet ribbing can be used for sweater cuffs, hems, and other edges when you want a compact, textured finish.
However, if your design requires plenty of stretch, you may want to compare it with slip stitch ribbing or half double crochet ribbing before deciding which technique to use.
The best choice depends on the look, texture, and fit you’re aiming for.
Remember, there’s no single ribbing technique that’s perfect for every project. Sometimes, the best way to find your favorite is to crochet a few swatches and see which one makes you happiest.
Final Thoughts: Simple Stitches, Beautiful Results
Single crochet ribbing is a wonderful reminder that even the simplest stitches can create beautiful textures.
With a foundation chain, a few rows of single crochet, and a little back-loop action, you can create a neat ribbed fabric for a variety of handmade projects.
Whether you’re a beginner learning new crochet techniques or an experienced crocheter expanding your stitch collection, I hope this tutorial inspires you to give single crochet ribbing a try.
And remember, your first swatch doesn’t have to be perfect. Every stitch is an opportunity to learn something new, so enjoy the process and don’t be afraid to experiment!
Please check out other tutorials and stories on our blog, and discover newly made crafts in my shop. Thank you for being part of the Knot and Curls journey! 💕
Happy crocheting! 🧶